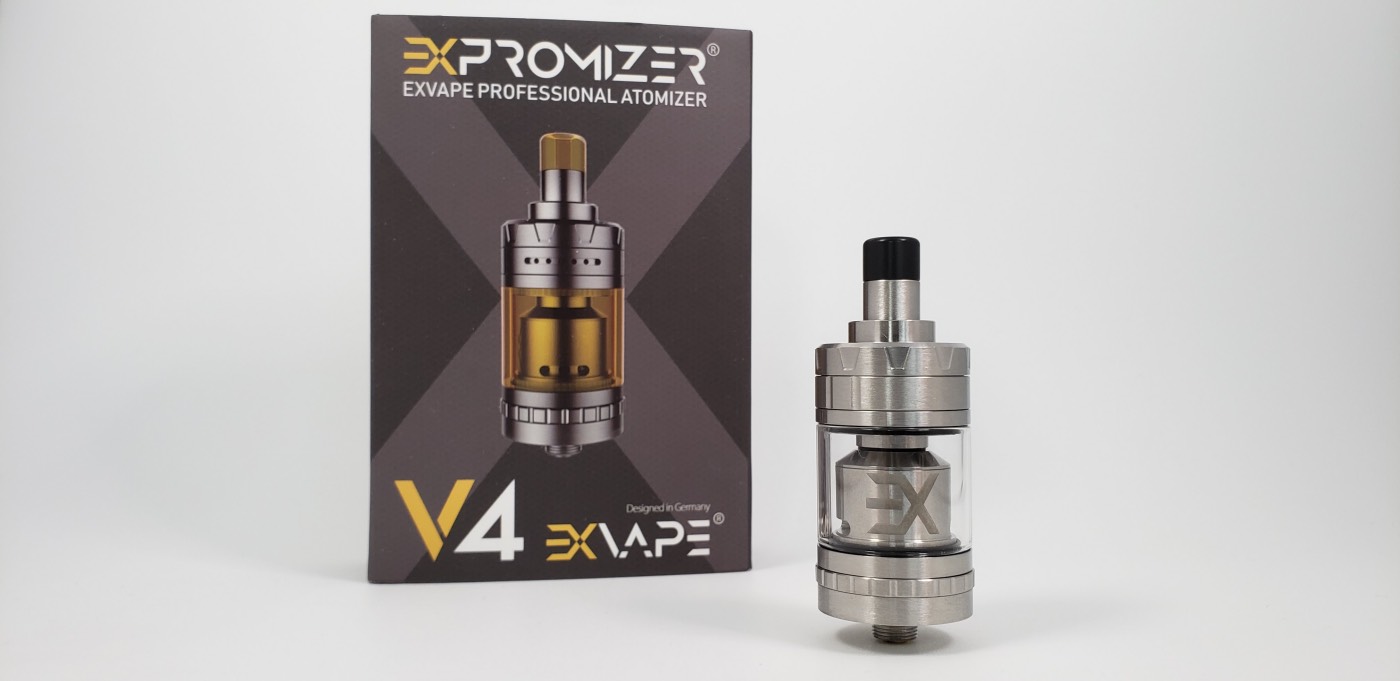
The Expromizer V4 was sent to me for review from HeavenGifts.com. You can get it here (affiliate). This is a tight-draw tank from EXvape and it’s designed in Germany and made in China.
I’ve never used any of the previous versions of the Expromizer, but I did watch Todd’s Reviews take on the V3 just to get an idea of what might have changed. The V3 had bottom airflow, a lot of parts, a juice flow control, and 4ml extension parts. Nothing bad, but definitely more complicated than your average tank. The V3 was able to do restricted lung hits, so it had quite a bit of airflow. Todd was also vaping it around 26 watts. The max coil size was about 2.5mm inner diameter, and maybe 3mm with a basic round wire build. The juice flow control wasn’t visible from the windows, which was poorly thought out, but other than that it was machined very well. He said the flavor was very good too. One of Todd’s complaints on the V3 was that the airflow hole beneath the coil was too big at 2.6mm diameter. He said it still worked well, but he felt that the draw would be better with a smaller airflow hole under the coil.
Ok, so we know a little about the previous version so let’s see what’s new.
Specs:
- 2ml Capacity
- Optional 4ml version with Bubble Glass
- Optional 4ml extension straight glass
- 23mm diameter, 43mm tall or 56mm w/drip tip, 76g in weight
- Stainless steel
- Top Airflow
- Colors: Brushed steel, Polished Steel, Black
- $44.90 from HeavenGifts.com
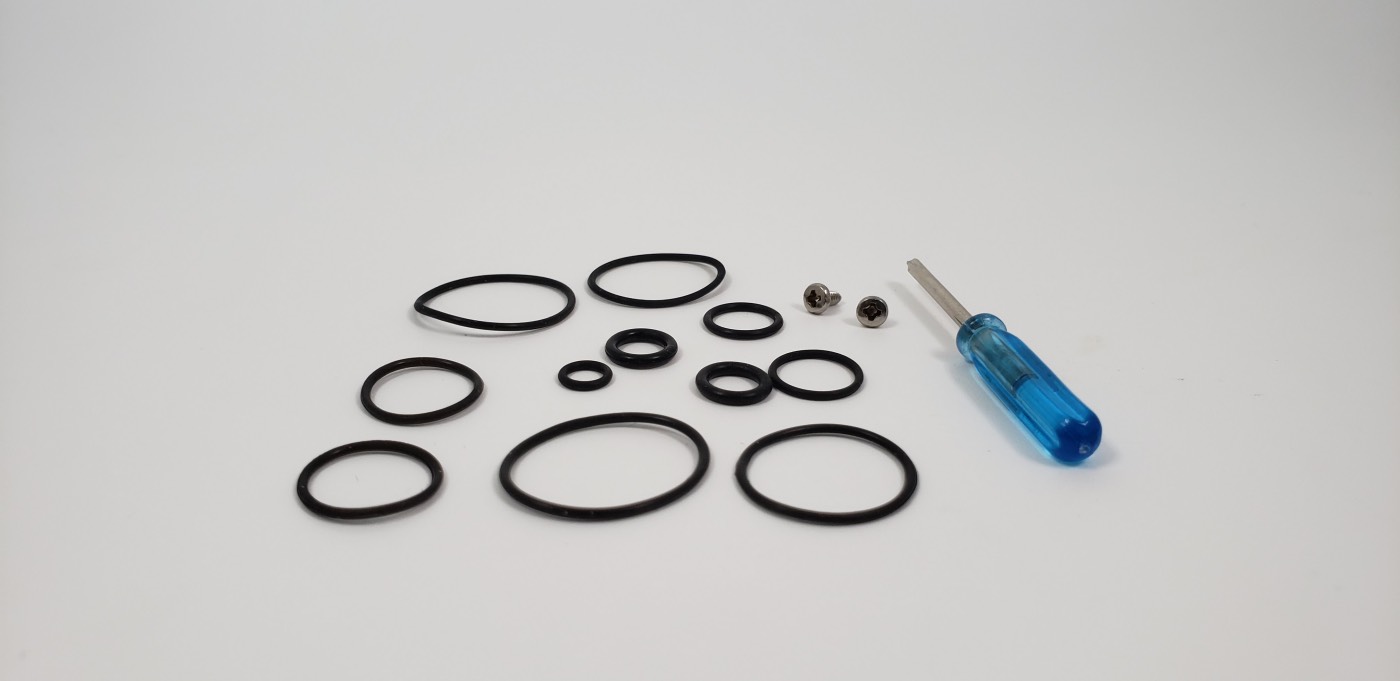
In The Box:
- Expromizer V4 tank
- Yellowish tinted acrylic tank (pre-installed)
- Spare clear glass tank
- Yellowish tinted mouthpiece (pre-installed)
- Black delrin mouthpiece
- Screwdriver
- Spare o-rings
- M2 srews
- User manual
Design
The Expromizer V4 looks great. In my mind, this really looks like a high-class German-designed product. Even if it’s made in China, it definitely has that German-inspired look and quality to it. It’s a nice piece of gear.
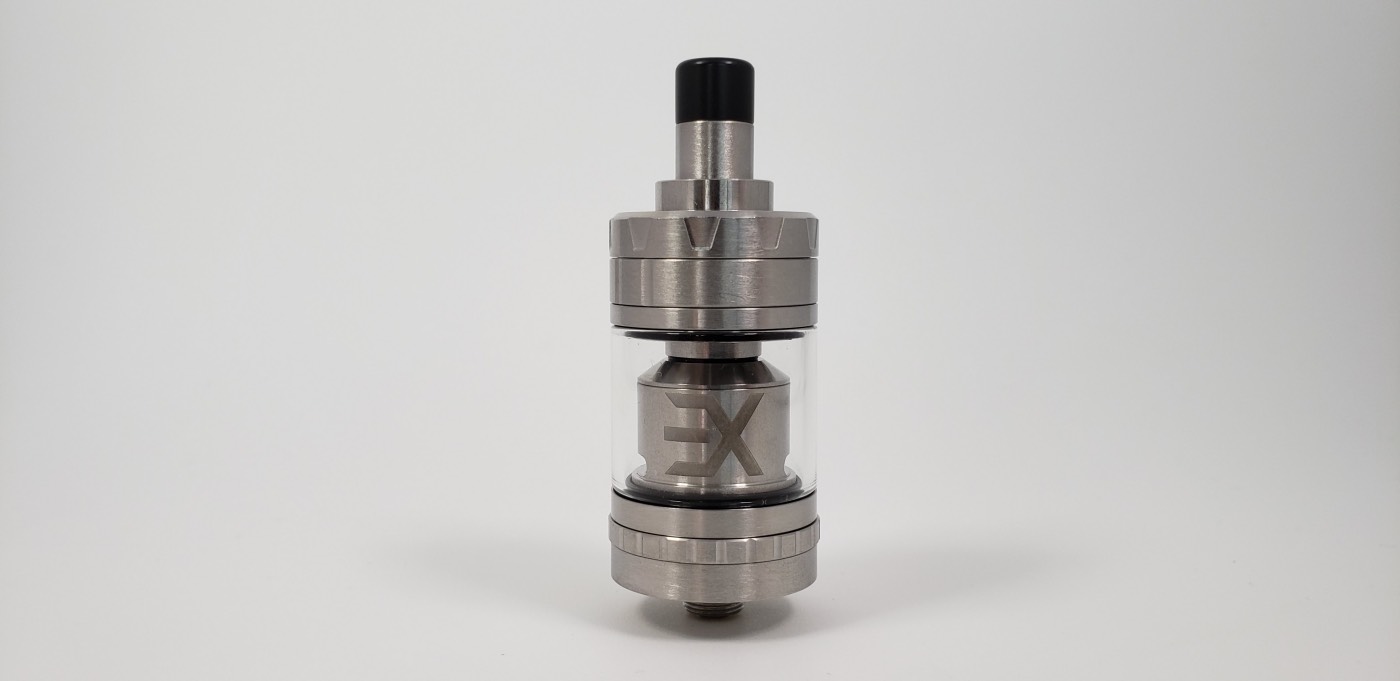
Tanks
![]()
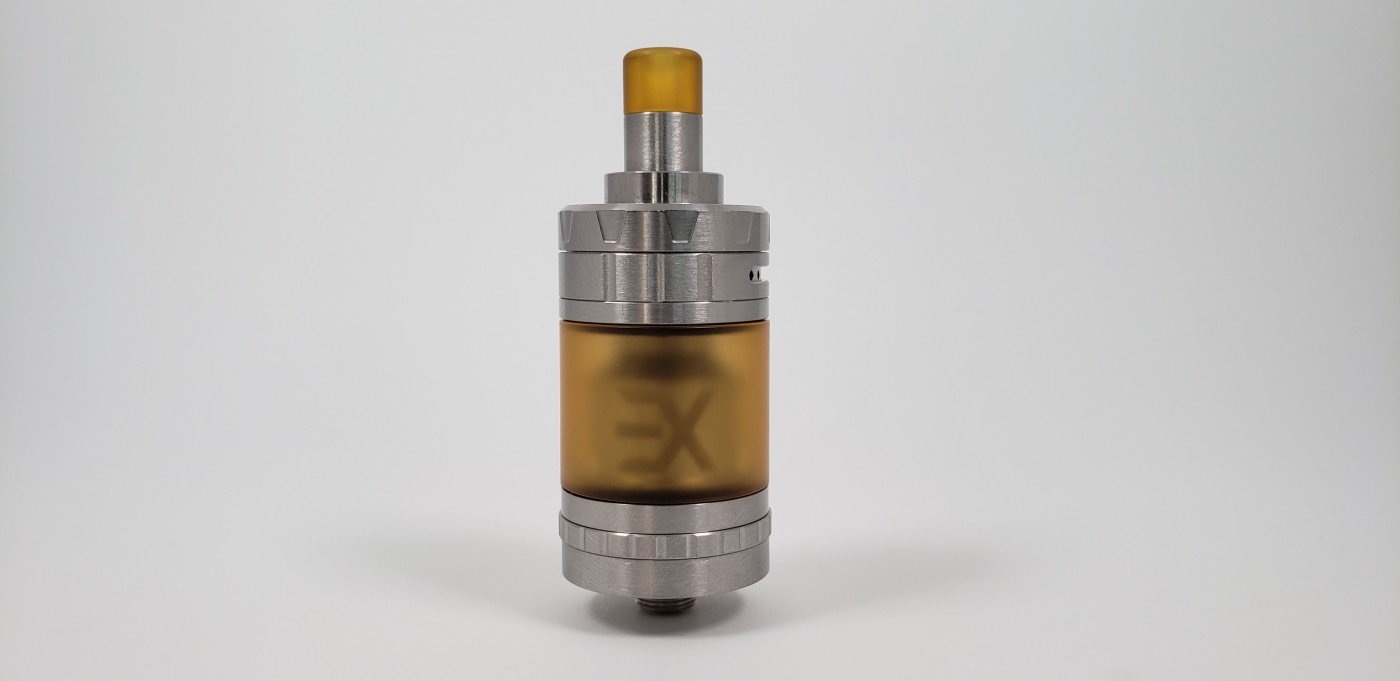
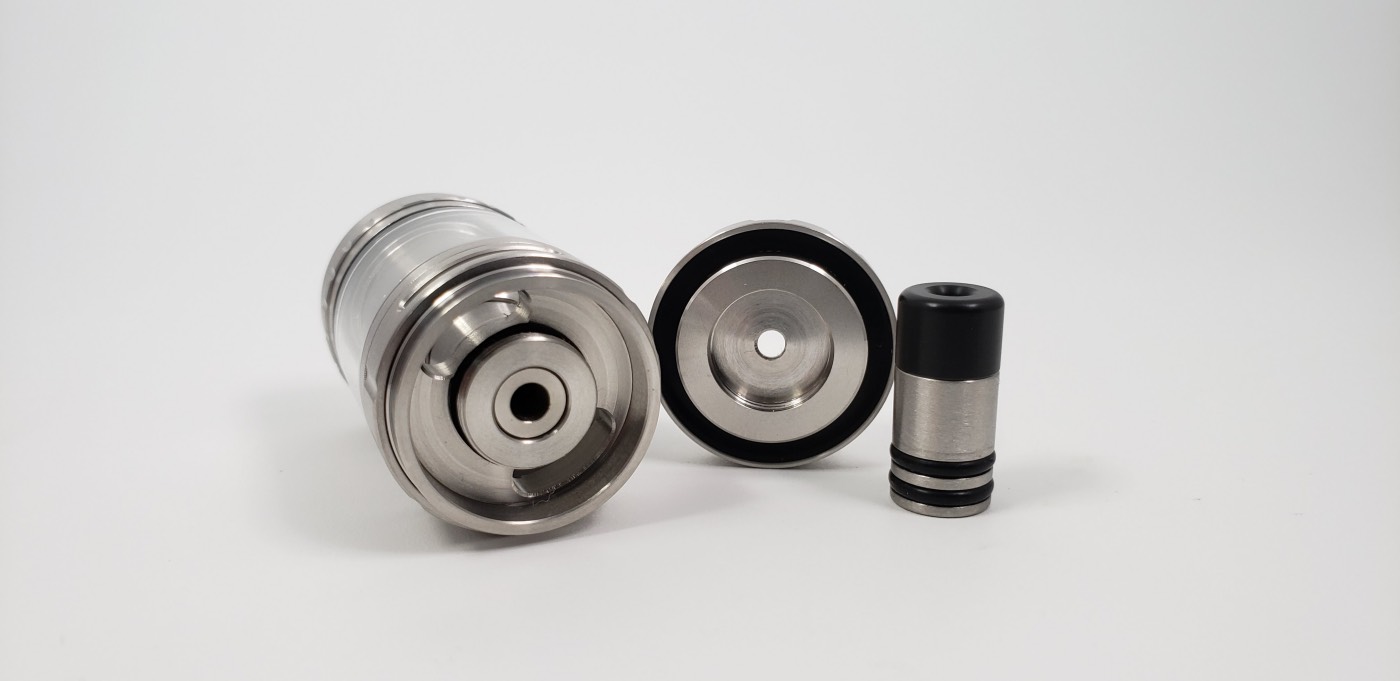
The tank comes with the 2ml yellowish tinted acrylic plastic tube pre-installed. You also get a spare clear pyrex glass tube in the box.
There are also optional tanks that you can buy.
There’s a 4ml pyrex bubble glass tube, which is the same height as the 2ml glass, but it’s 27mm in diameter.
Then you have the 4ml extension kit. This is a taller tube but it’s 23mm in diameter, so you get more e-juice capacity but it’s still flush with the base. And there are two versions of the extension kit; one is the yellowish acrylic tank and the other is a clear pyrex tank.
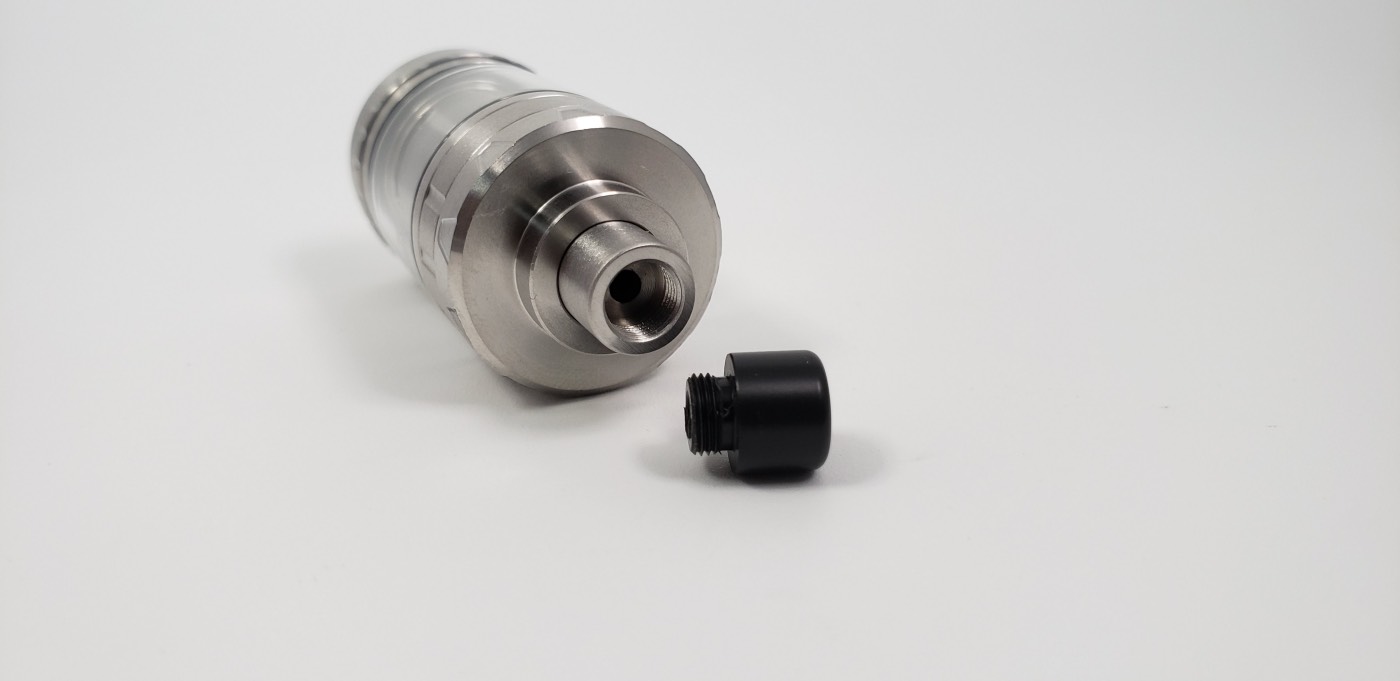
Mouthpiece
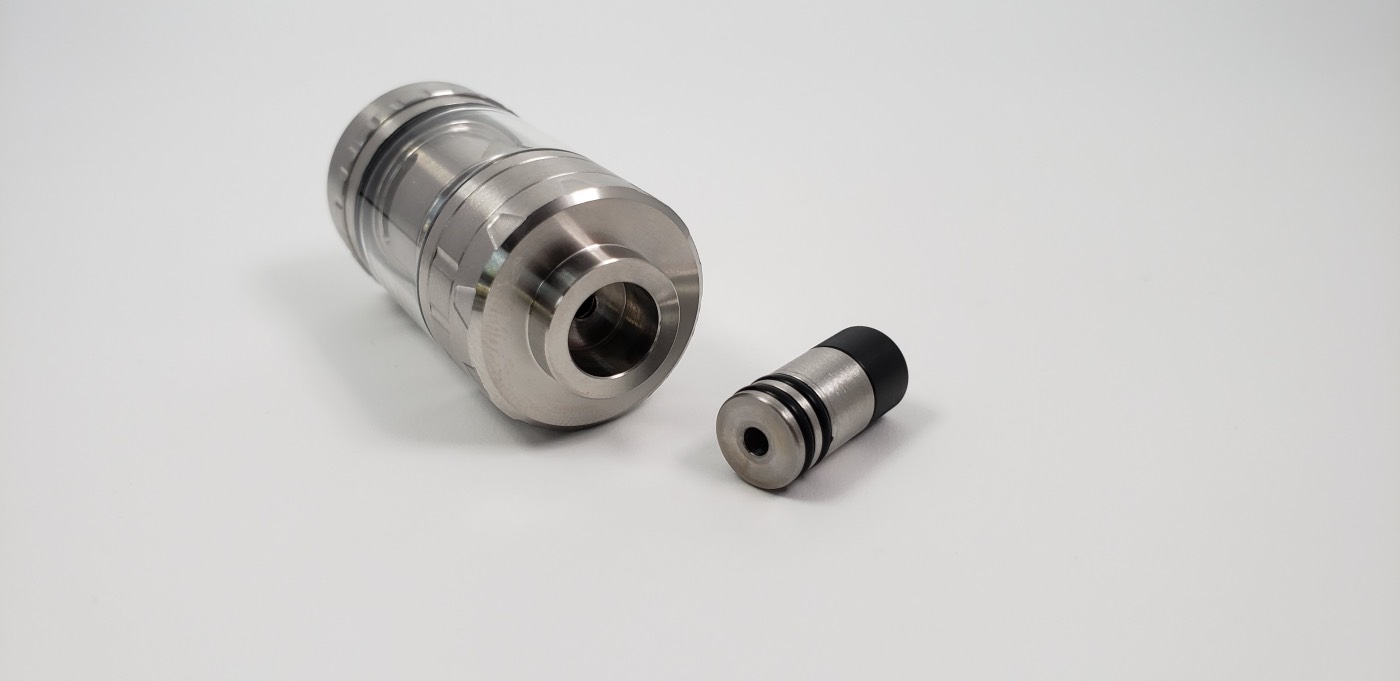
The mouthpiece on the Expromizer V4 is two pieces. You have the metal piece that fits snugly into the top cap and then you have the plastic tips that screw onto the top of that.
Exvape included both a yellowish tip and a black Delrin tip, so you can customize the look a little bit.
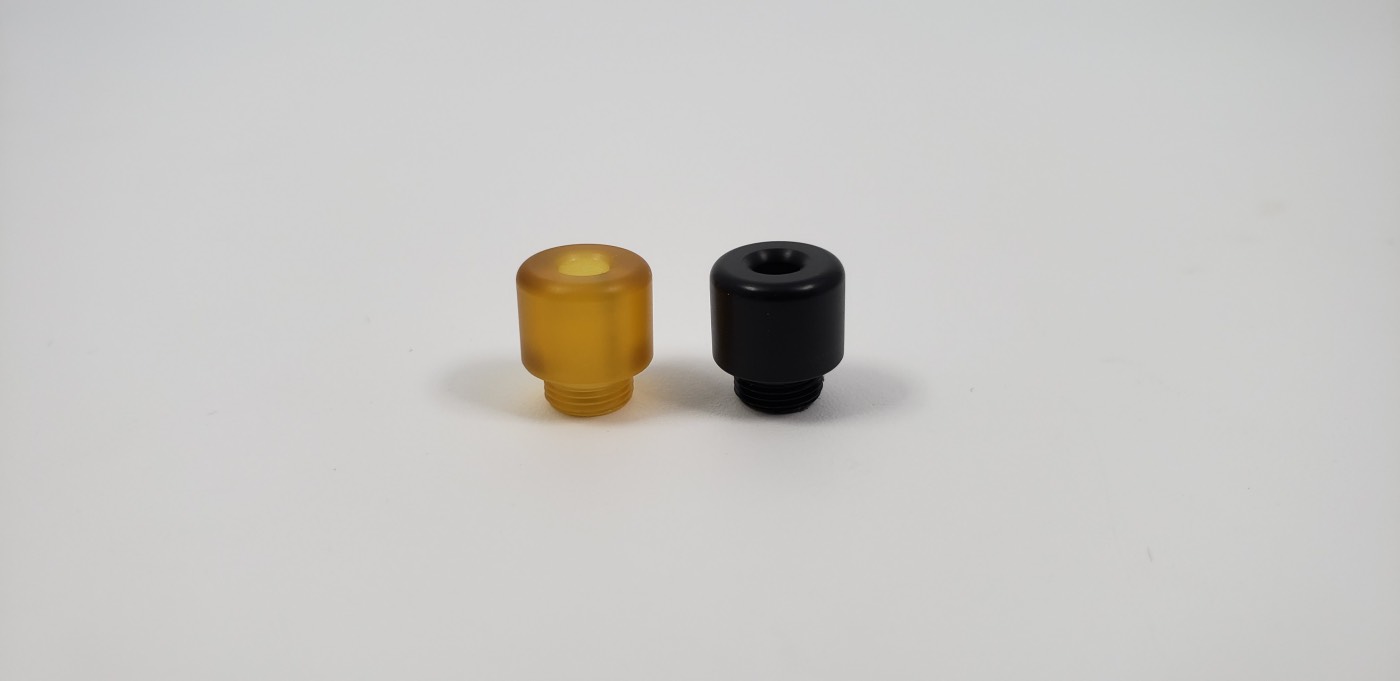
The hole in the tip is really small and matches up with the hole in the chimney piece so it’s lined up perfectly all the way through.
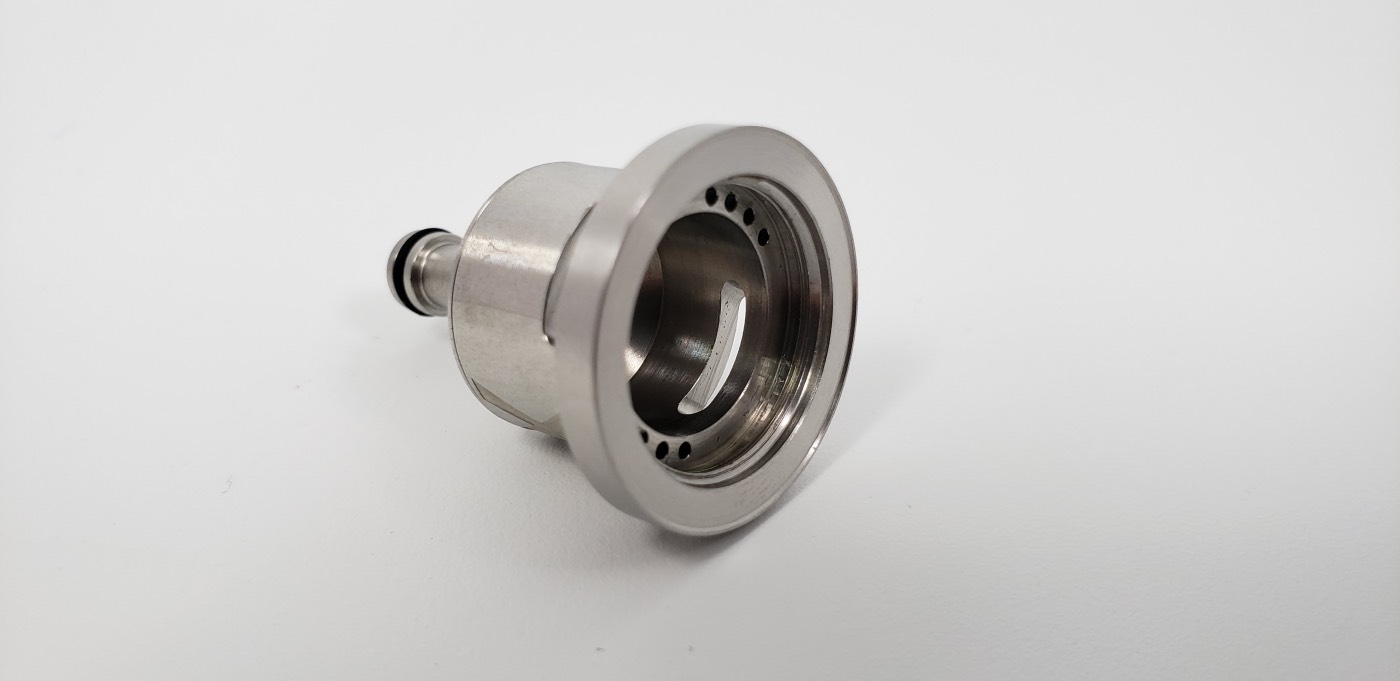
Airflow Control
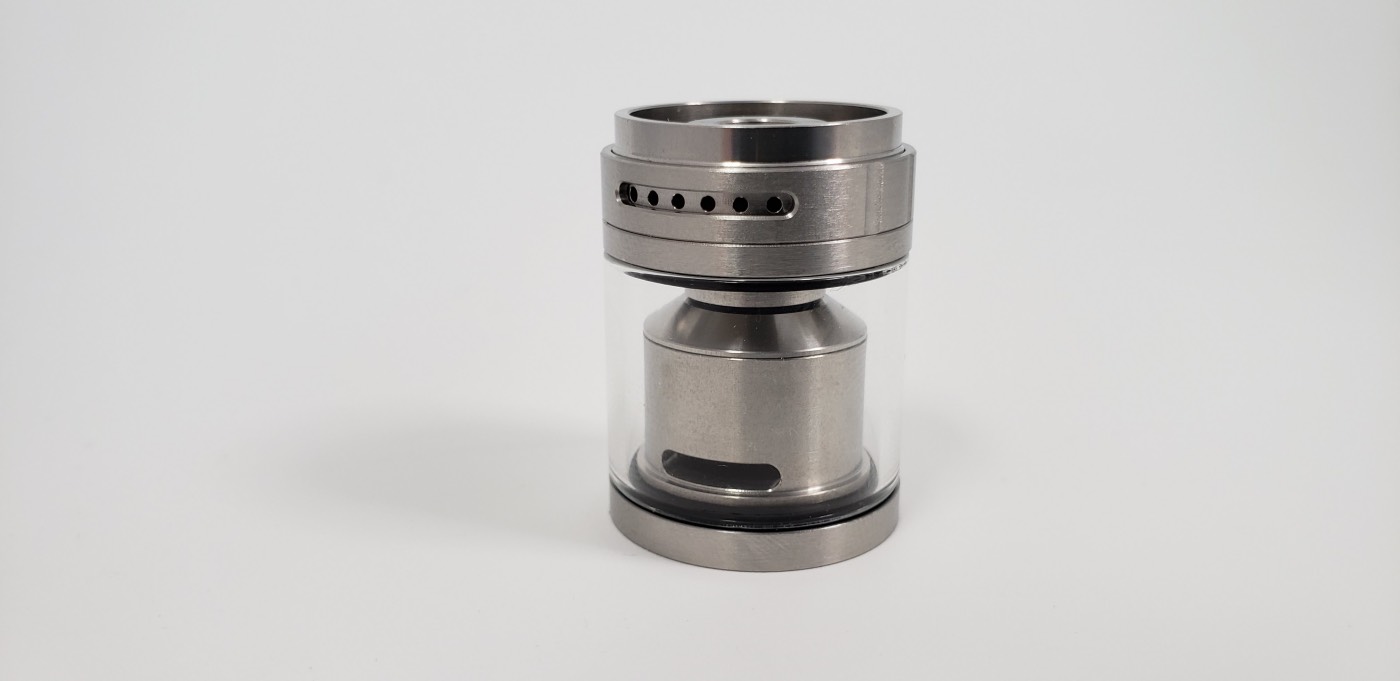
The V4 has top airflow, designed to prevent leakage and according to Exvape, to appeal more to beginners. This is using top-to-bottom airflow, which is a familiar airflow system that has become popular with a lot of the newer top airflow tanks. The way this works is that it pulls in air from the top of the tank, transfers it down the sides of the inside of the chamber, and then it pulls it back up from the beneath the coil and through the chimney. It works really well and the flavor comes out pretty well.
The airflow control ring comes off so you can clean behind it, which is always nice. There are six settings to pick from. Each hole is 1mm in diameter, so you can really get a nice tight draw if you want. With all airflow holes open it’s still a very tight draw. You can’t get a restricted lung draw on this tank. So the V4 is really designed for those of you out there who want a tight draw. At the lowest airflow setting, this is one of the tightest draws I’ve ever had on a tank.
And the draw is super-smooth and just feels great. I really like it.
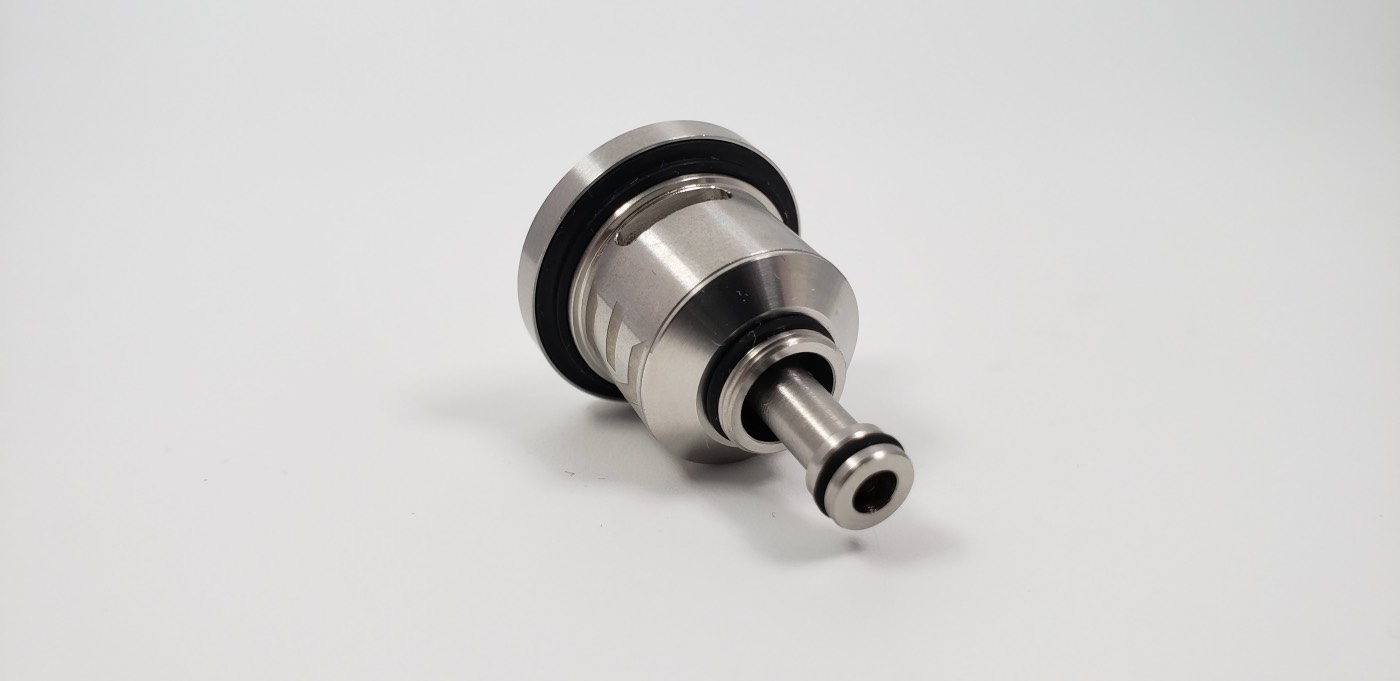
Liquid Control
The Liquid Control system is a mainstay of the Expromizer family of tanks and it’s back in the V4. You’ll see it inside the bottom of the inside of the tank. You change settings by turning the base of the tank. You need to do this while it’s attached to a device because it has to turn in the same direction you tighten it onto the device. That also means that the tank can get get a little tight on the device. Not really tight, but just a little tighter than usual. So because of that, when taking the tank off, you want to grip it by the base, not the glass, or you’ll end up unscrewing the glass.
The Exvape site says there are five settings to pick from, but I only see three. There are three holes on each side and both sides have to be open. You can’t just close off one side. So yeah, seems like three options to me. Anyway, these are designed to let you control how much e-juice you want to allow into the deck. The smallest holes are 1.4mm and the biggest holes are 2mm. The middle hole is probably right between that.
This is a great feature because it lets you adjust the settings to your build. If you’ve used many rebuildable tanks, you know that different types of coils, differences sizes and inner diameters of coils, and even different lengths of cotton can change the way the tank works. So if one build works great and then you switch it out later and it doesn’t wick as well or if it wicks too much and gets flooded, you have the option to change the e-liquid control.
Another cool reason to use this is that you can use any type of e-juice in here. Exvape says that with thin e-juice, like high PG e-juice, you want to set the control to the smallest Liquid Control setting. For thick high-VG e-juice, you open it wide up to the largest setting.
On older models of the Expromizer, the cotton sat above liquid wicking holes. The cotton had to cover the holes to prevent it from flooding. That also meant that only the tips of the cotton would wick e-juice. This actually worked well from what I’ve heard, but Exvape wanted to make it even better in the V4.
So the V4 now puts the cotton in direct contact with the e-liquid, which is supposed to provide even better liquid flow. I don’t have any older models to compare, but the Liquid Control works great. It wicks great, all the time.
Top Fill Top Cap
The Expromizer V4 is a top-fill tank. The key thing to remember with this tank is that it has that liquid control setting built in, which means that you need to remember to close it off before filling it up or you’ll flood the tank. So to fill it up, just close the liquid control, screw off the top cap, and that’s it. There’s a lot of space here so you shouldn’t have problems with using any size of e-juice bottle.
Just remember to open up that liquid control again before vaping.
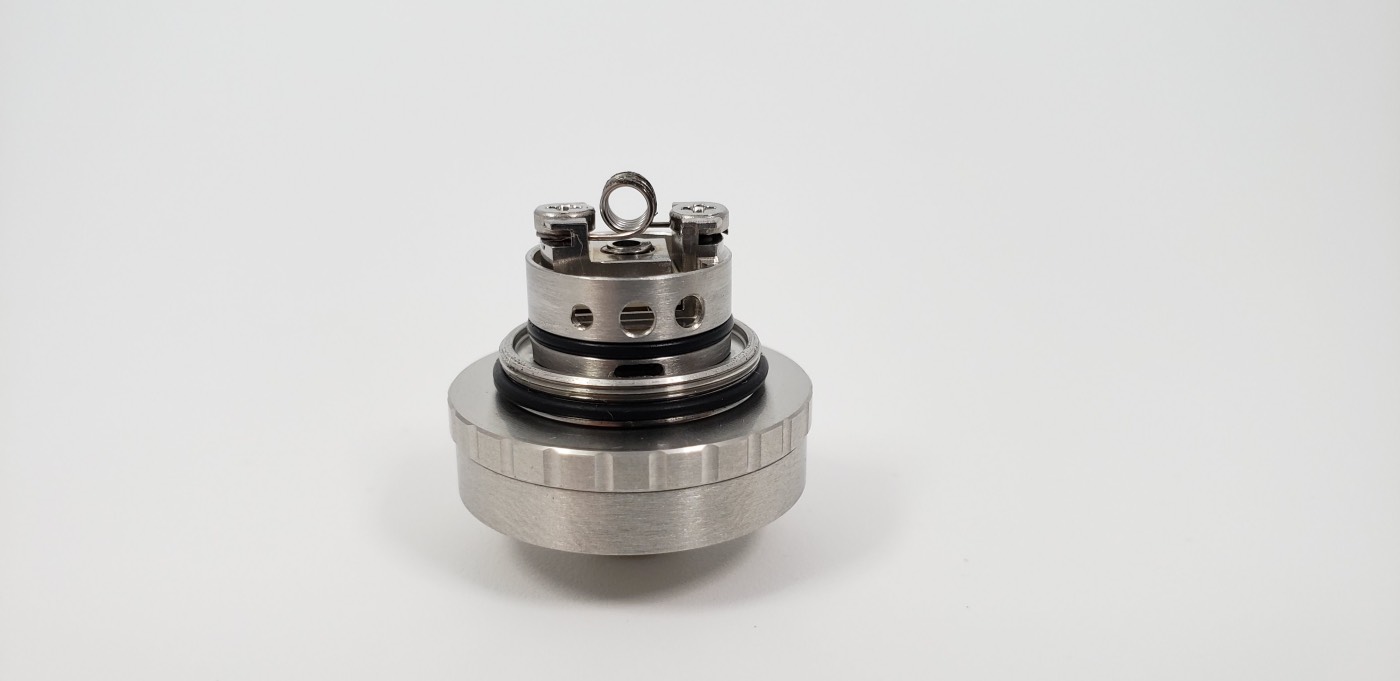
The Build Deck
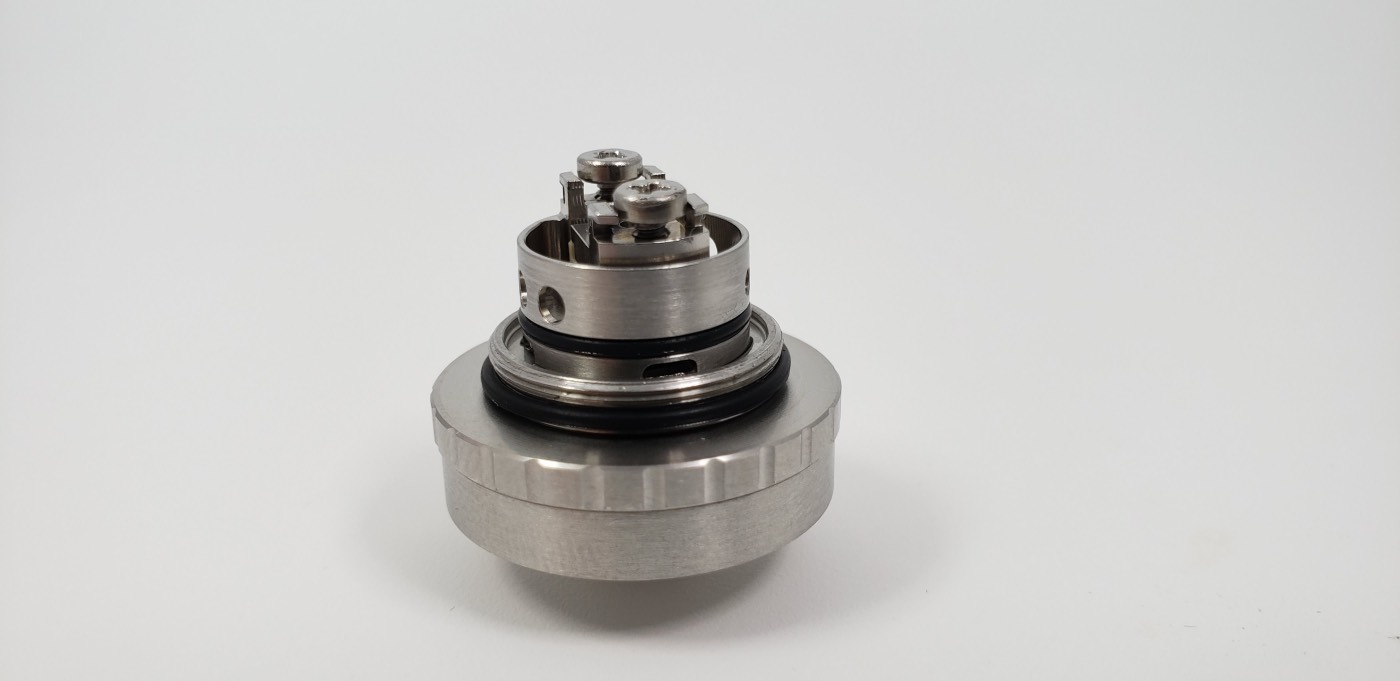
Like all previous versions of the Expromizer, the V4 is a single-coil deck. The coils sit in the middle and with the coil lets going in both directions, you just tighten the legs down under the Phillips head post screws. The screws are flat on the bottom, but the coil legs still try to work themselves out so you’ll need to make sure they’re really pinched in there.
You’ll also notice these little ledges sticking out. Exvape doesn’t say if these have a purpose, but they’re useful for wrapping the wire under and tightening the legs down. My guess is that’s their purpose.
When trimming the coil legs, you need them to be absolutely flush with the posts. If they stick out even a little, you’ll get friction trying to screw the chimney back on.
The tank doesn’t come with any cotton or coils or any recommendations for sizes, so you’ll have to play around with it. If you’re going to use Claptons, a 2.5mm diameter coil is about as big as you want to go. You might be able to fit 3mm diameter, but it would probably be best to use basic round wire builds if you go that high. And 3.5 is just too big. 2.5mm diameter really seems like the best size for this tank.
When wicking the coil, you want to cut the cotton so that it just reaches the bottom of the deck and maybe even a little less. I’ve found that if you put too much cotton in there, it plugs up the Liquid Control holes and when you take a hit, it just sucks up a ton of e-juice into the deck and it floods like crazy. And there’s no way to correct it after that other than by taking it apart and cutting some of the length off of the cotton. Just make sure you aren’t plugging up those liquid control holes. Other than that, the Liquid Control feature works great and it just wicks up e-juice like nothing.
Final Thoughts
With a rebuildable deck and the Liquid Control, this will probably cater more to advanced vapers, but it’s really not all that complicated to use. Based on what I’ve seen of the V3, Exvape fixed pretty much all of the previous flaws. You can see the Liquid Control while you’re setting it, and the draw is perfectly designed for tight draws. It still has great wicking and the flavor is really good. My only cons would be that the post screws try to push out the coil legs and that you have to be careful how you wick it so that it doesn’t flood. But in the end, this is a really awesome MTL device. The best MTL tank I think I’ve ever used as far as flavor and performance goes actually, so in my opinion, this is a must-buy.
This was sent to me for review from HeavenGifts.com, so if this is something you’re interested in, you can get it from them for $44.90 (affiliate).
Alex is a former smoker who successfully quit smoking after 14 years by switching to vaping. Now a pro-vaping advocate, Alex has become a seasoned expert with over a decade of experience in the vaping industry. Since starting his vaping journey in 2010, Alex has earned a reputation as a trusted reviewer, extensively testing all types of vape gear, including mech mods, sub-ohm tanks, RDAs, disposables, e-juices, boro devices, squonkers, dry herb vaporizers, and e-rigs. He’s also explored the craft of coil building and DIY e-juice.
Since 2015, Alex has published more than 800 in-depth articles on vaping, produced over 500 videos covering product reviews, industry news, and tips, contributed to several well-known vape publications, and hosted a popular vaping podcast featuring over 100 episodes and nearly 40 hours of content.