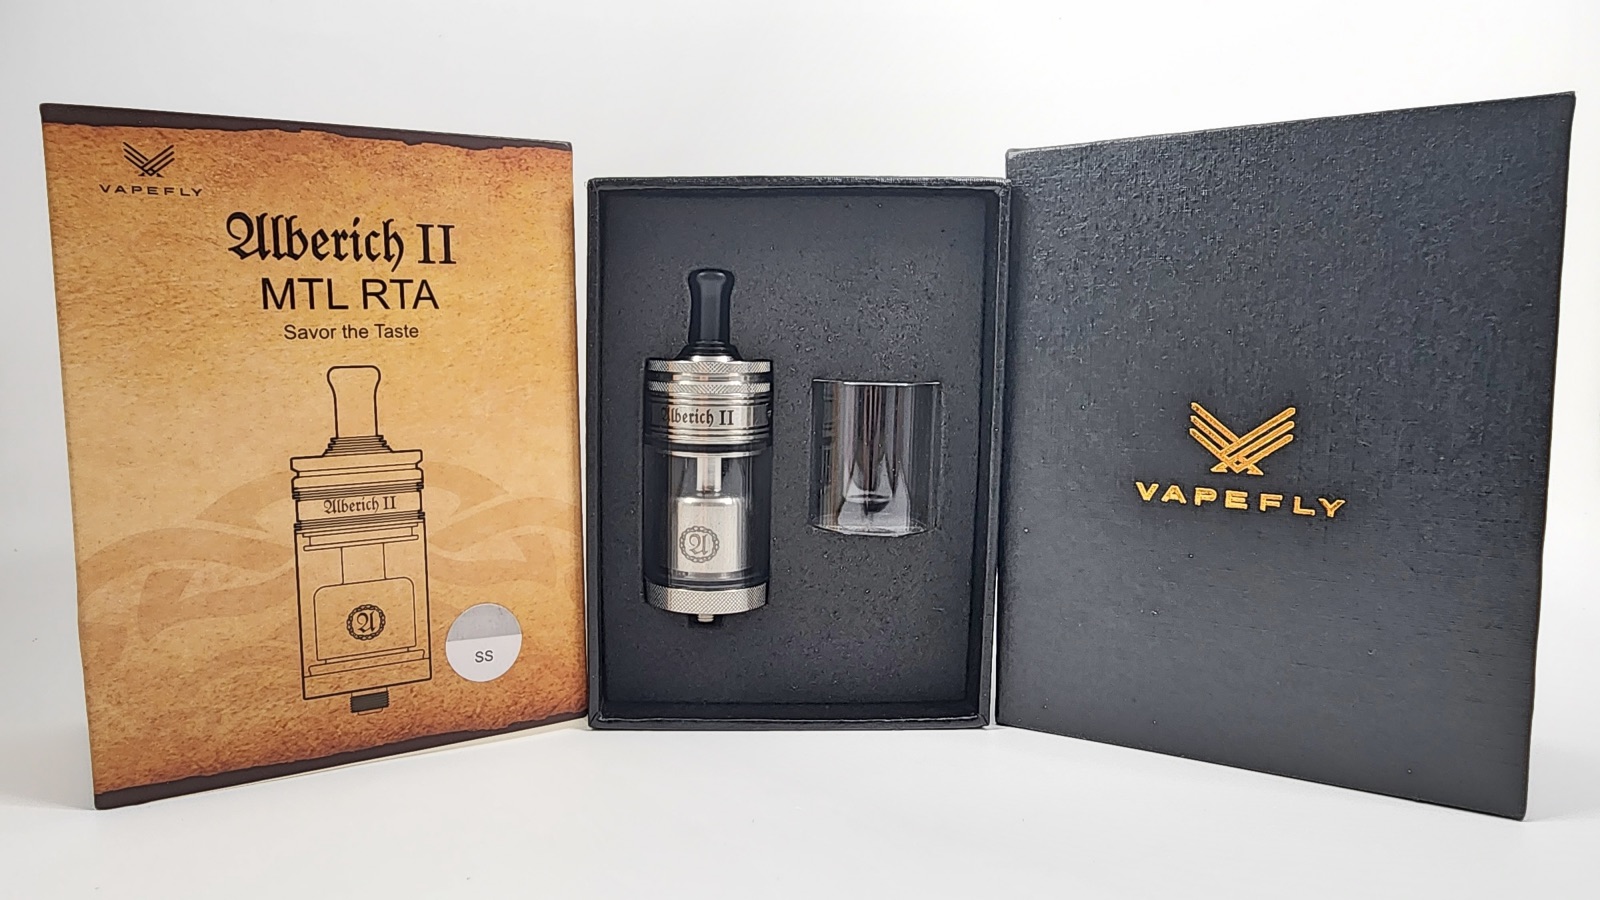
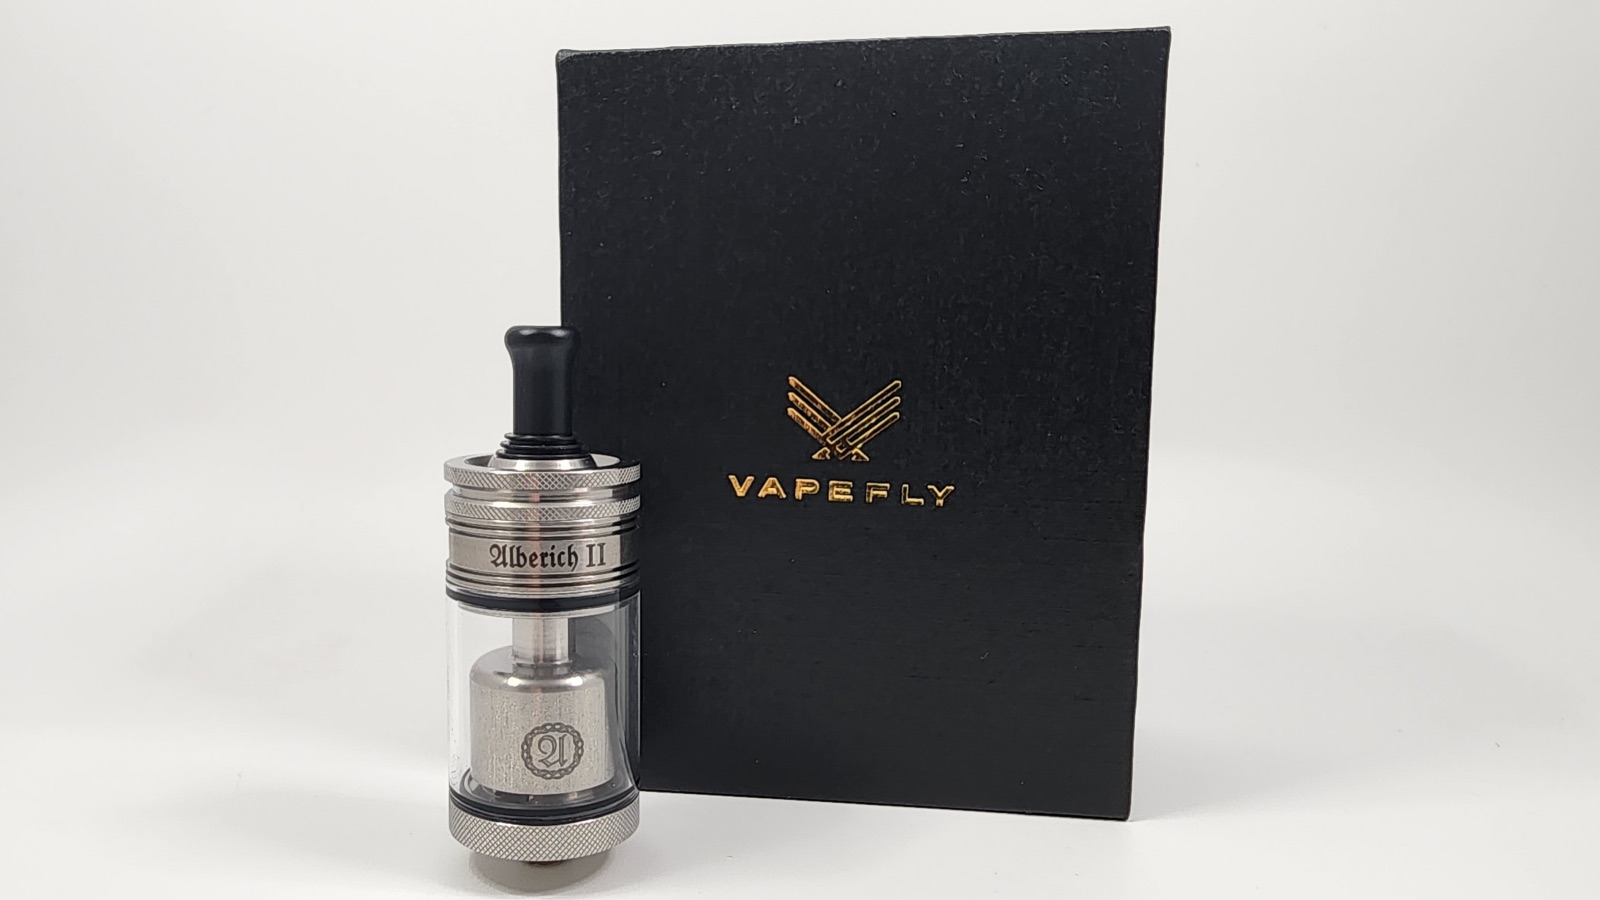
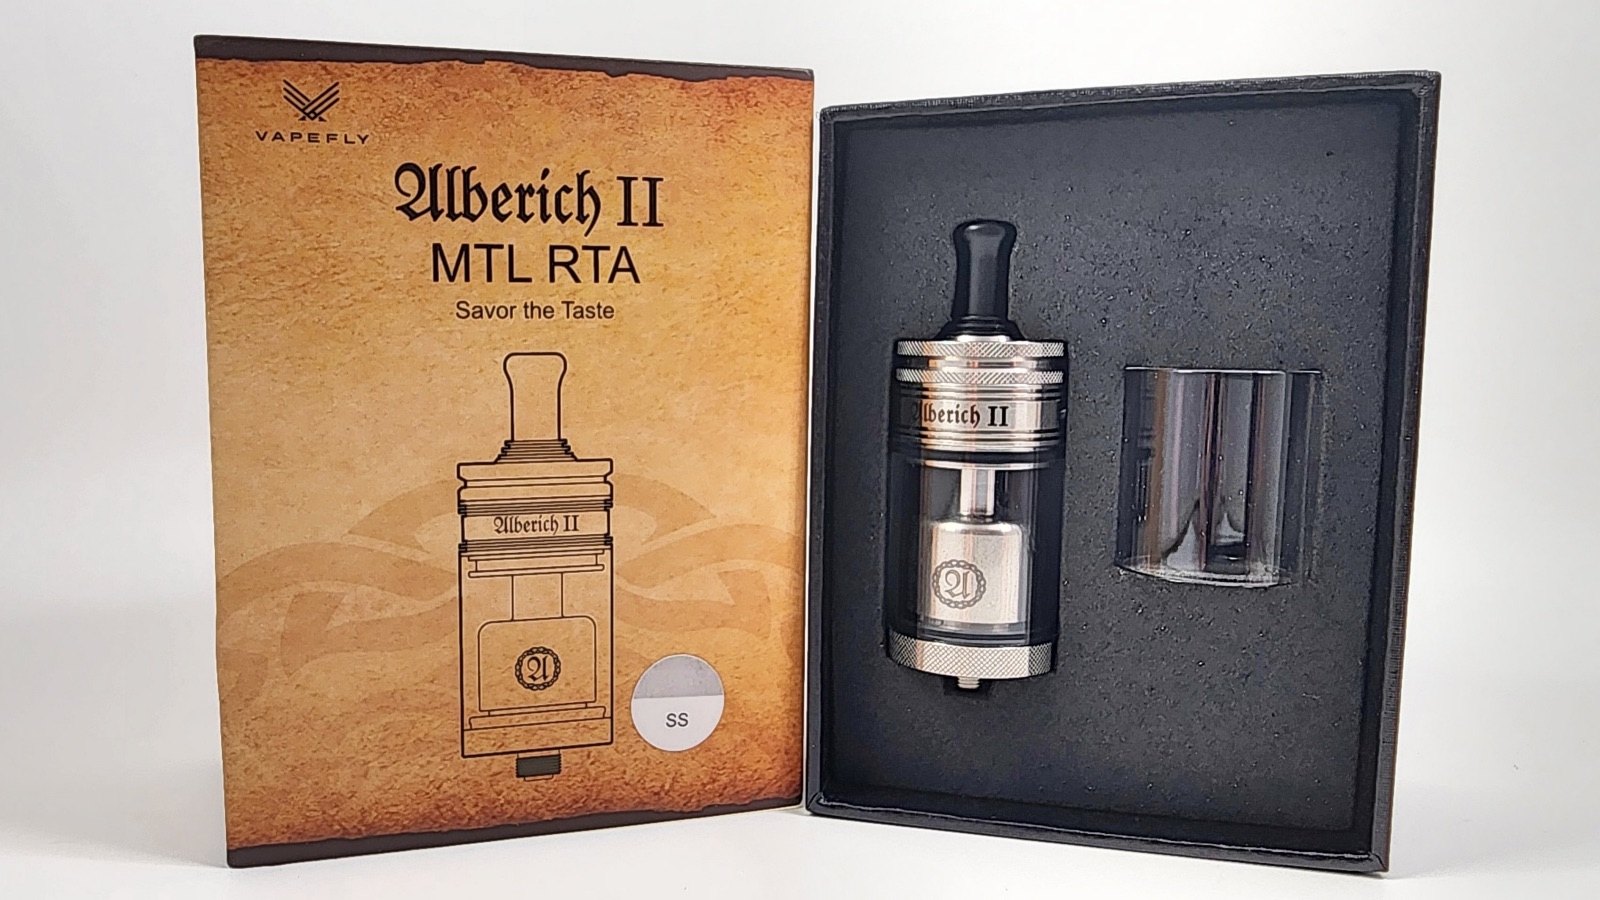
The Vapefly Alberich II MTL RTA was sent to me for review by Sourcemore. You can get it from them for $18.39 with the coupon code ALMR2. So we finally have something different from pod systems and disposables here, with a rebuildable MTL RTA. This is the successor to the original Alberich MTL RTA from Vapefly, and it’s similar in many ways but with some tweaks and improvements.
Specs
- 23.00mm diameter
- 59.65mm height
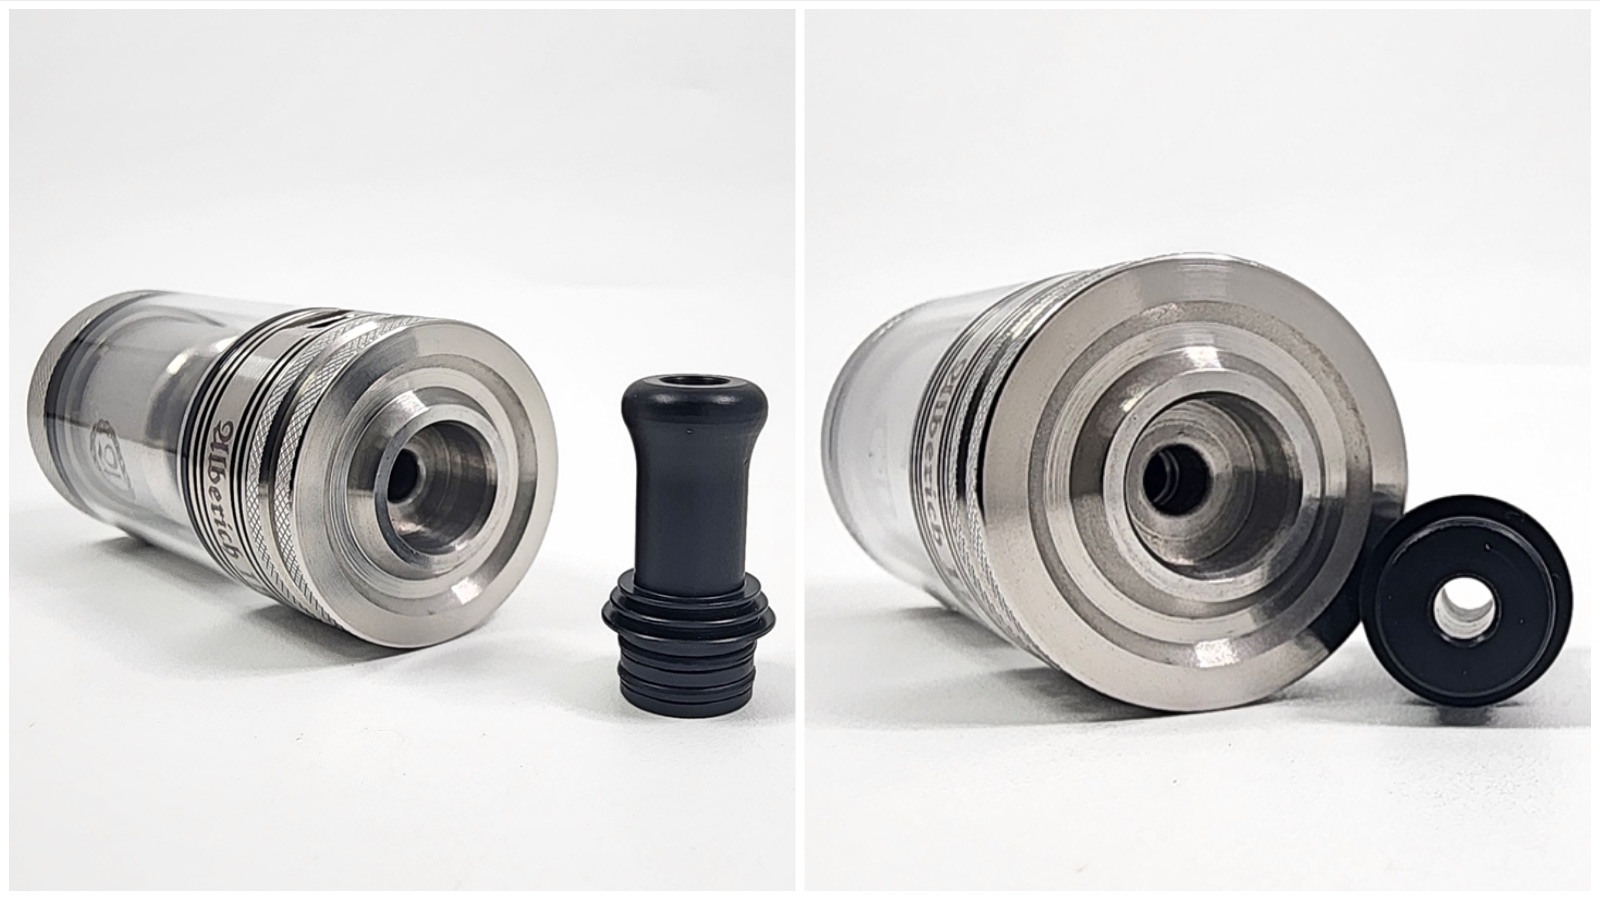
- 510 removable mouthpiece
- Rebuildable: single coil
- 4ml capacity
- Colors: Silver, Black, Gunmetal
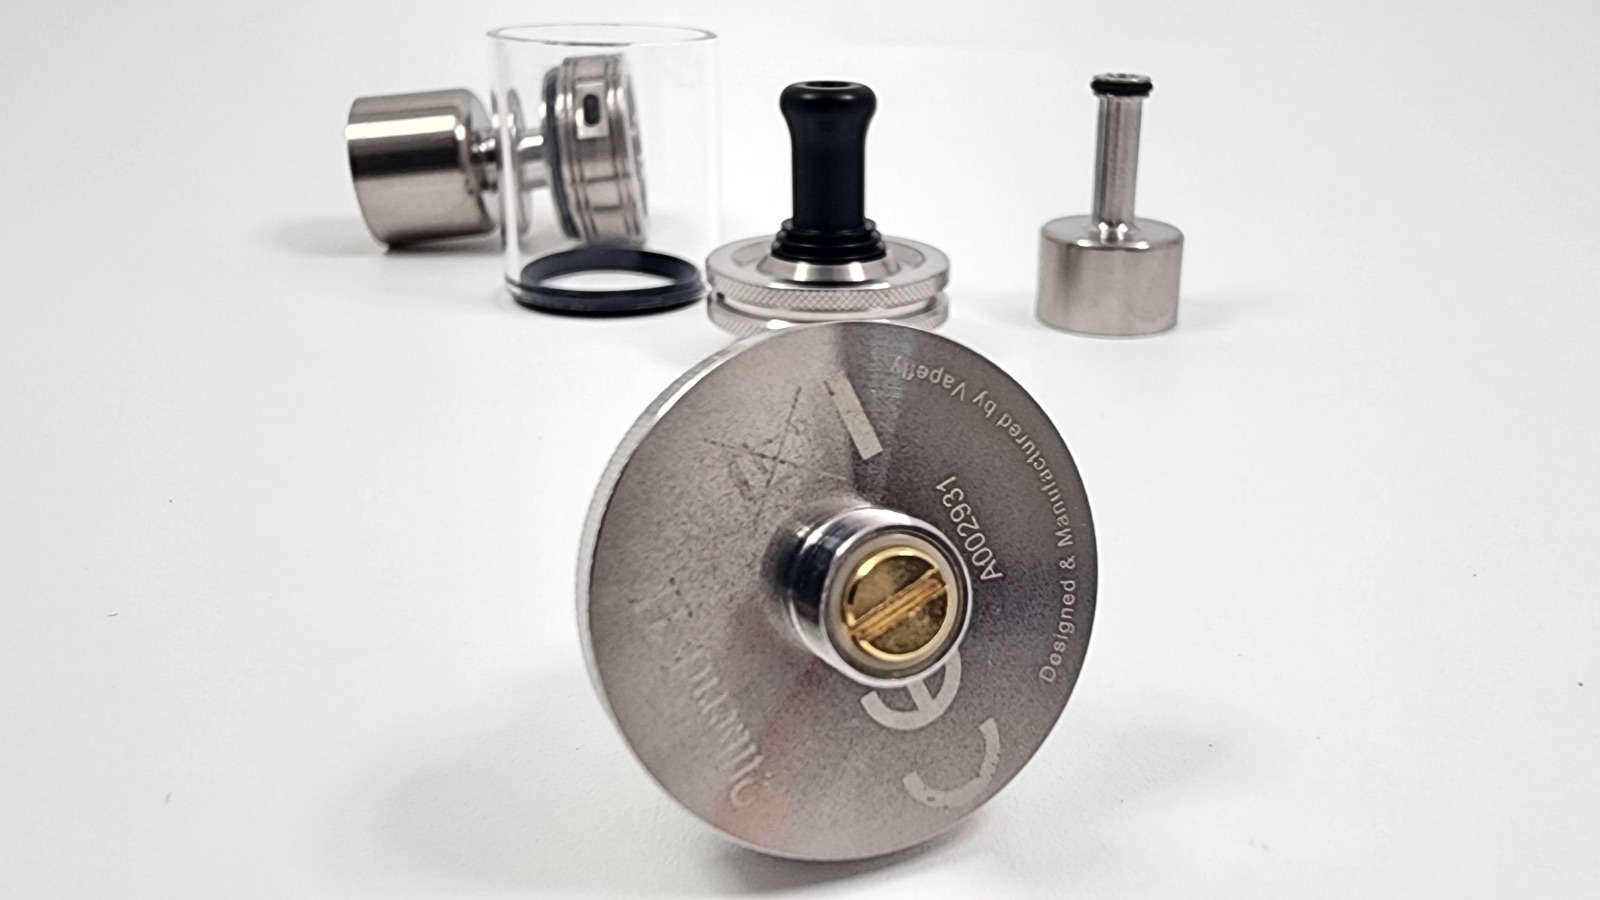
In The Box
- Alberich II MTL RTA
- 1.0ohm KA1 Prebuilt Coil
- 1.0ohm Ni80 Prebuilt Coil
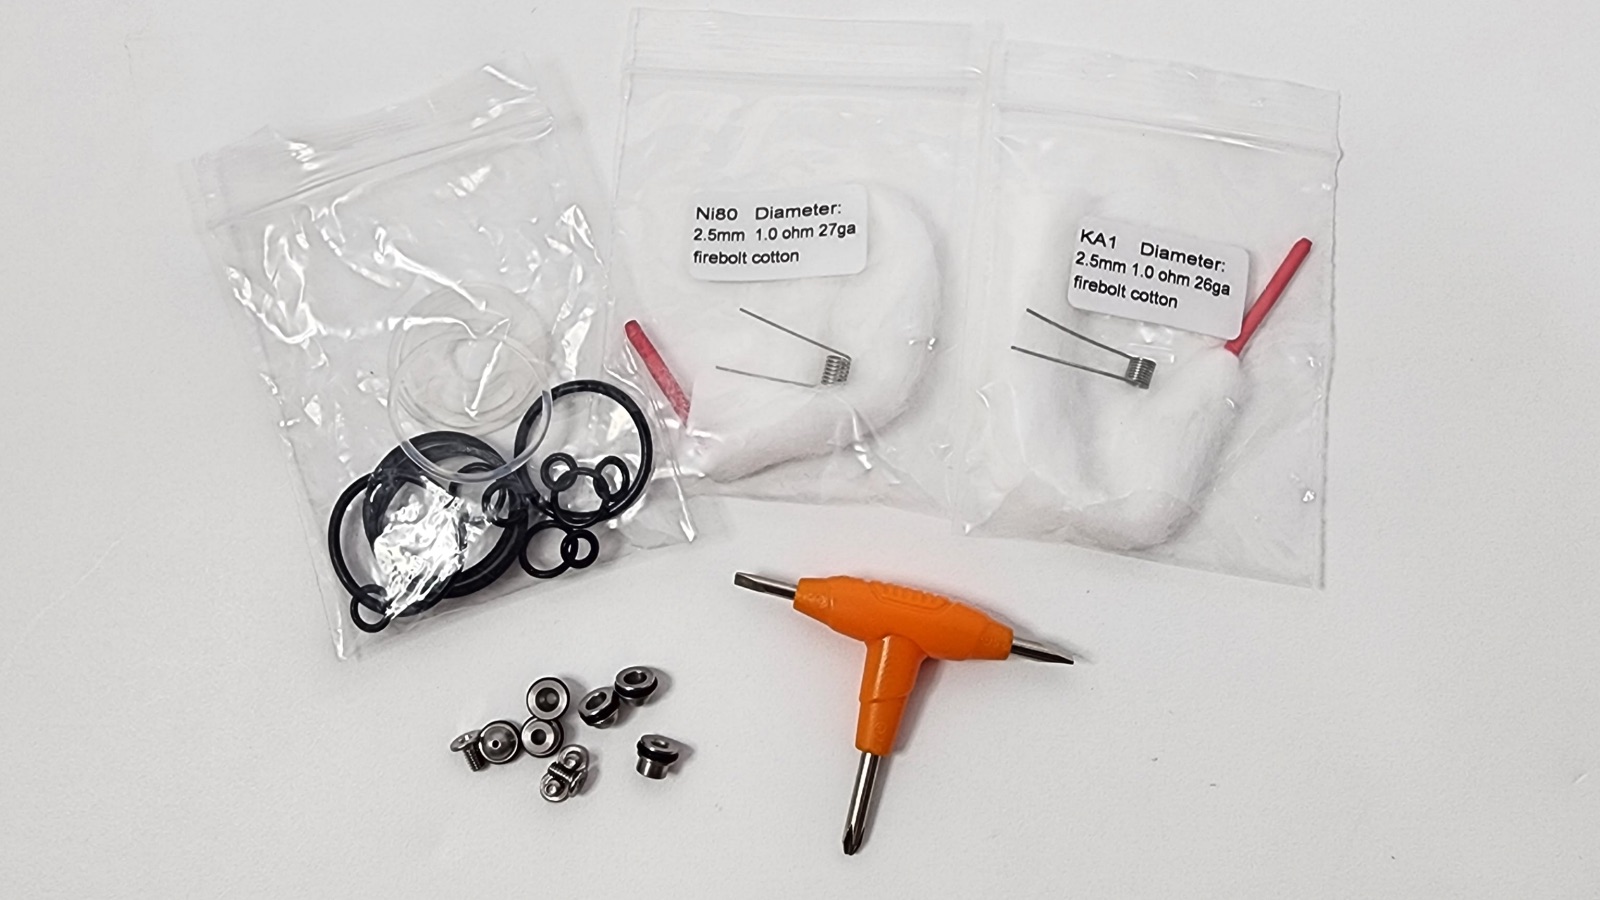
- 2x Firebolt Cotton
- 6x Airflow Pins
- Spare 4ml Glass Tube
- 4 spare screws
- T-shaped screwdriver
- Spare o-rings and seals
- Style & Design
Design
The Alberich II MTL RTA maintains a sleek and compact design, with a diameter of 23mm and a height of 59.65mm. It comes in three different colors: Silver, Black, and Gunmetal.
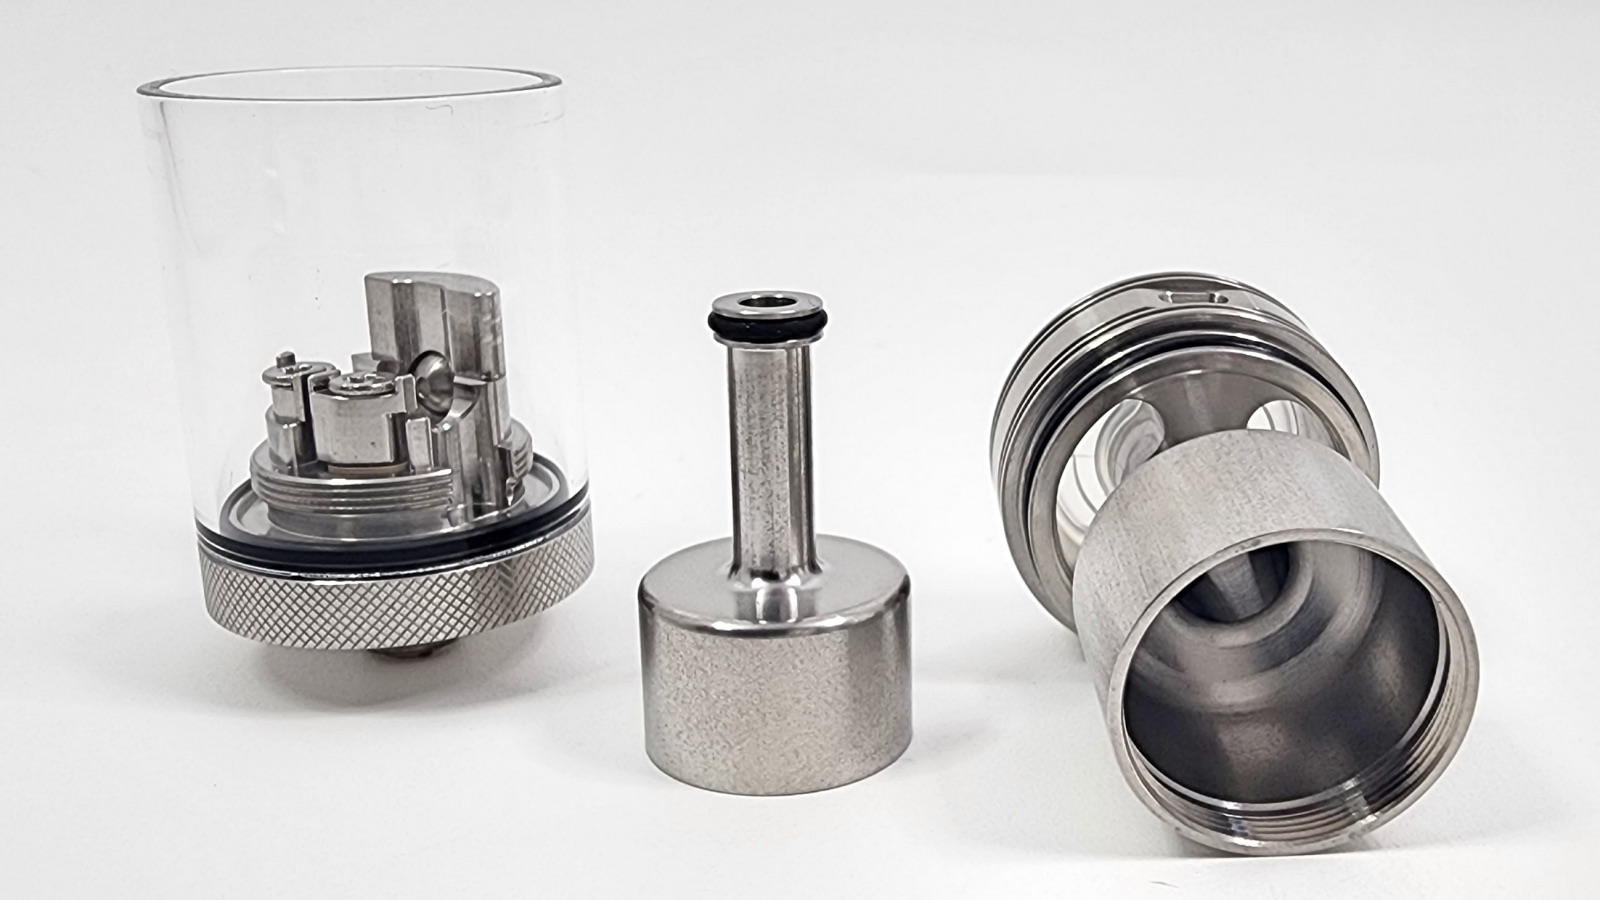
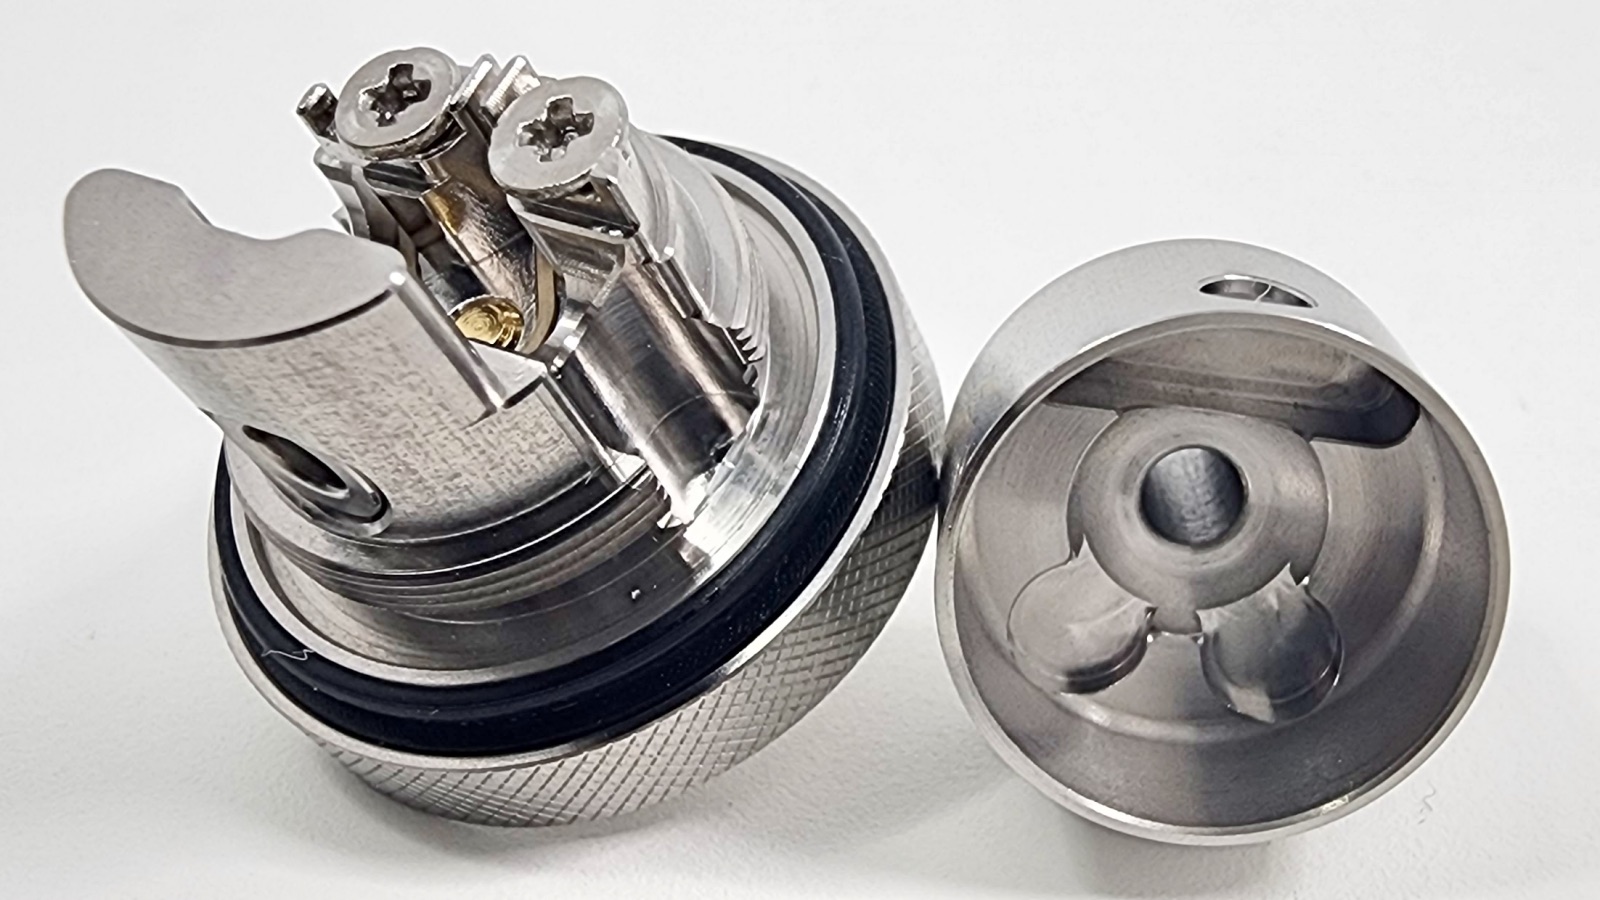
So let’s talk about what’s new with the Alberich II versus the previous model, aside from the looks. The main differences are that this is now top-to-bottom airflow, whereas the first version had bottom airflow. So that prevents leaking. The airflow pins have been changed so that they fit into the deck rather than needing to be screwed in at the 510 pin, which makes it much easier to change those airflow adapters. The airflow adapters are in slightly different sizes, and I don’t know if that’s better, but it’s a change. The chamber takes up much less space.
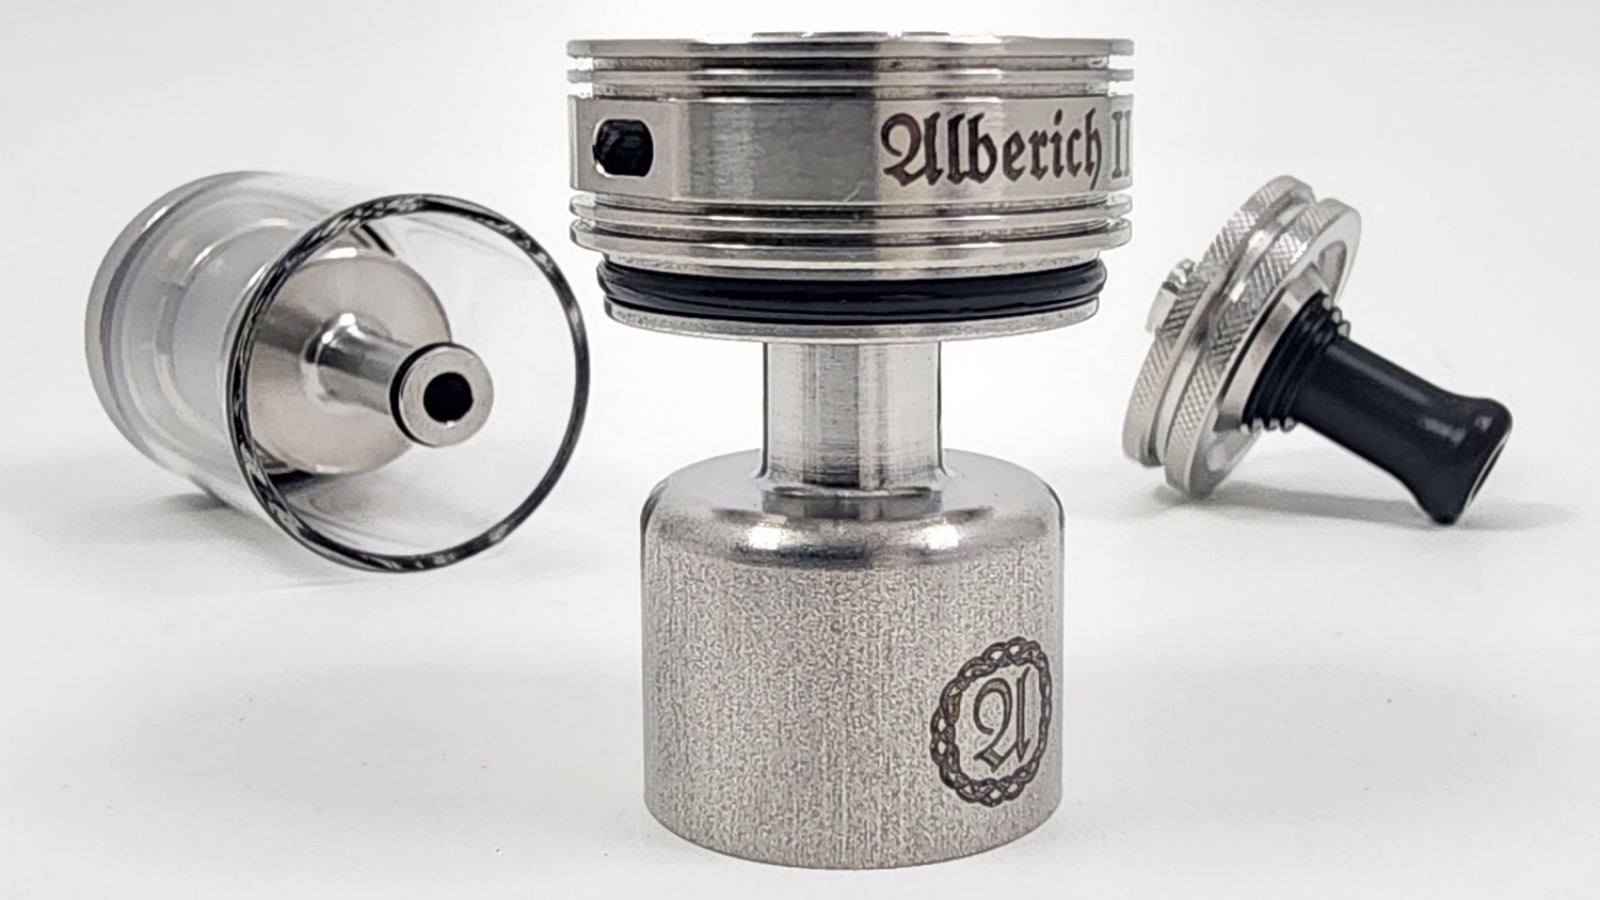
And the deck is much different. The changes in the deck can be good and bad. The previous version’s deck was more open and easier to build on. It also had four posts, even though it was a single coil deck, which made it easier to install a coil no matter what direction the coil legs are facing. The new deck has two posts and a smaller working space, but the benefit of that is that it’s less confusing and possibly better designed for flavor and airflow.
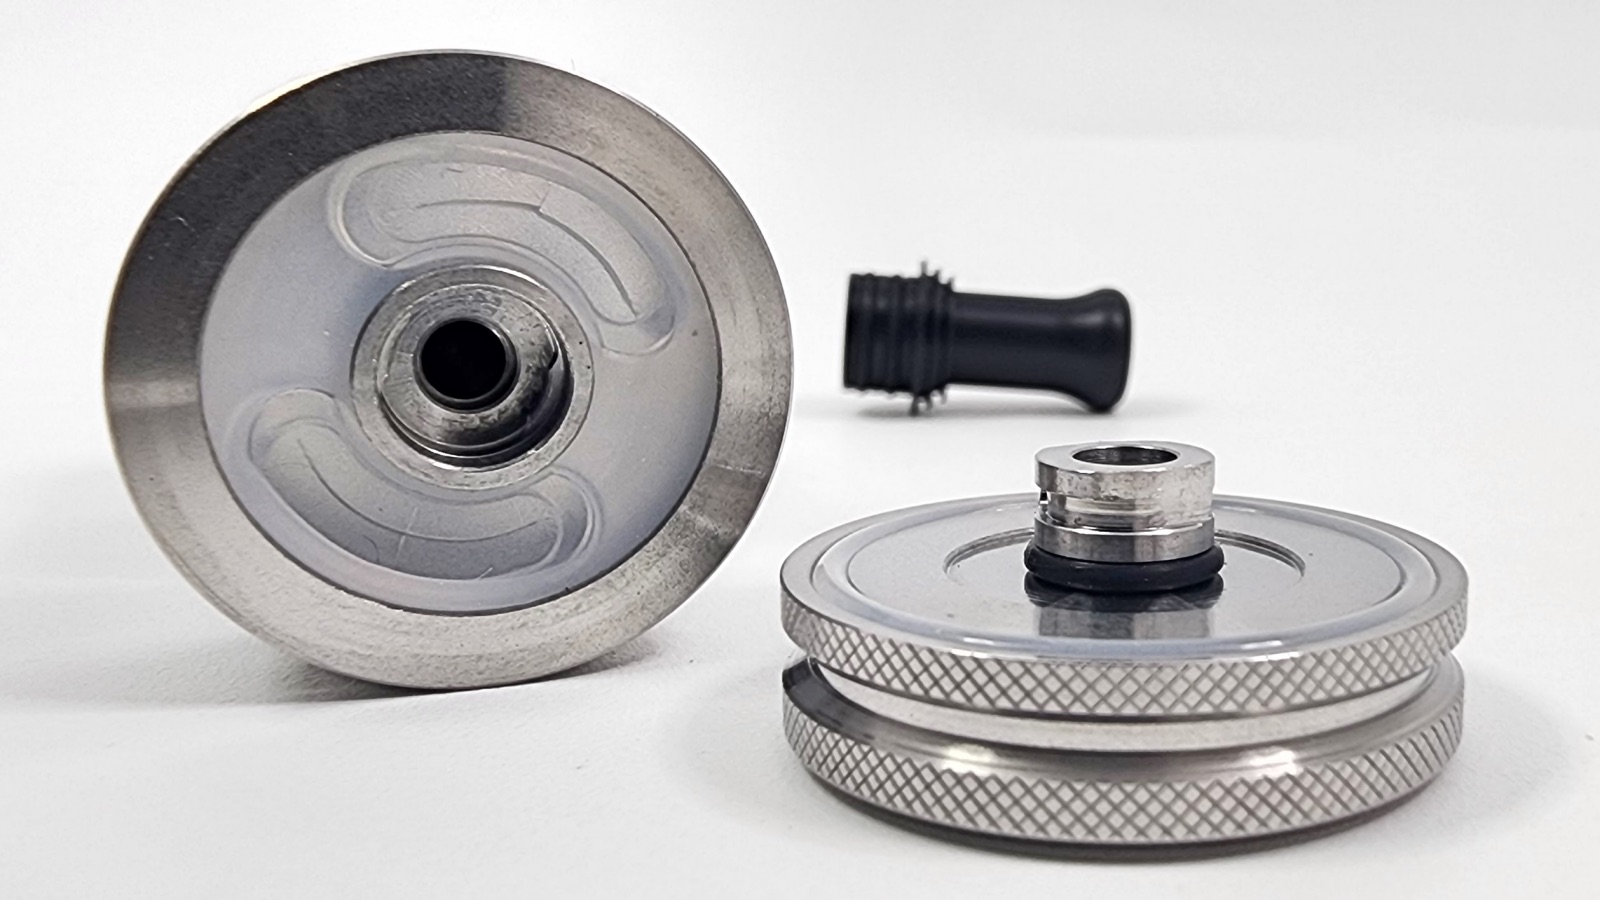
This is a top-fill tank and easy to fill. The top cap does an easy quarter-turn and it comes right off.
Airflow Control and Pins
The airflow comes in from the top of the tank, down through the chamber section and into the deck through the airflow pin, and back up through the chimney. It’s a fairly standard method of directing airflow in top-airflow tanks, so there’s nothing too different here except for using the airflow pins.
Using airflow pins is an interesting choice from Vapefly because this is far more difficult to modify than using a simple airflow control ring. To change the airflow on this deck, you need to disassemble it, push out the pre-installed airflow pin, and replace it with whatever size pin you want to give you the airflow you want. That means it’s more work and fiddling that you’ll need to do until you find the right airflow. And when you first get this tank going, it’s not easy to change around when you have a tank full of liquid. They’re also tiny, tricky to clean, and easy to lose. But the good thing is that when you find the pin you like, you don’t have to deal with the airflow again, and it’ll always be set exactly how you expect.
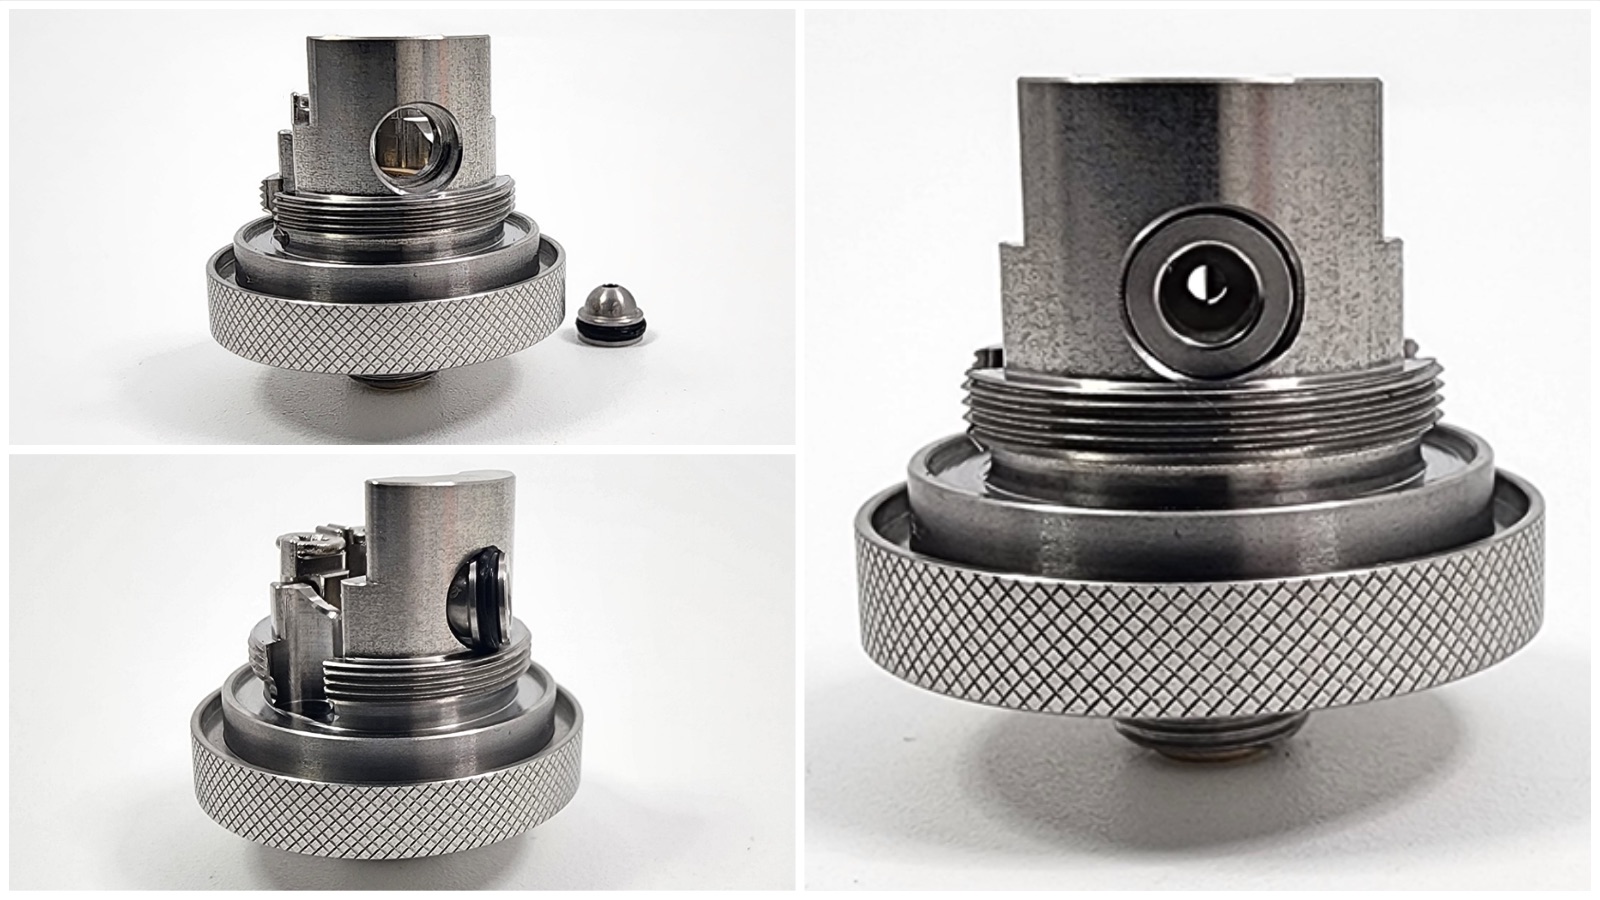
The deck comes with the 1.2mm pin pre-installed, which is in the middle of your choices and will probably be perfectly fine for most people, so you might not need to change anything at all. I’ve found this one to be at a slightly loose mouth-to-lung draw and very comfortable to use. If I had never messed around with the other pins, I would be completely fine with that one.
But you also have several other choices:
0.8mm, 1.0mm, 1.2mm, 1.5mm, 1.8mm, 2.0mm
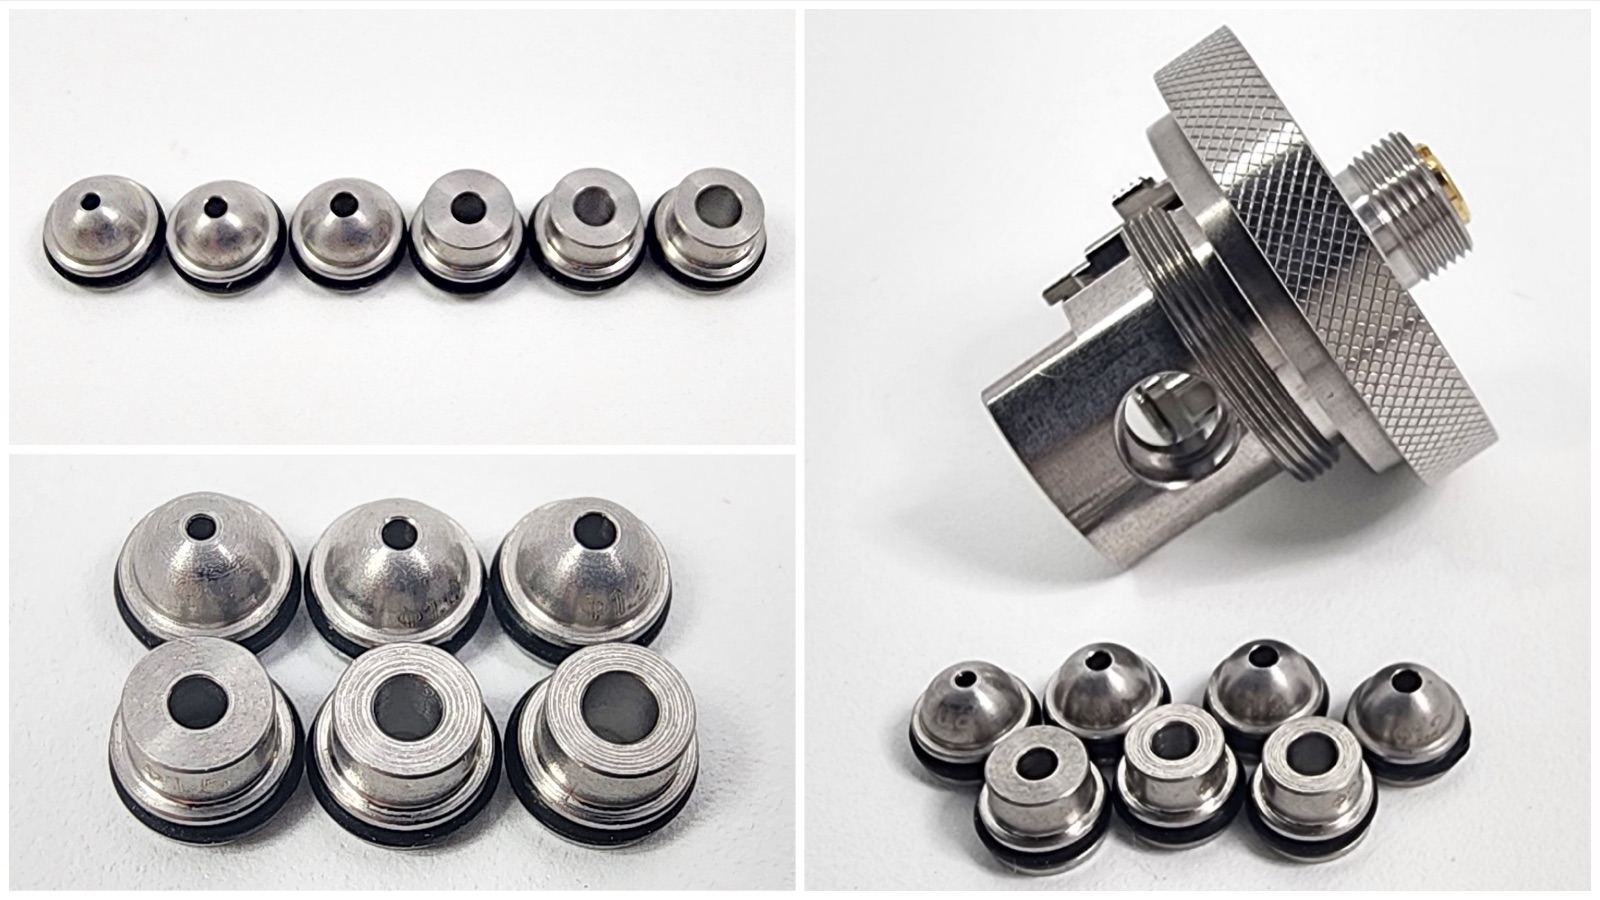
The three smaller ones are rounded, and the three larger pins are flat and more squared off.
The smallest airflow, 0.8mm, is extremely restricted. It’s a super tight draw. And the 1.0mm is close to the same with just a little more airflow coming through. The 1.5mm pin is where it really starts to become a loose MTL. The 1.8 is getting close to a lung draw. And you can even vape this without a pin installed if you want a restricted lung draw. All of the pins work well and have enough differences to make them useful.
One thing to keep in mind is that you should make sure the pins are fully seated. I accidentally left a pin slightly unseated, and the airflow wasn’t working right, so you just need to make sure it’s pushed all the way in.
I would also suggest testing the pins and taking pulls without firing the tank before you fill it up. That way, you can gauge how well you’ll like it first. But I tested each one with a full tank to get a good feel for each one. And I ended up sticking with the 1.2mm pre-installed pin.
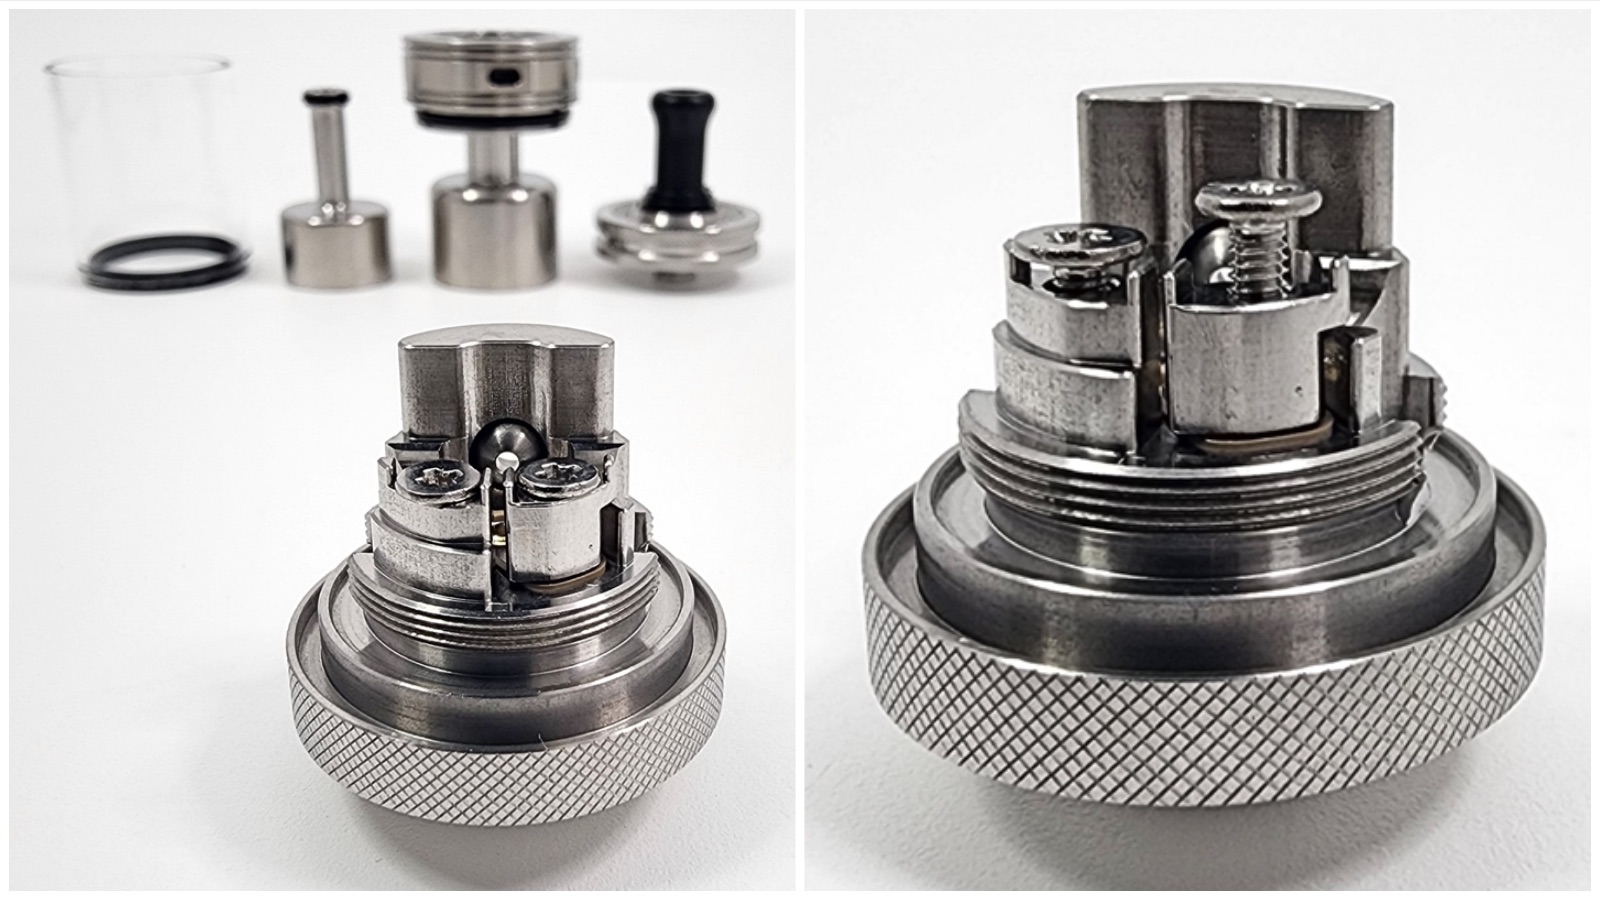
The Build Deck
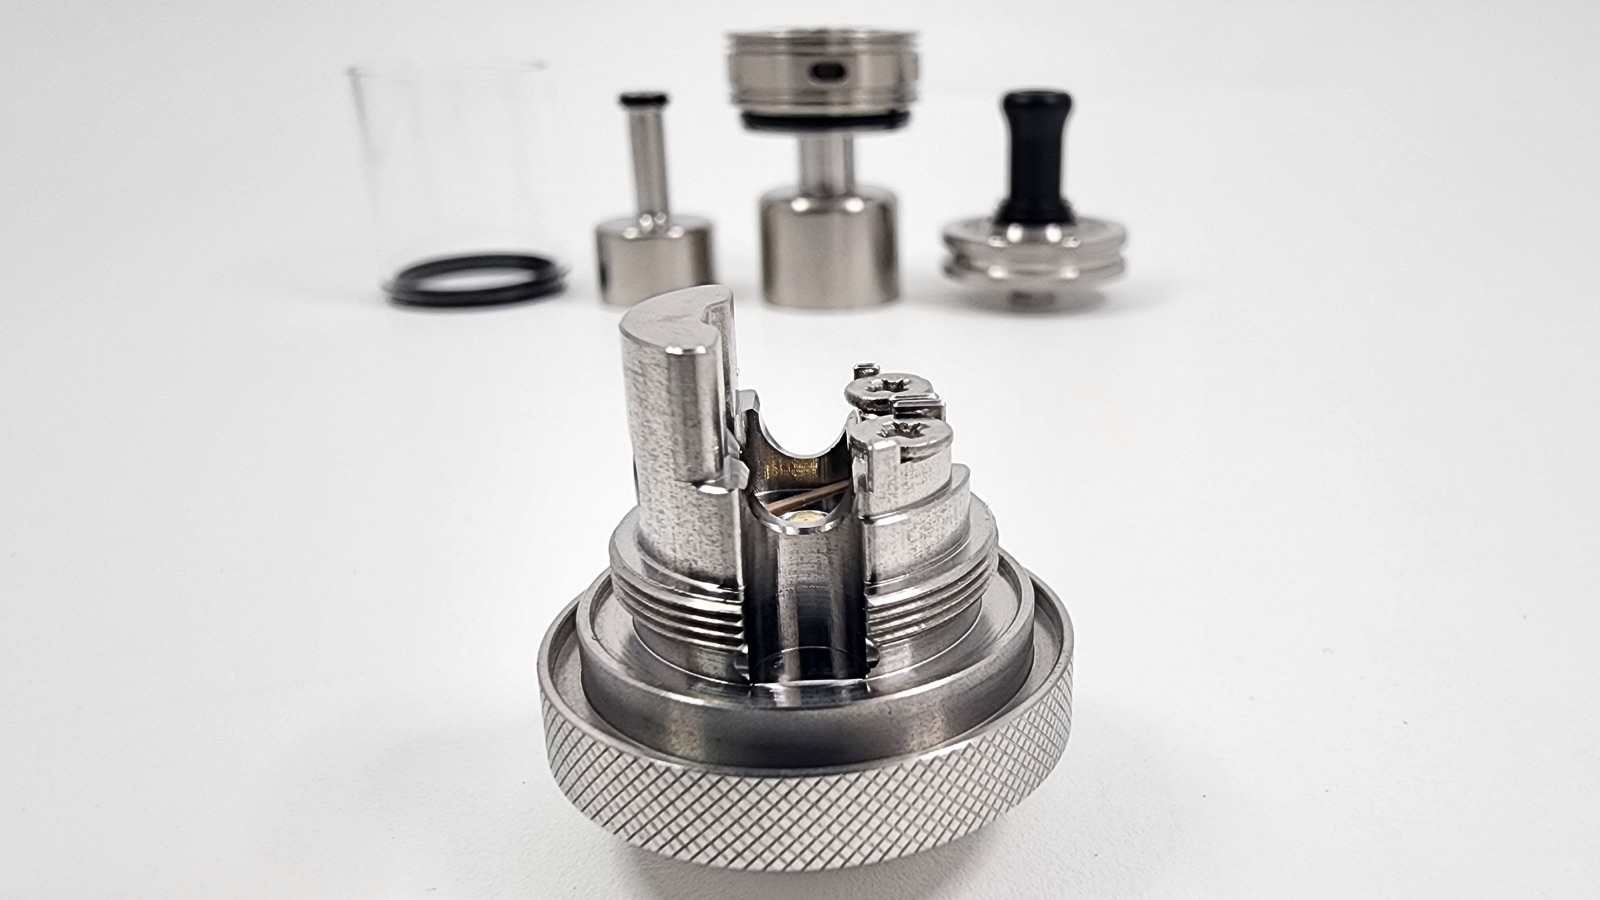
The deck has a wall on one side where the airflow pins are installed. I think the main purpose for it is to have a place to install the pins, but it also fits into a specific slot on the chamber so that you can be sure everything is in the right place when you screw it together.
The rebuildable section of the deck has a curved space for the coil and two coil posts to screw the coil down. Vapefly recommends installing the coil below the screws on the posts, so a little lower into the deck. You want the coil legs to be straight and level. That’s an easy way to remember the best way to install the coil.
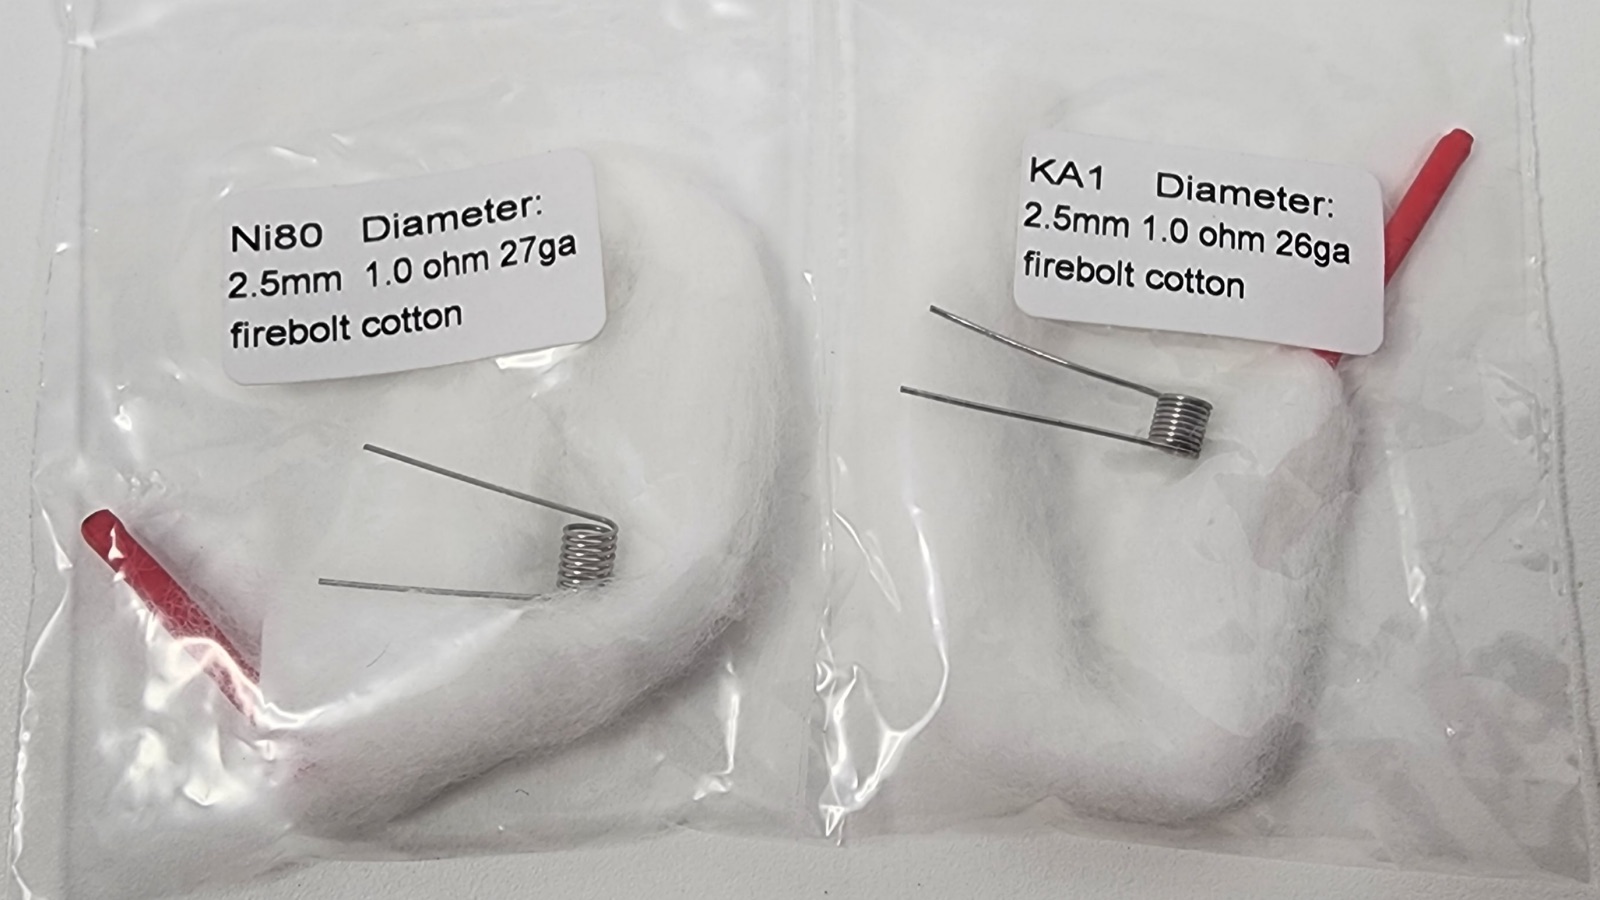
The coils included in the kit:
- KA1, 2.5mm diameter, 1.0 Ohm, 26 gauge wire, contact coil
- Ni80, 2.5mm diameter, 1.0 Ohm, 27 gauge wire, contact coil
The coil sizes Vapefly includes in the box are exactly what you want to aim for if you’re building your own coils. A 2.5mm diameter coil is about the maximum you can fit. I’ve tried building my own 2.5mm coils using 24g wire, and it fits, but just barely.
24 gauge might be just slightly too big at that diameter. And I had a hell of a time with positioning, clamping the wires down, fitting the chamber over the deck, and issues with shorting because the coil would end up touching the deck after getting it all together.
So I highly recommend using the specs of the coils that Vapefly included if you build your own, meaning 2.5mm max and 26 gauge or smaller wire. Their coils are also contact-coils, meaning there’s no space between each ring of the coil, and that makes it easier to fit in the deck too, but I like spaced coils and haven’t issues with that as long as there are only 5-7 wraps on the coil.
Clamping the coil wires down is pretty straightforward. You place the wire under each screw and tighten it down. And here’s where I ran into another problem with the 24 gauge DIY coil I built; it tended to slip out when tightening the post screws down. So again, go with 26g or smaller.
After tightening the post screws, you’ll need to cut the excess metal from the coil legs. And you want to get that as flush as you can. Just a little bit of metal sticking out will touch the chamber cover when you put it over the deck, which will cause a short, and your device won’t fire. I’ve found that there’s not a lot of wiggle room here.
Wicking the Coil
The cotton that comes with the Alberich II is another good indicator of how this deck should be wicked. It’s a little tight but not so tight that when you tug the cotton it pulls on the coil.
I’ve been cutting the cotton where it meets the base of the deck. You can run the cotton down the channels on each side and cut it at the bottom. You want at least enough cotton that it sticks out below the chamber cap when it’s all put together. That’ll ensure it’s always sitting in the liquid and wicking correctly.
Final Thoughts
And that’s the Alberich II. It’s not the easiest tank to work with, but I think that’s part of the joy of it too. This is a tank for people who want to experiment with their setup and fine-tune everything until they get it just right. And then you can turn on a vape video, take it all apart, and start all over again. It’s like therapy for vape nerds like me.
The Vapefly Alberich II MTL RTA is an excellent atomizer for those who enjoy MTL vaping. Its top-to-bottom airflow design ensures a leakproof experience, and the six interchangeable airflow pins allow for precise airflow control that you won’t have to play around with once you find the pin you like. Including two prebuilt coils, cotton, a spare tank, spare seals and o-rings, and a screwdriver is awesome. The most challenging thing for me was dealing with those airflow pins; otherwise, the Alberich II MTL RTA is nice to use. It’s well-designed, high-quality, has smooth airflow, and it just vapes great.
The Alberich II MTL RTA was sent to me for review Sourcemore.com. You can get it from them for $18.39 with the coupon code: ALMR2.
Alex is a former smoker who successfully quit smoking after 14 years by switching to vaping. Now a pro-vaping advocate, Alex has become a seasoned expert with over a decade of experience in the vaping industry. Since starting his vaping journey in 2010, Alex has earned a reputation as a trusted reviewer, extensively testing all types of vape gear, including mech mods, sub-ohm tanks, RDAs, disposables, e-juices, boro devices, squonkers, dry herb vaporizers, and e-rigs. He’s also explored the craft of coil building and DIY e-juice.
Since 2015, Alex has published more than 800 in-depth articles on vaping, produced over 500 videos covering product reviews, industry news, and tips, contributed to several well-known vape publications, and hosted a popular vaping podcast featuring over 100 episodes and nearly 40 hours of content.