
This is a new device in the always popular line of Pulse devices created by Vandy Vape in collaboration with Tony B. The Vandy Vape Pulse AIO was NOT sent to me for review. I purchased this for myself because it looks like Boro tanks will be a big trend this year. I need to keep up with what’s popular, and I also need to be able to test out any new Boro tanks that come out, so I wanted to pick one up.
If you’re interested in picking one up, here are some places you can find a good deal:
- Get it from VapeSourcing for $72.99 (get 5% off $60 with code VS60 or 10% off $100+ with code VS100)
- Get it from HealthCabin for $68.99 (see their coupon codes here)
Boro tank devices aren’t a new thing. They were created by Doug Dino of Billet Box in Roy, Utah, way back in December 2012. I’ve wanted a Billet Box for a long time because the guys on The Plumes of Hazard channel always talked about them. But at a cost of around $300, Billet Box’s are way too expensive for me, especially because I don’t know if they’ll give me a vape that I’d like and because I’ve heard out finicky they can be. But now the Pulse AIO boro tank device is out for around $60-80. So it’s a great entry point. And if I end up liking it, I’d like to get a nice Billet Box.
Specs:
- 21700 and 20700 battery compatible (or 18650 with the included adapter)
- Adjustable from 5-80 watts
- 0.05 to 3.0 Ohm resistance
- Rebuildable or VVC coil compatible
- 5ml capacity in pre-built coil tank
- 3.5ml capacity in the RBA tank
- USB Type-C charging
In the Box:
- Pulse AIO device
- Two Boro tanks (a VVC coil tank and a rebuildable tank)
- Coil cutting tool
- 510 drip tip
- Two VVC coils
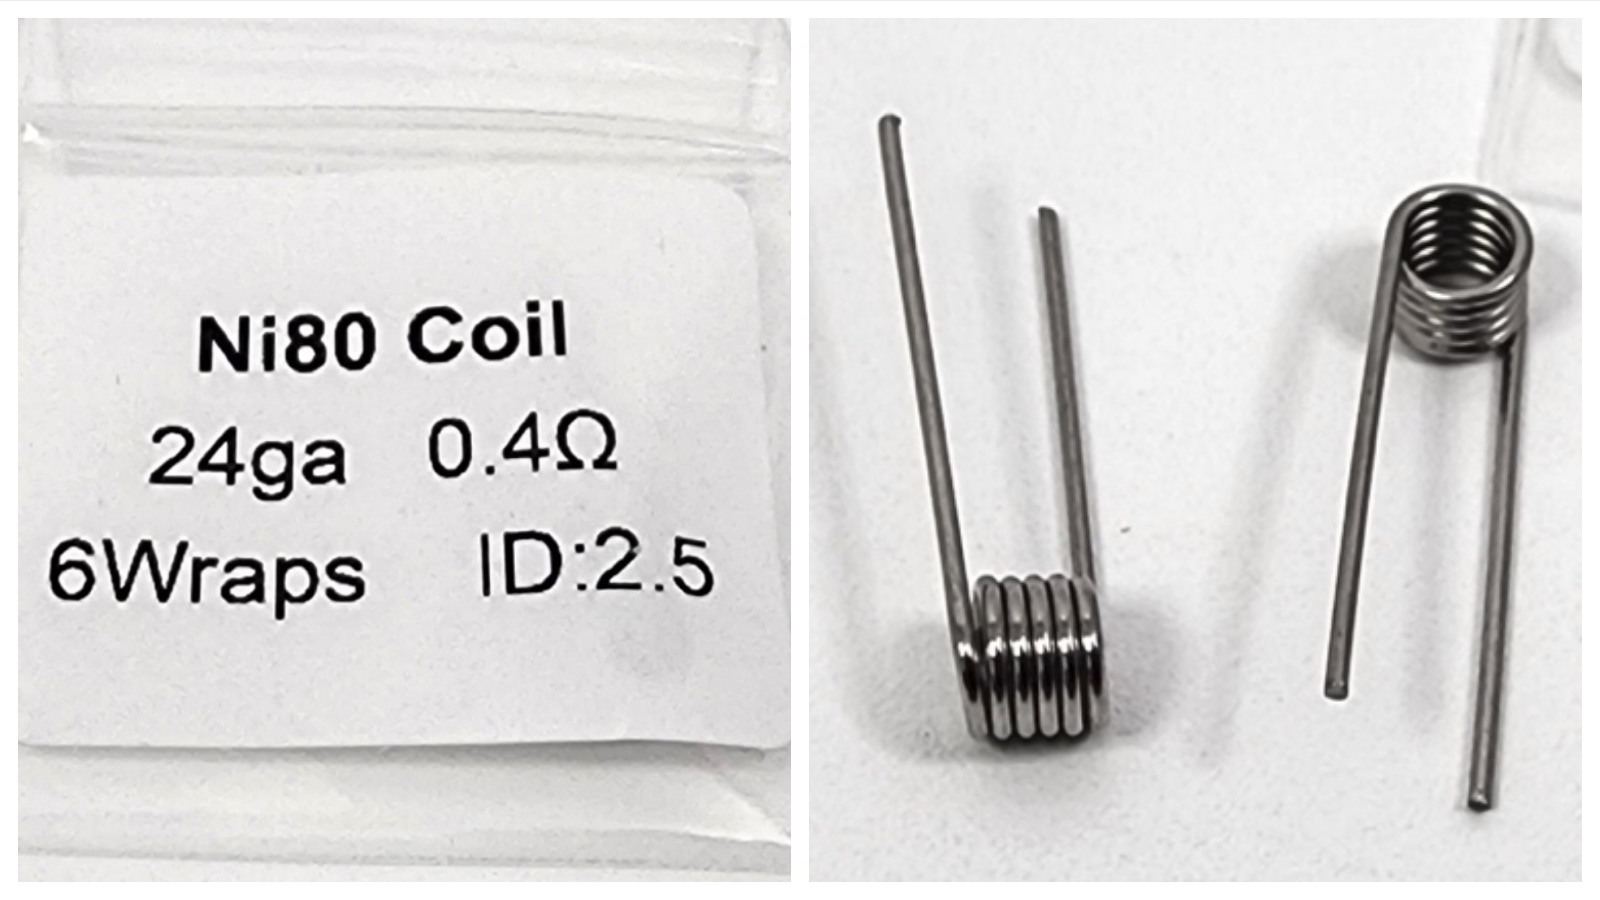
- Two 24 gauge Ni80 0.4 Ohm coils
- 18650 battery adapter
- USB-C charging cable
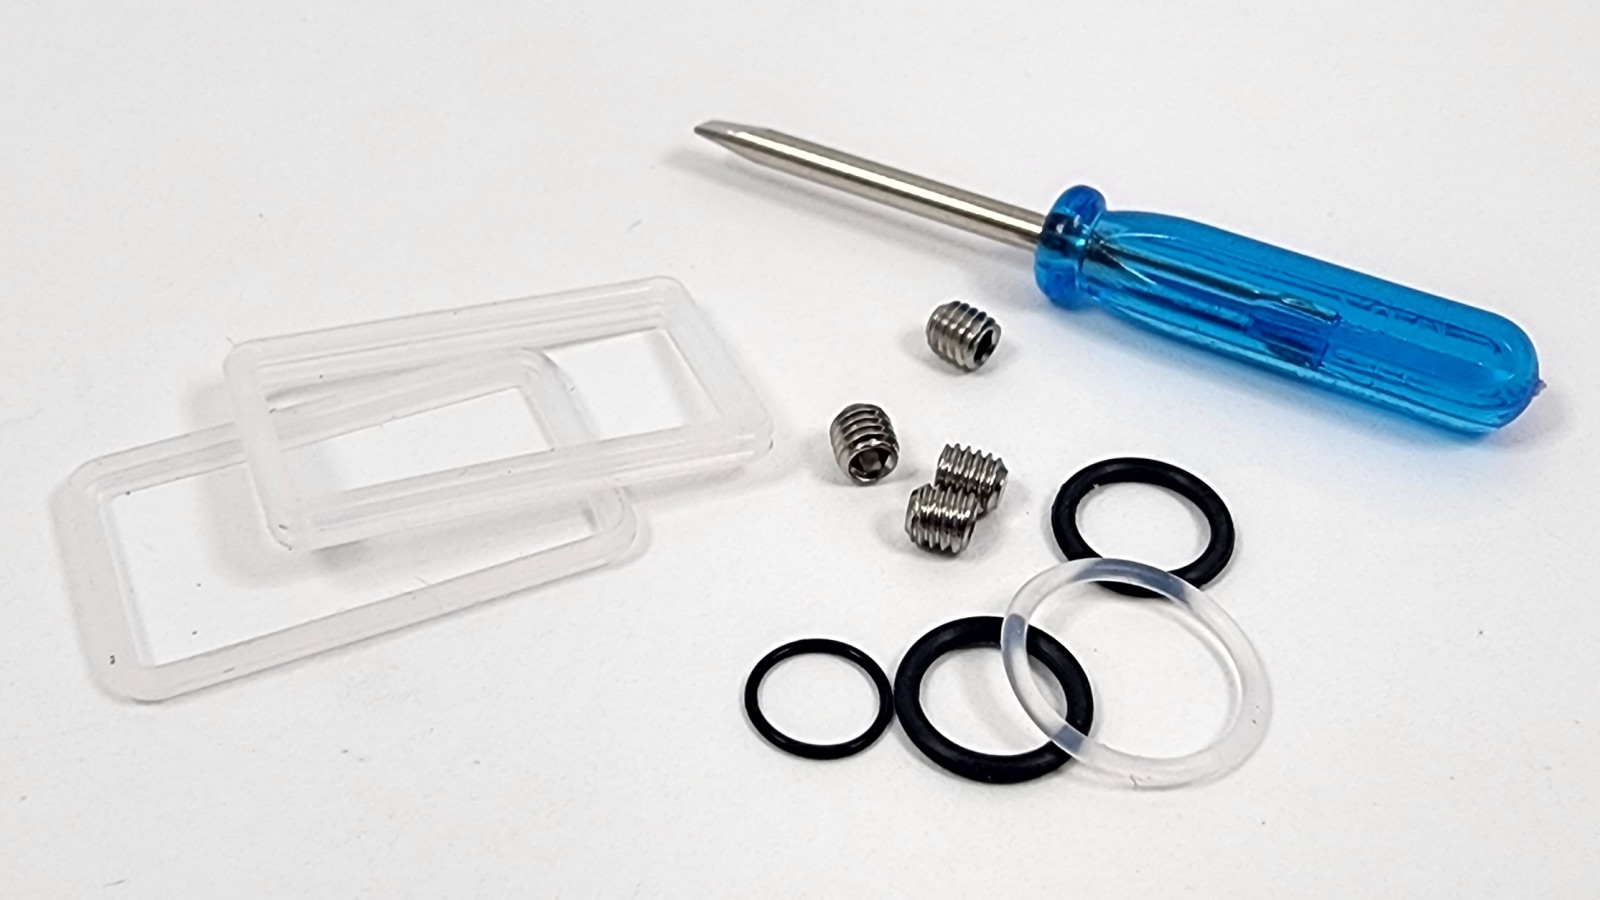
- Parts and accessories
Pulse AIO Design
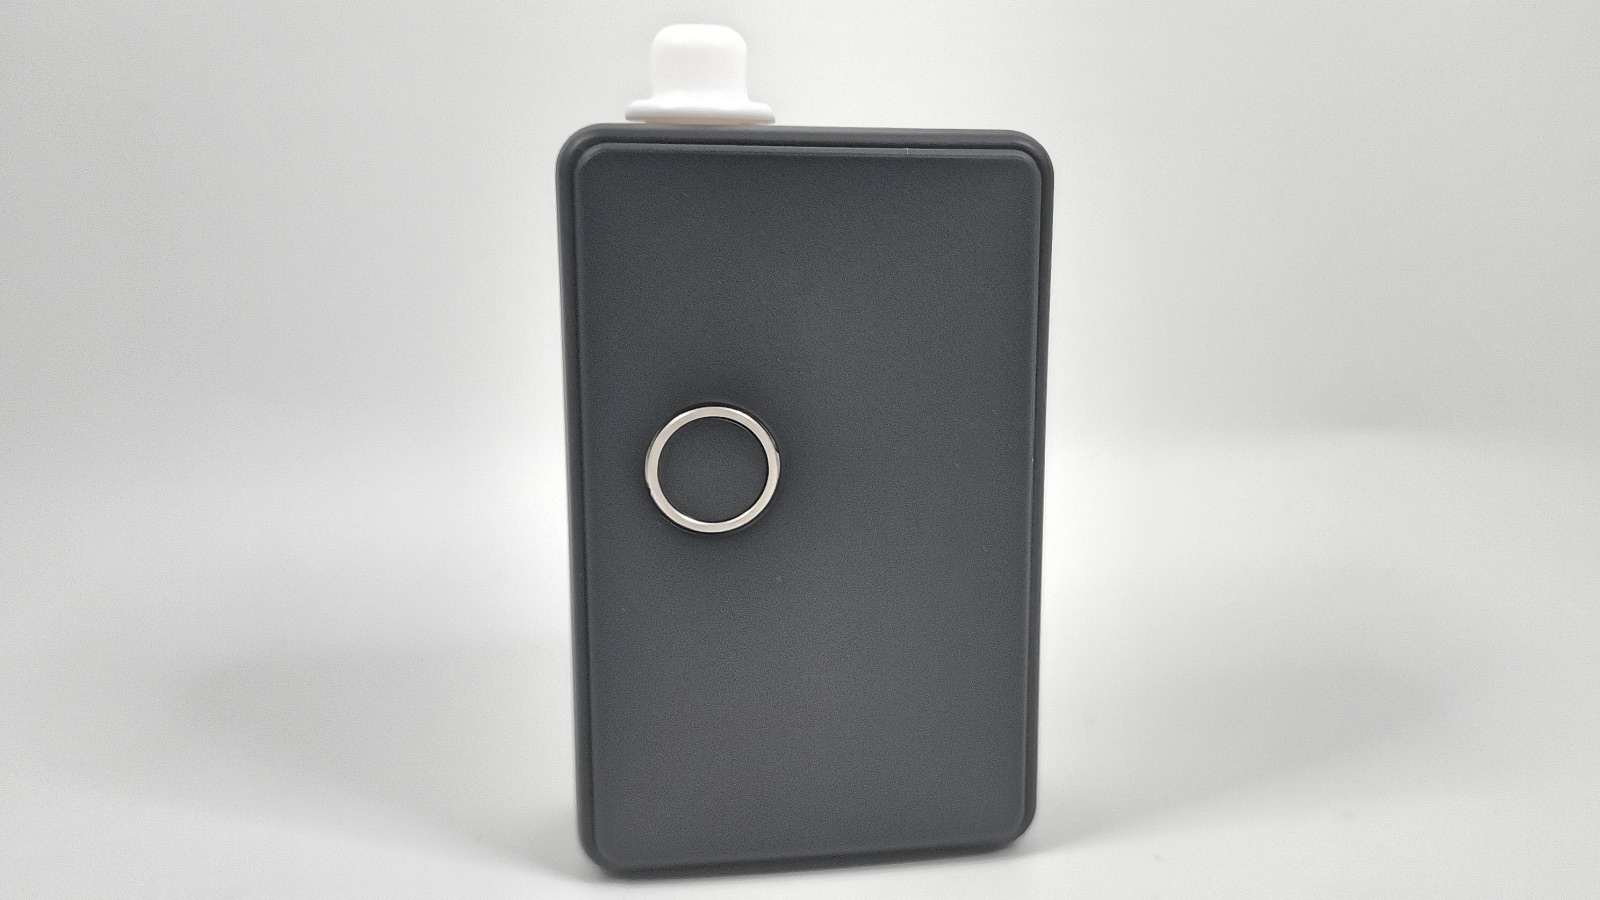
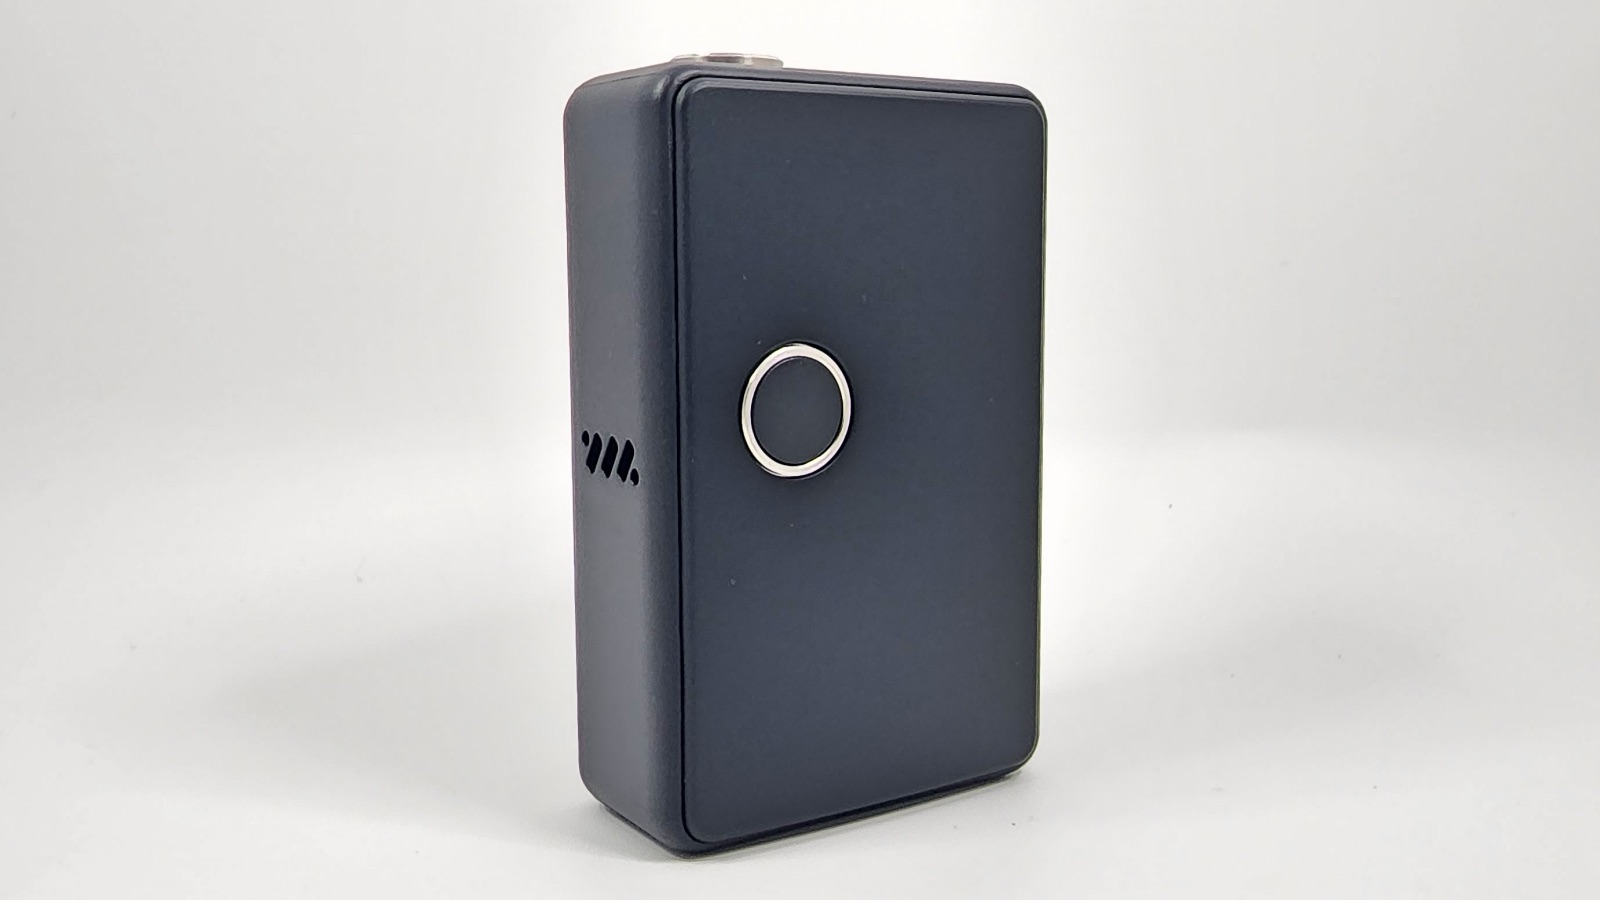
The Pulse AIO is a small box with a round button and an airflow cutout on the side. At the top is a 510 drip tip slot and that’s really it. It’s very minimal on the outside.
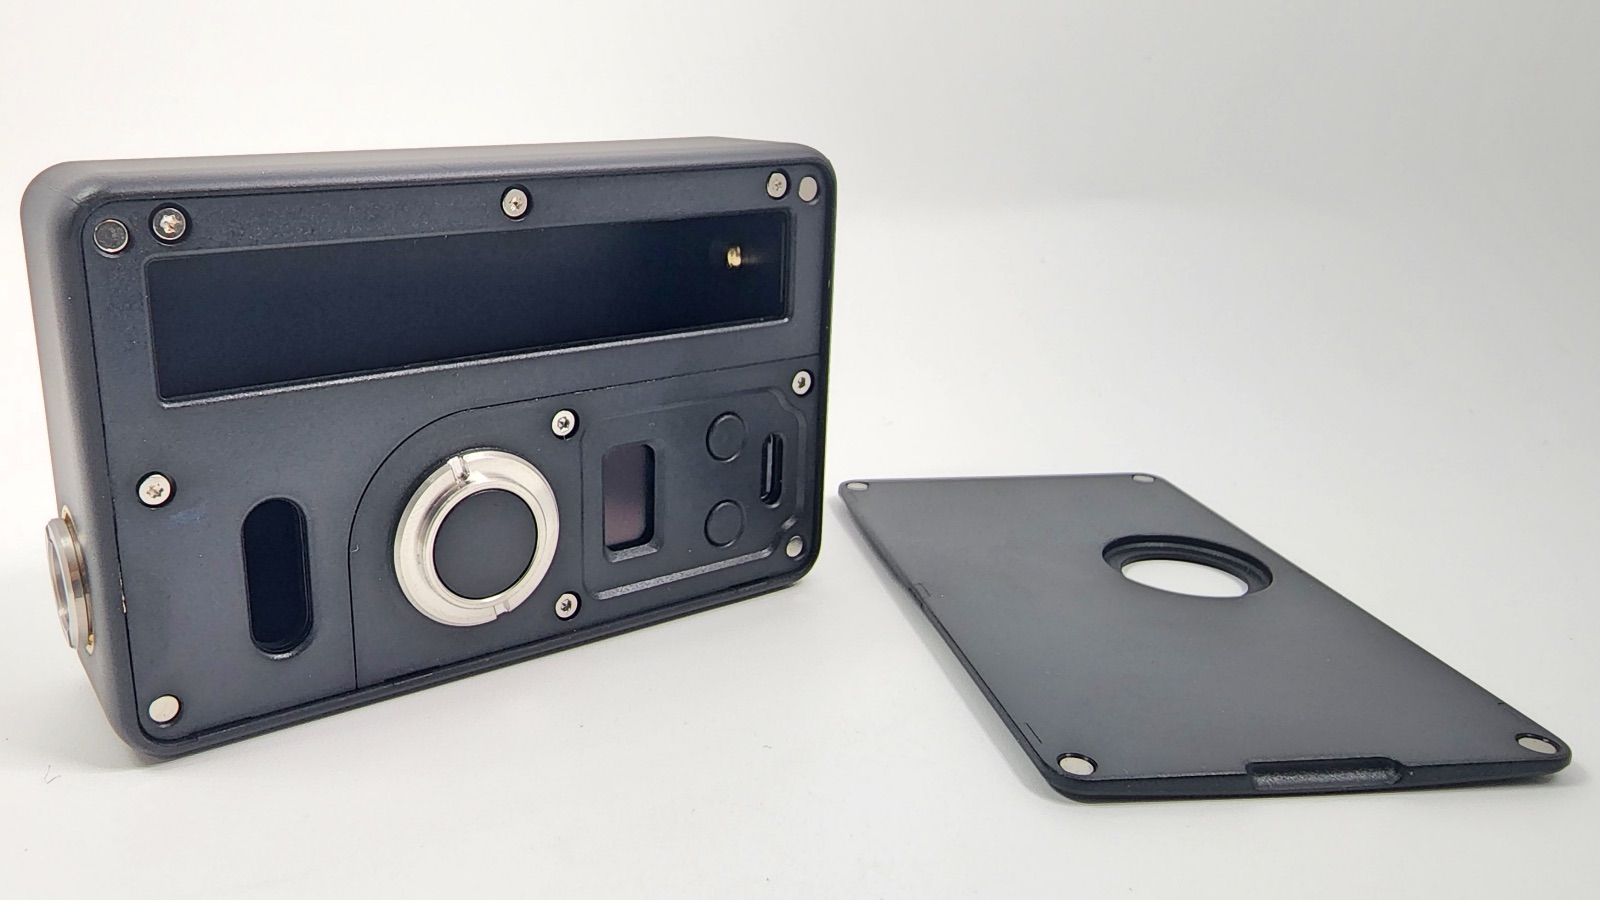
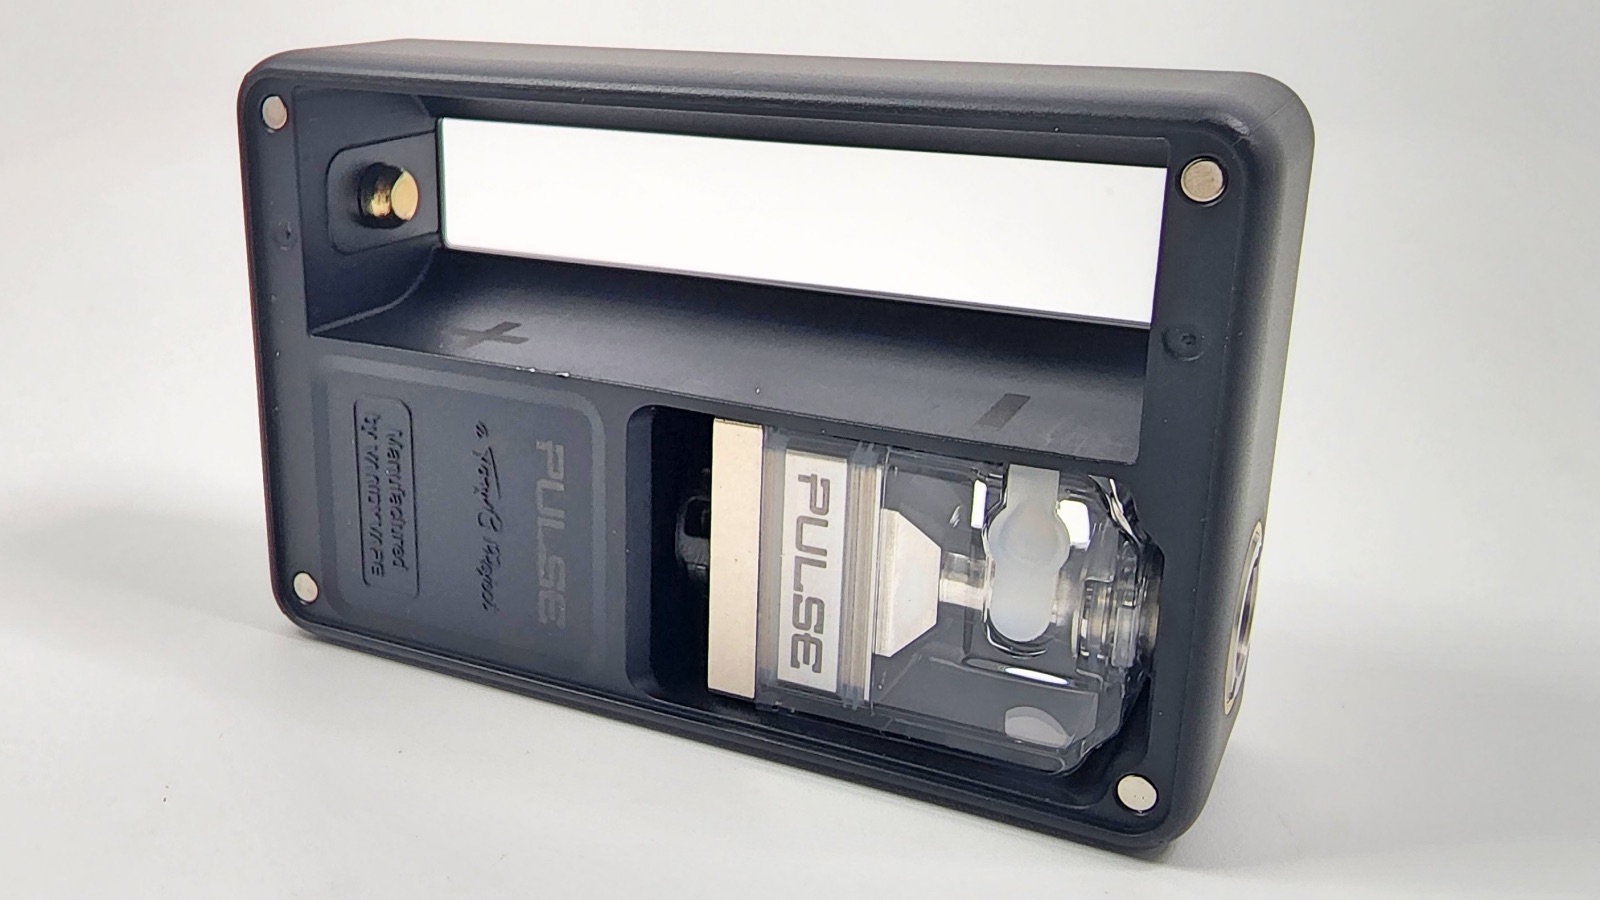
This also has two removable panels, one side gives you access to the battery sled and tank slot and the other side gives you access to push the battery out, a window to see your e-liquid levels, the screen, and the function buttons.
There are six colors currently available; black, frosted white, frosted green, frosted black, frosted red, and frosted blue. All of the “frosted” designs are basically see-through. I don’t really like any of those colors so I went with the solid black, which I do like. I’ve also heard that new panels are on the way so you can really customize the looks of it.
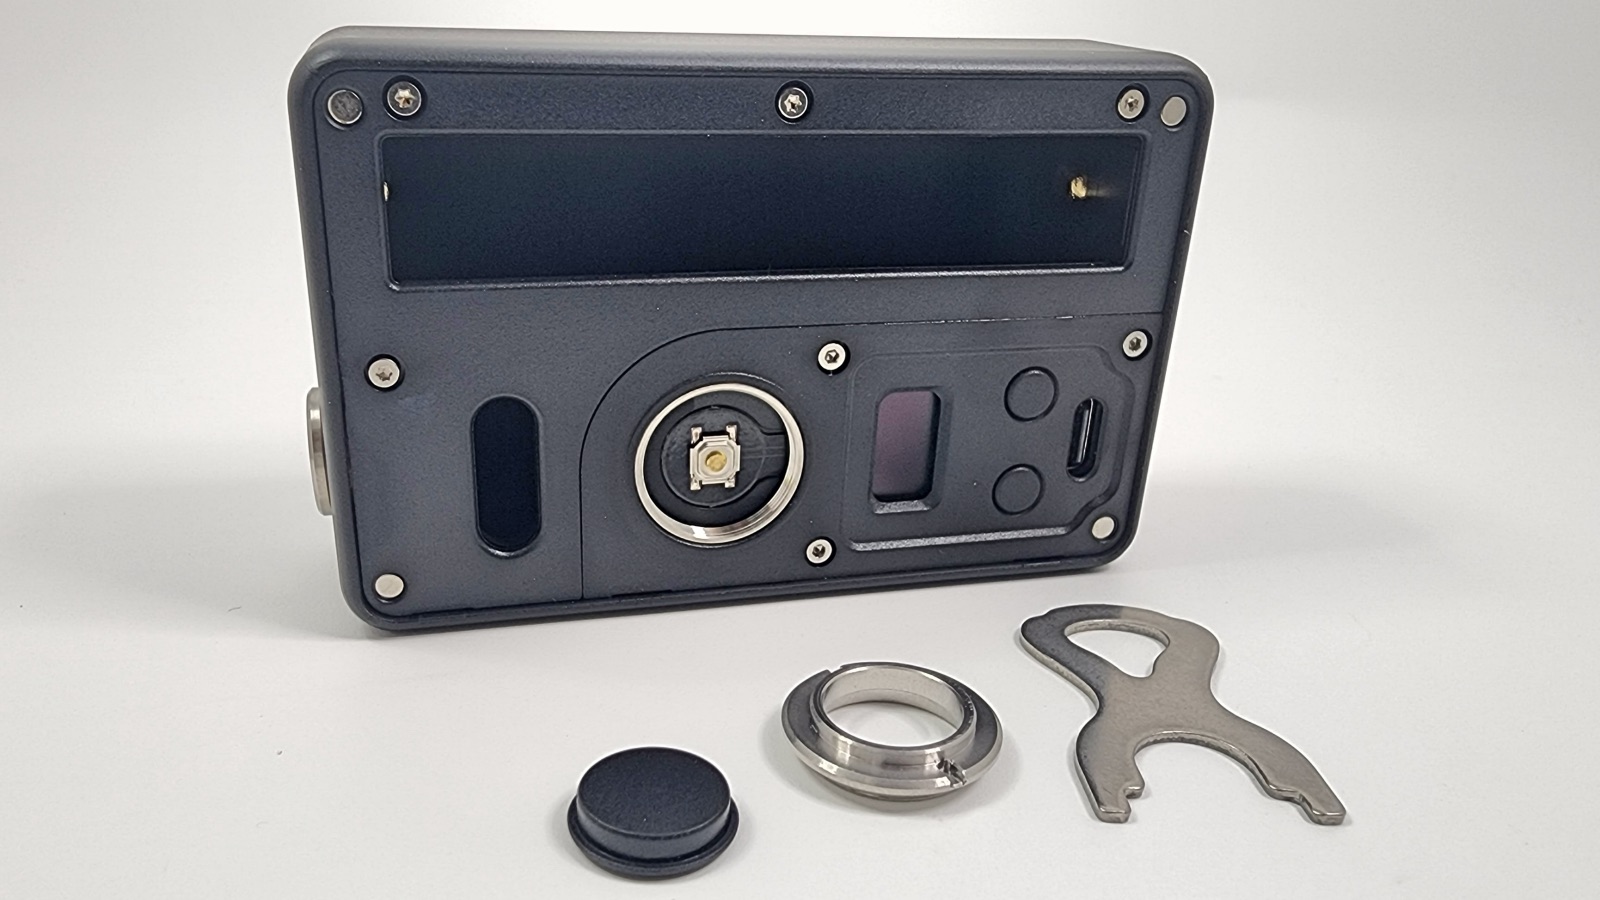
You can also remove the screen panel and the button, so you can customize those parts too. There’s a wrench in the box that has two functions. One side is for your coil tightening screw and the other is perfectly designed to unscrew the button.

The device is 55.6mm (2.1 inches) wide, 97.5mm (3.8 inches) tall, and 28.2mm (1.1 inches) thick.
Mouthpiece
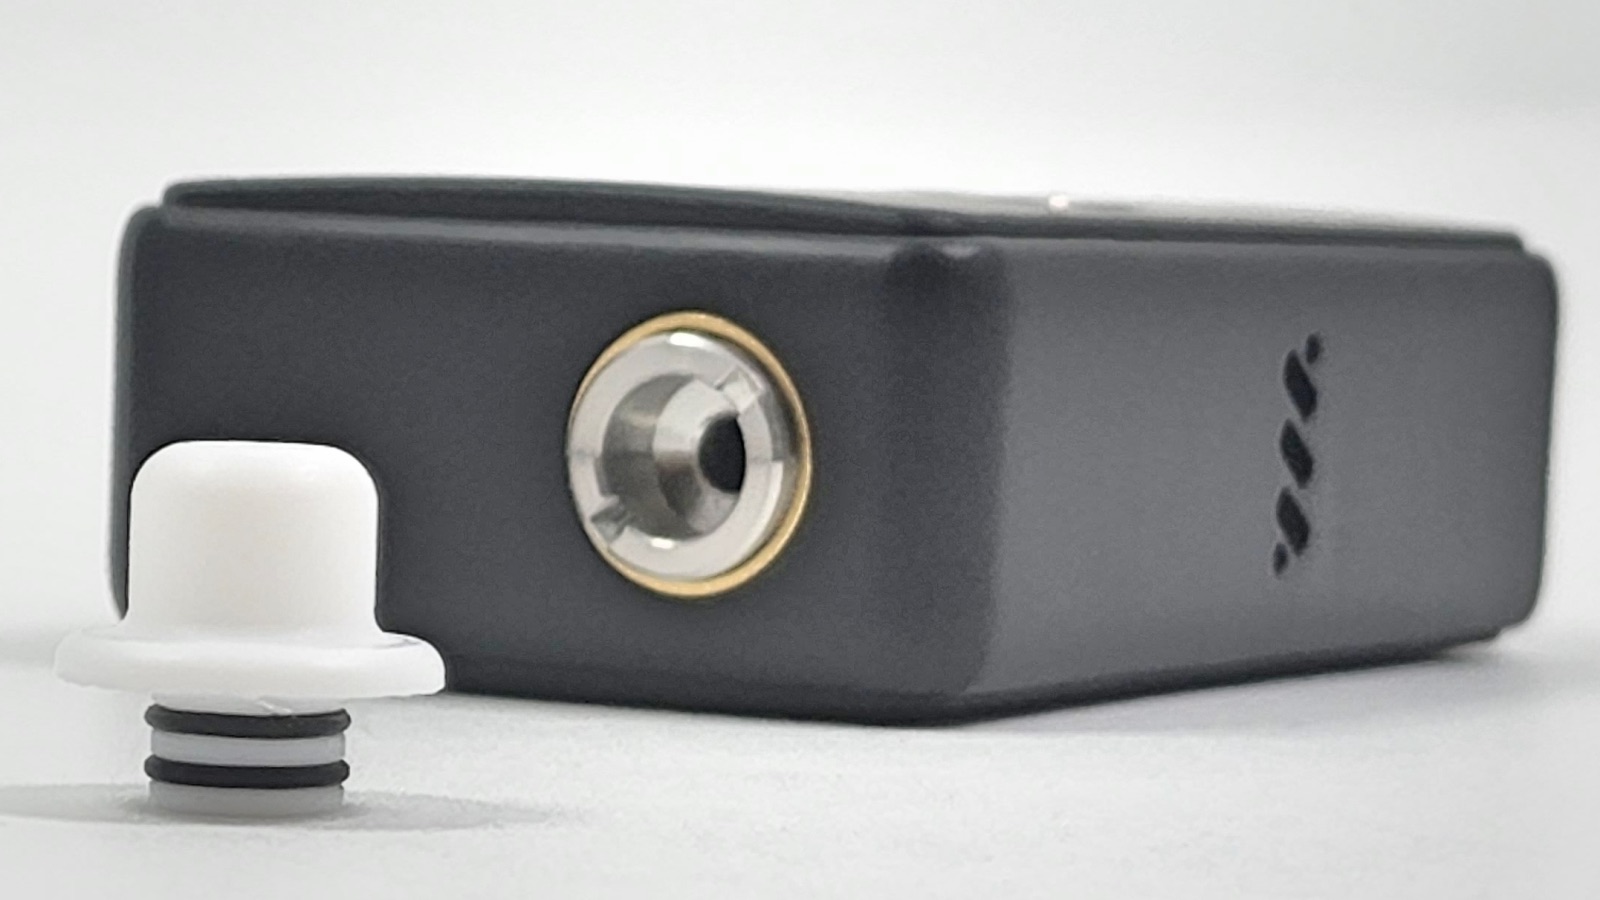
The mouthpiece is a tiny 510 nub that fits into the tank tightening screw. It’s a pretty comfortable tip but I think it’s ugly. The solid white color of the tip doesn’t look good on the black device, and I don’t think it looks good on the clear devices either, except for maybe the white one. Obviously, that’s all subjective though.
One other thing I didn’t like about it is that it’s really hard to fit into the mouthpiece hole. I really have to work at it to squeeze it in there. I guess it’s good that it won’t fall out, but I think there’s just a little too much restriction there.
Tank Tightening Screw and 510 Pin
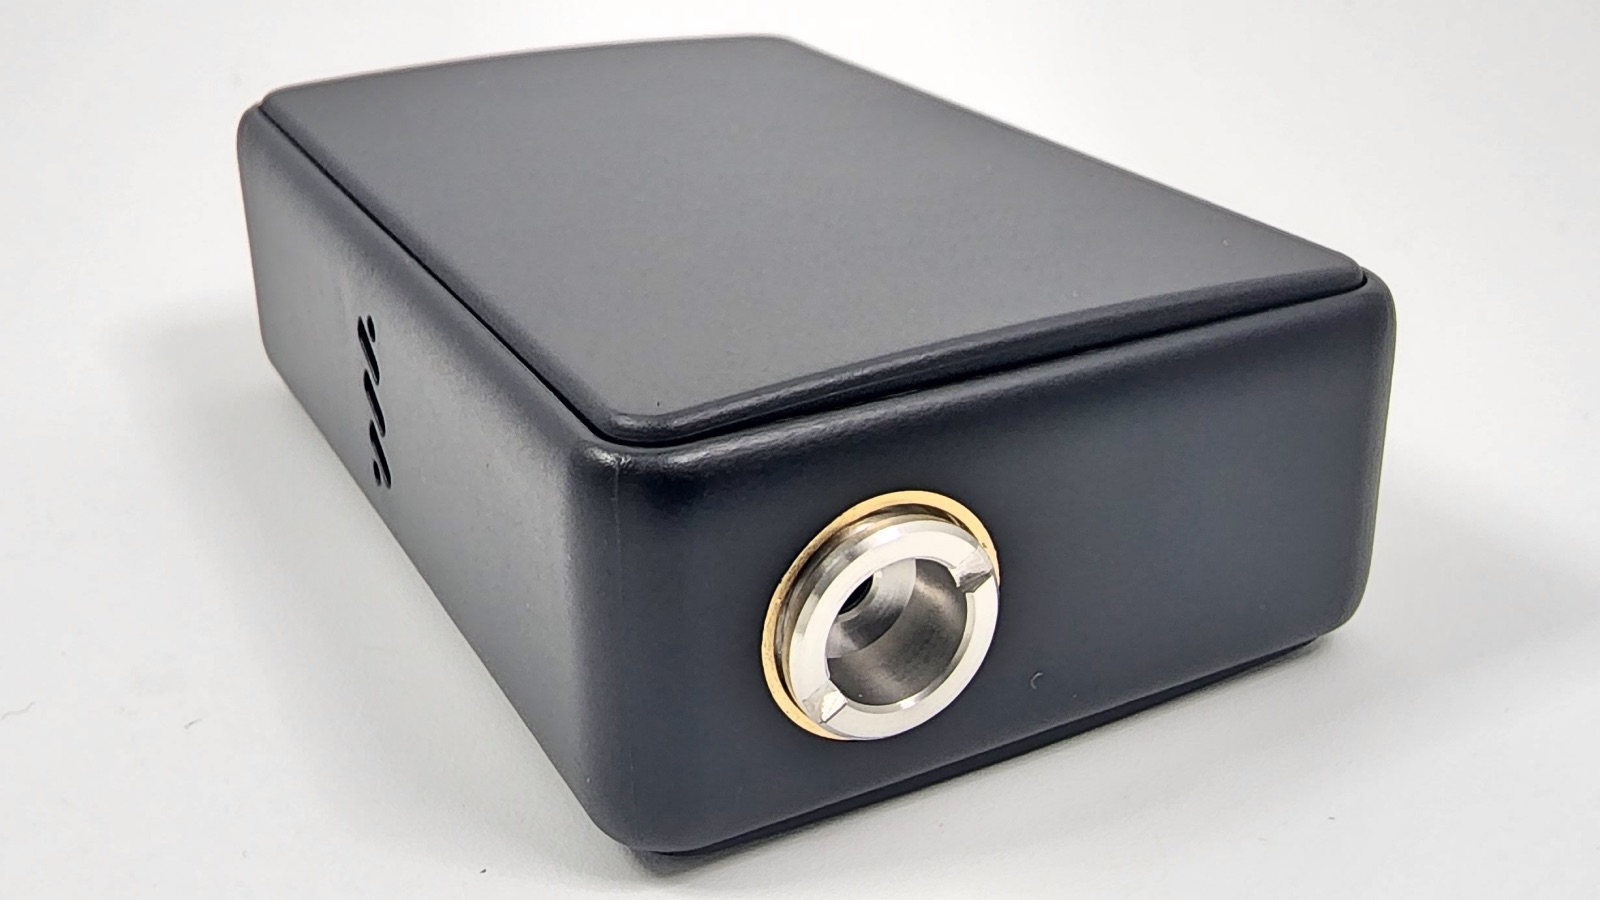
The tank slides into the device and needs to be tightened down to stay in place. You’ll see the 510 pin at the bottom of the tank section too. This can also be unscrewed to raise or lower it, depending on the tank you use. Some tanks might require you to adjust one or both of those to get a good connection.
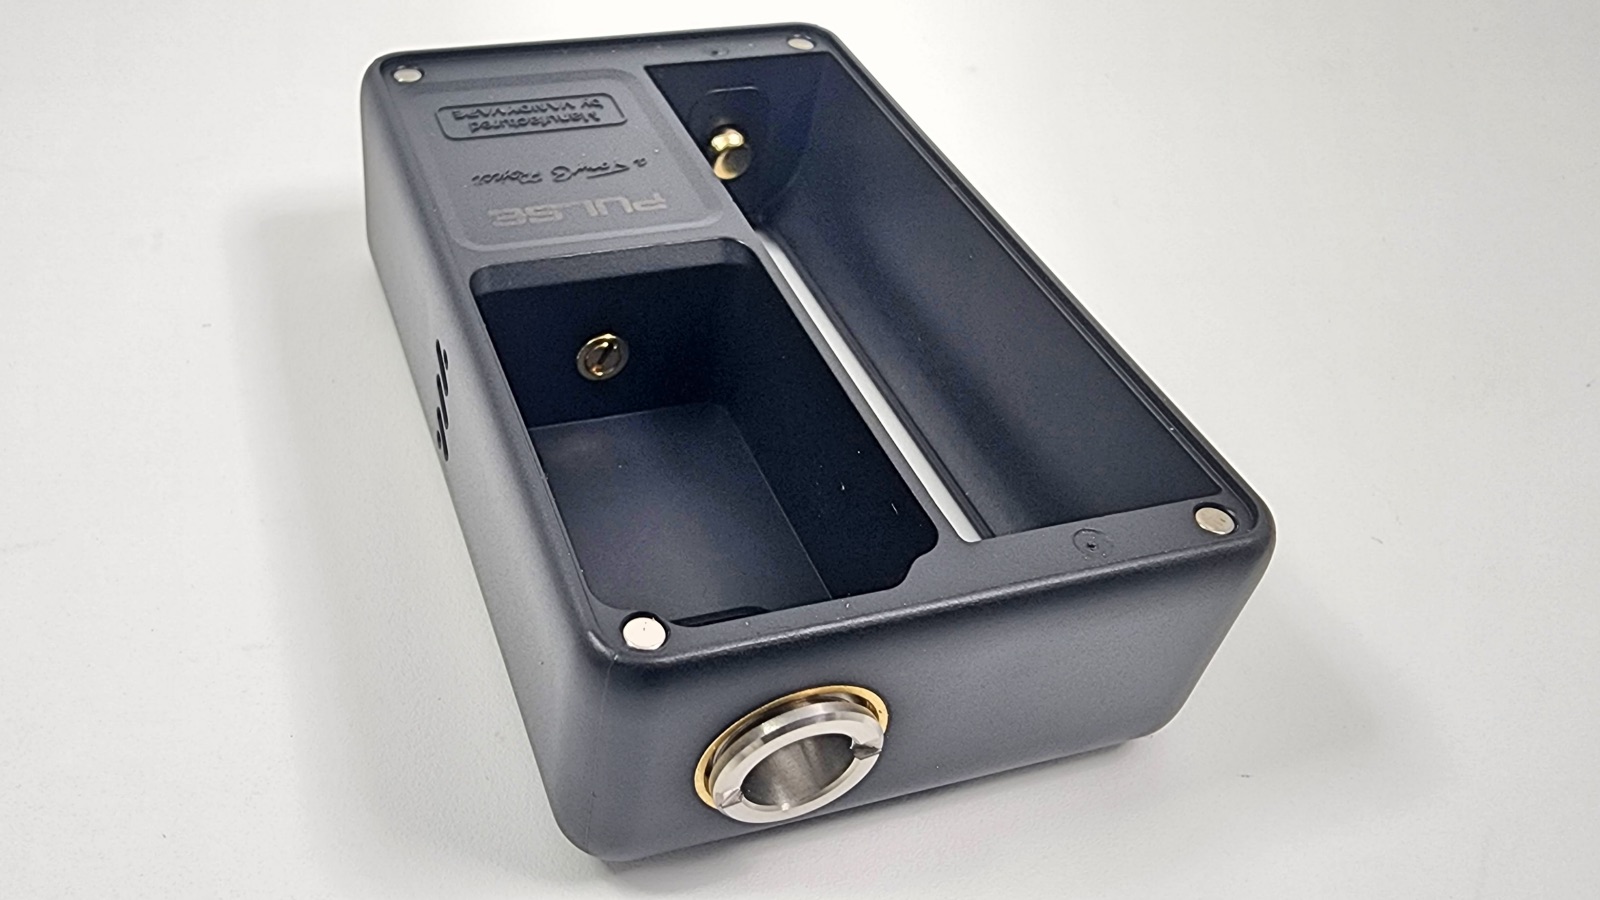
The tank tightening screw and the hole that it connects to on the tank are slightly offset, which makes it so that you can’t put the tank in backward. It’s pretty simple though. Just drop your tank in, make sure the 510 pin is up far enough to make a good connection with the bottom of the tank, and then tighten down the screw on the top.
That wrench that we talked about earlier; that’s the screwdriver for the tank tightening screw, so don’t lose it. You’ll need it! I’ve also been using the flat edge of the mouthpiece to loosen that screw. It’s probably not good for the tip, though.
Two Tanks in the Box
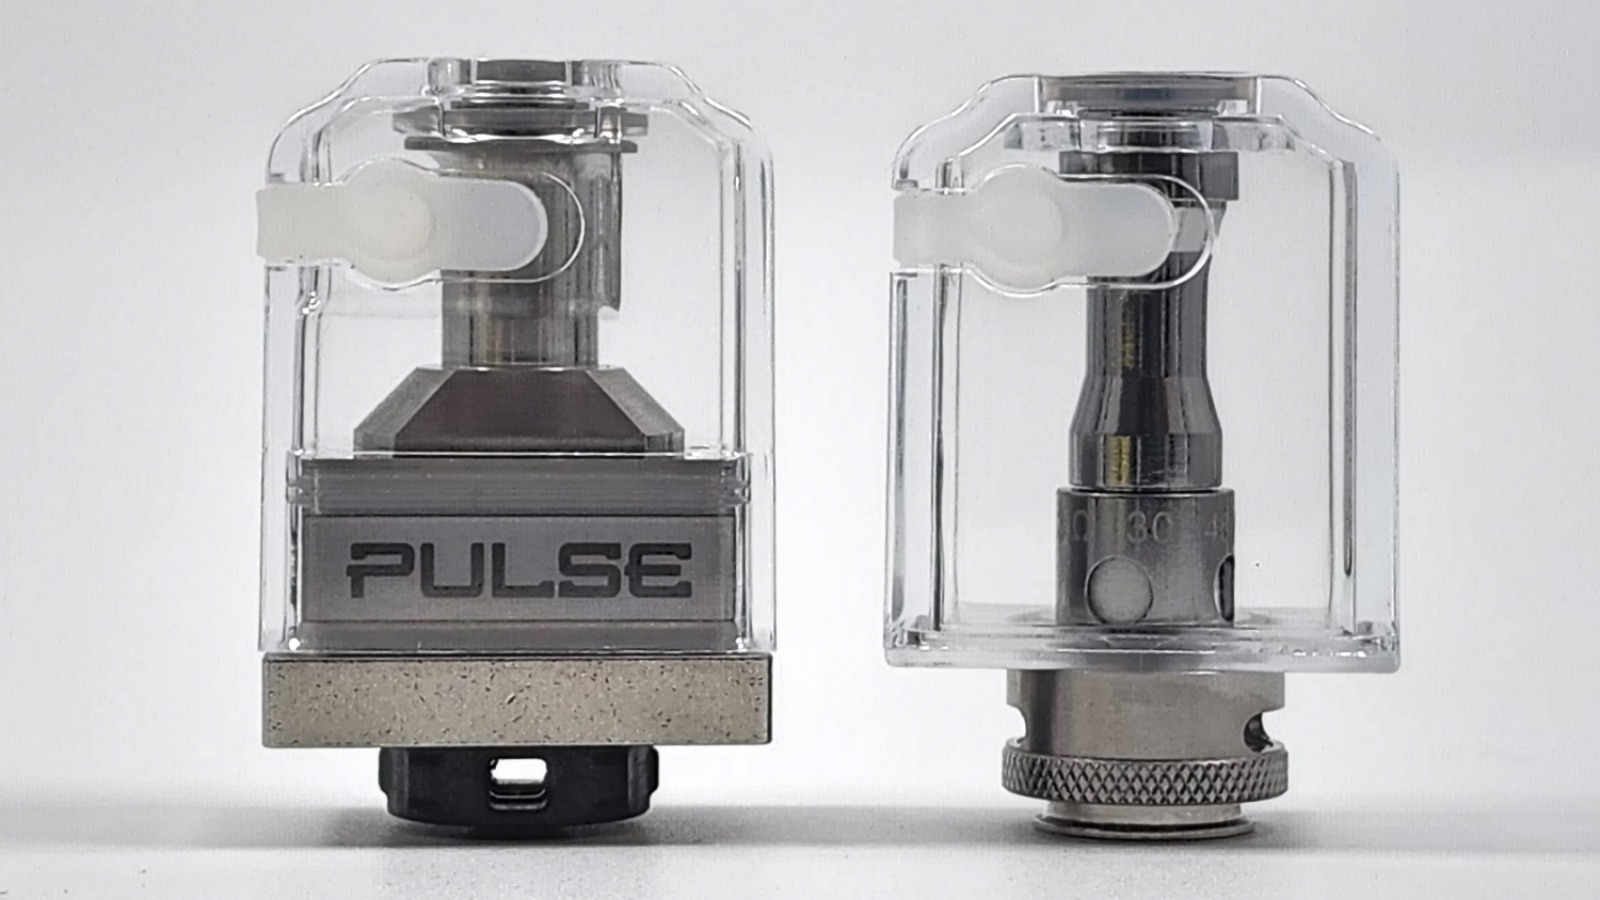
Vandy Vape included two tanks in the box – a rebuildable tank and a coil head tank. That’s a huge plus. I would have expected one or the other but not both.
The Vessel RBA Boro Tank

In the Billet Box world, the tanks used in a Billet Box is called a bridge. I’m going to stick with calling it a tank to keep it simple.
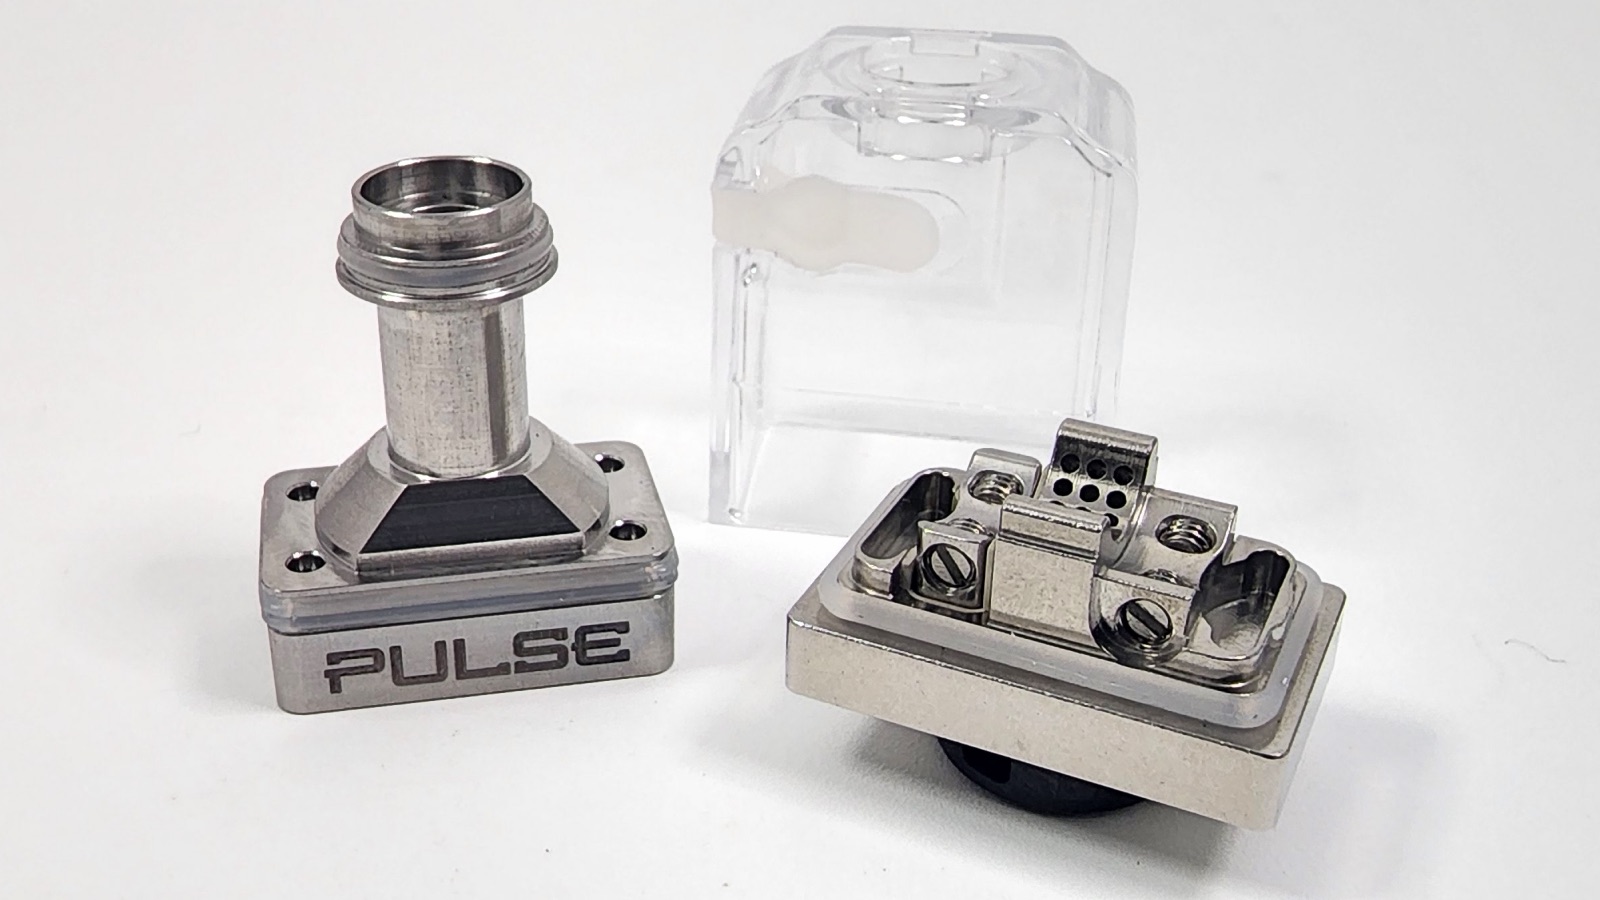
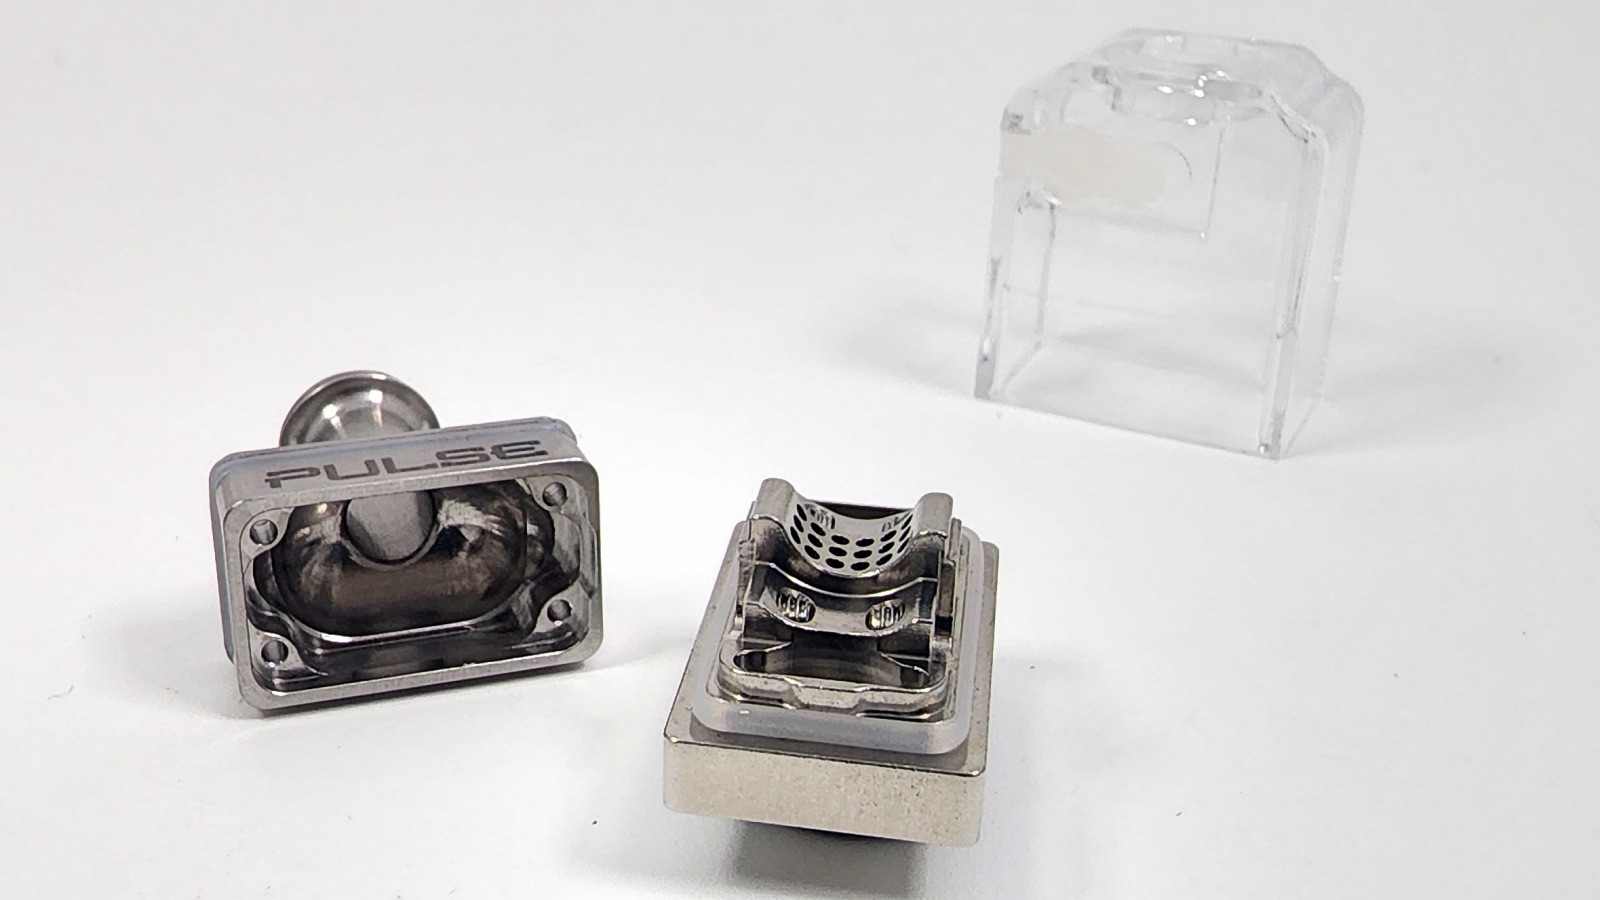
The Vessel RBA has several parts. There’s the tank section, a chimney, and the build deck. There are notches on all of these parts so you won’t be able to put them together the wrong way.
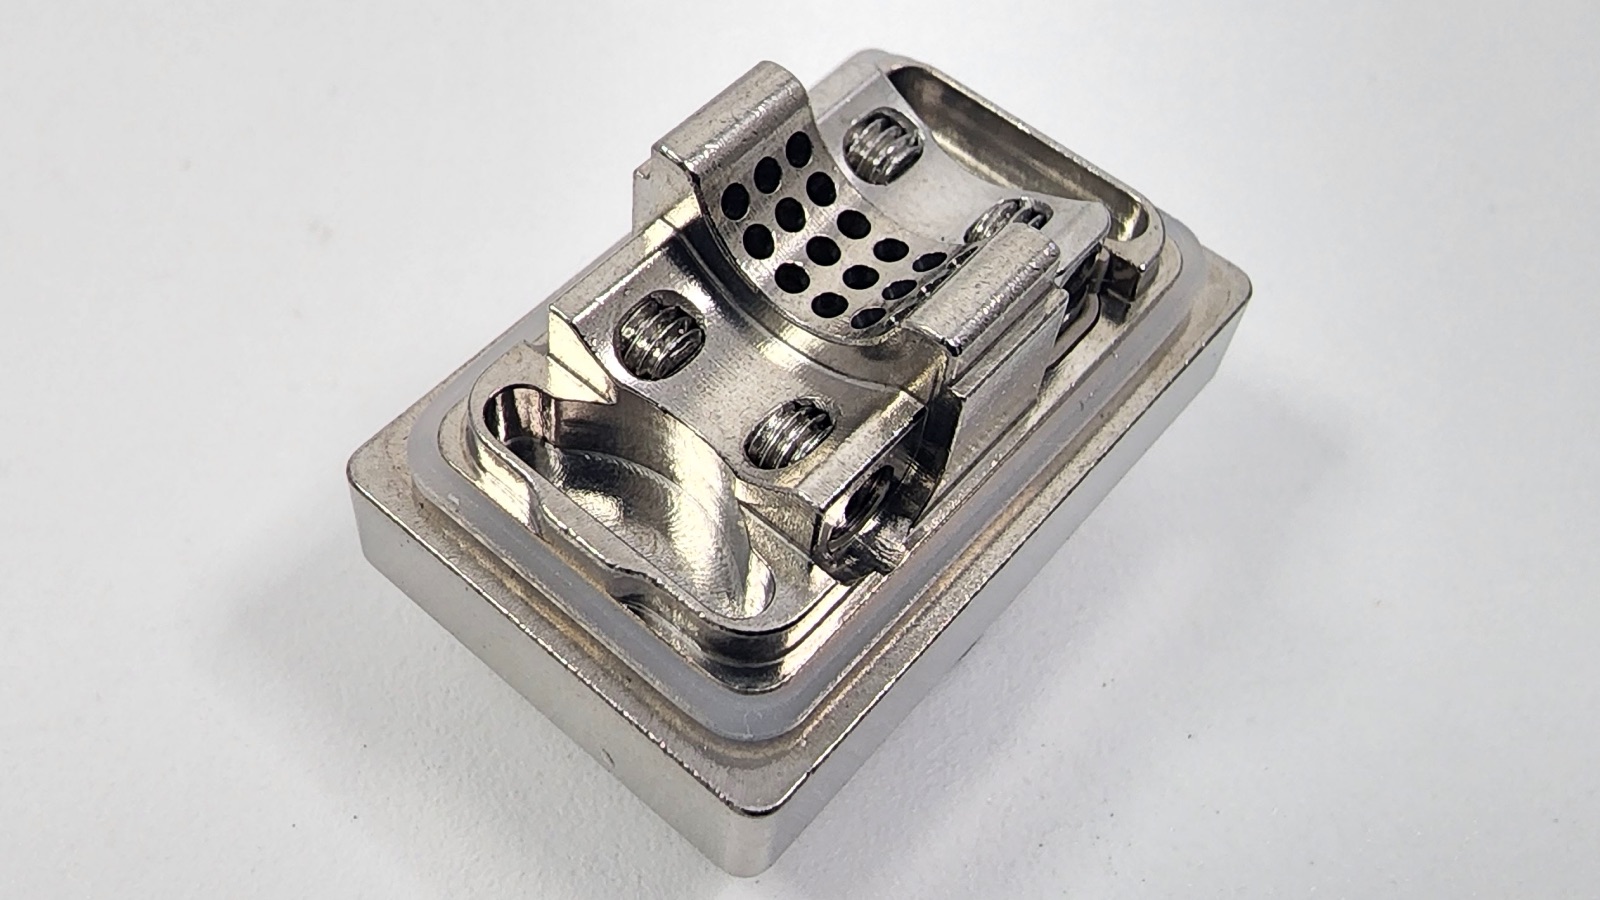
The build deck is easy to build on. It’s a single coil deck that has curved walls. Those walls have airflow intake holes to surround the bottom half of the coil. And Vandy Vape includes two coils in the box, so that’s nice.
There are four post screws, which gives you the option to use coils wrapped in any direction they might be wrapped in. The pre-installed screws are flathead screws, but there are also four spare hex screws in the box if you want to use those instead.
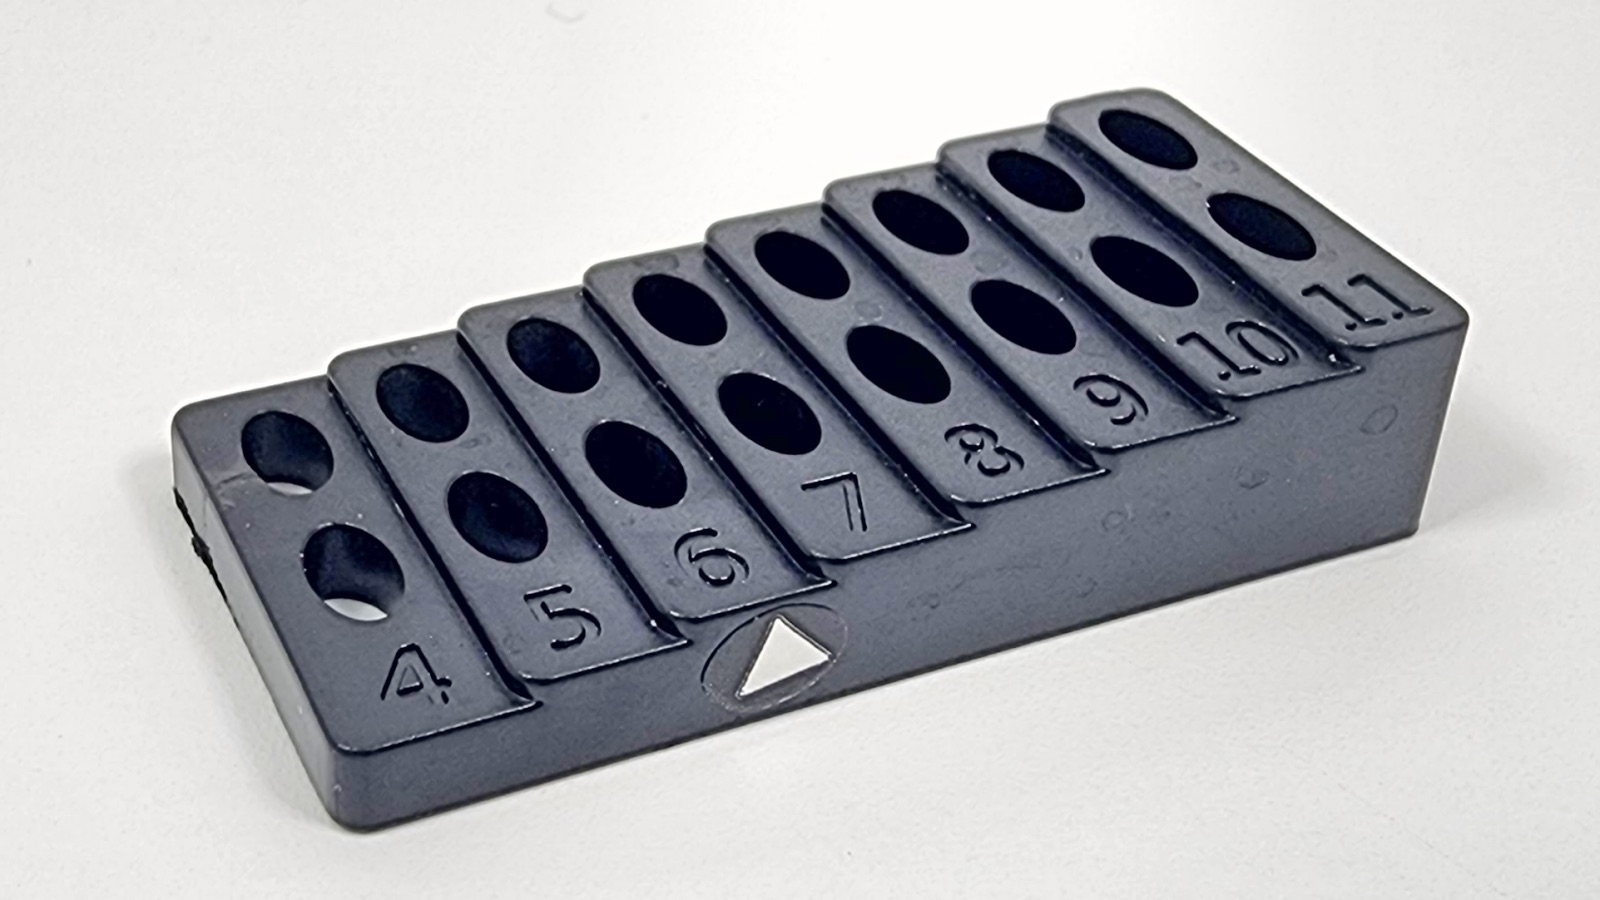
Since this is a postless deck, you need to measure and cut the coil leads before installing the coil. Vandy Vape included a coil cutting tool in the box to make it easy, and they’ve also marked the optimal length, which is 6mm.
Once you have your coil leads cut, you need to undo those post screws, install and tighten down the coil, straighten it out, and test it. To test it, it’s easiest to use another device. You can remove that airflow ring at the bottom of the deck and then screw the deck into any 510 device. Make sure it works, and then you can wick it. Wicking is simple too. I’ve found that wicking it slightly tight and cutting the ends of the wick just enough to reach the wick holes works great.
Before installing the tank, make sure to adjust the airflow ring at the bottom. You can’t fit your fingers in there to adjust it when it’s installed, so that might take some playing around and taking the tank in and out of the device to get right.
Overall, it’s a really simple process, but there are some things to point out here. You really need to make sure the coil leads are pinched down by the tips of the screws. If they aren’t and are held in by the sides of the screws, you’re going to get a poor connection and the atomizer might not fire. I had a lot of problems with this until I figured that out. But what threw me off was that the tank fired fine on other devices I tested it on but it just wouldn’t get a strong enough connection on the Pulse.
Another issue is that the deck fits into the tank section loosely. That seal doesn’t hold it in place well, so it’s easy to bump it of out place. That’s something you definitely don’t want happening if the tank is full. So I highly recommend making sure your build works before you fill it up. And if the tank is full and you need to take it out for some reason, hold it all tight so that it doesn’t open up.
When installing the Vessel RBA, you really need to make sure it’s screwed down tight with that tightening screw. You don’t need to crank it down or anything, but you want to make sure it’s tight enough to hold the tank parts together.
The VVC Boro Tank
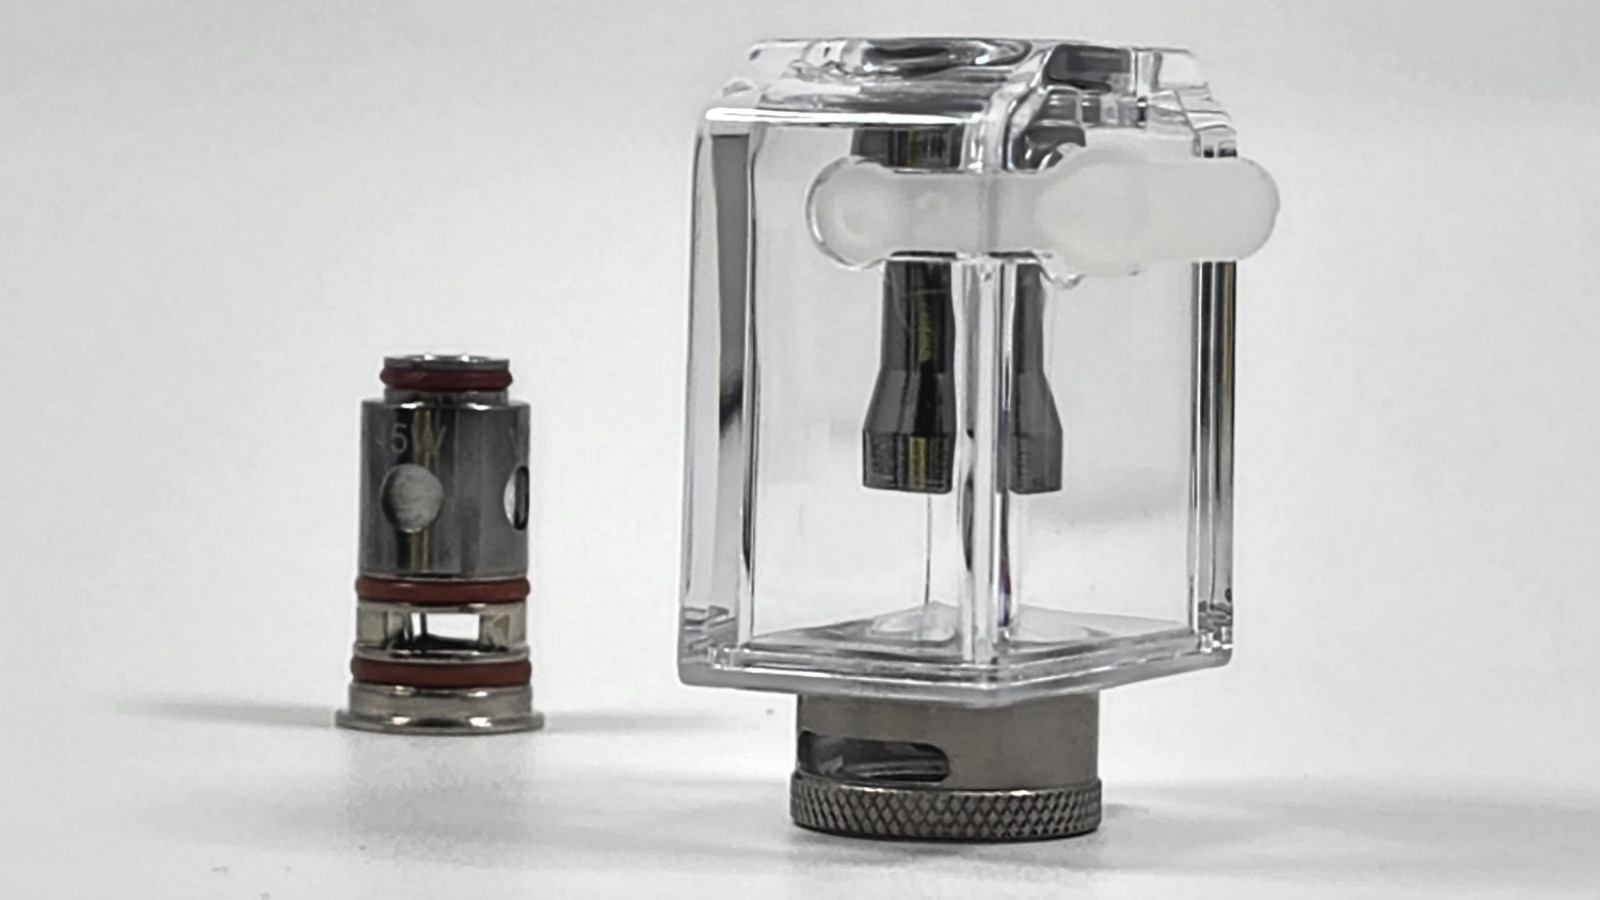
The VVC tank allows you to use VVC coils in the Pulse AIO. So if you like Vandy Vape’s coils or want to keep things easy, you can use this tank. It’s compatible with all VVC coils, so there’s something there for everyone.
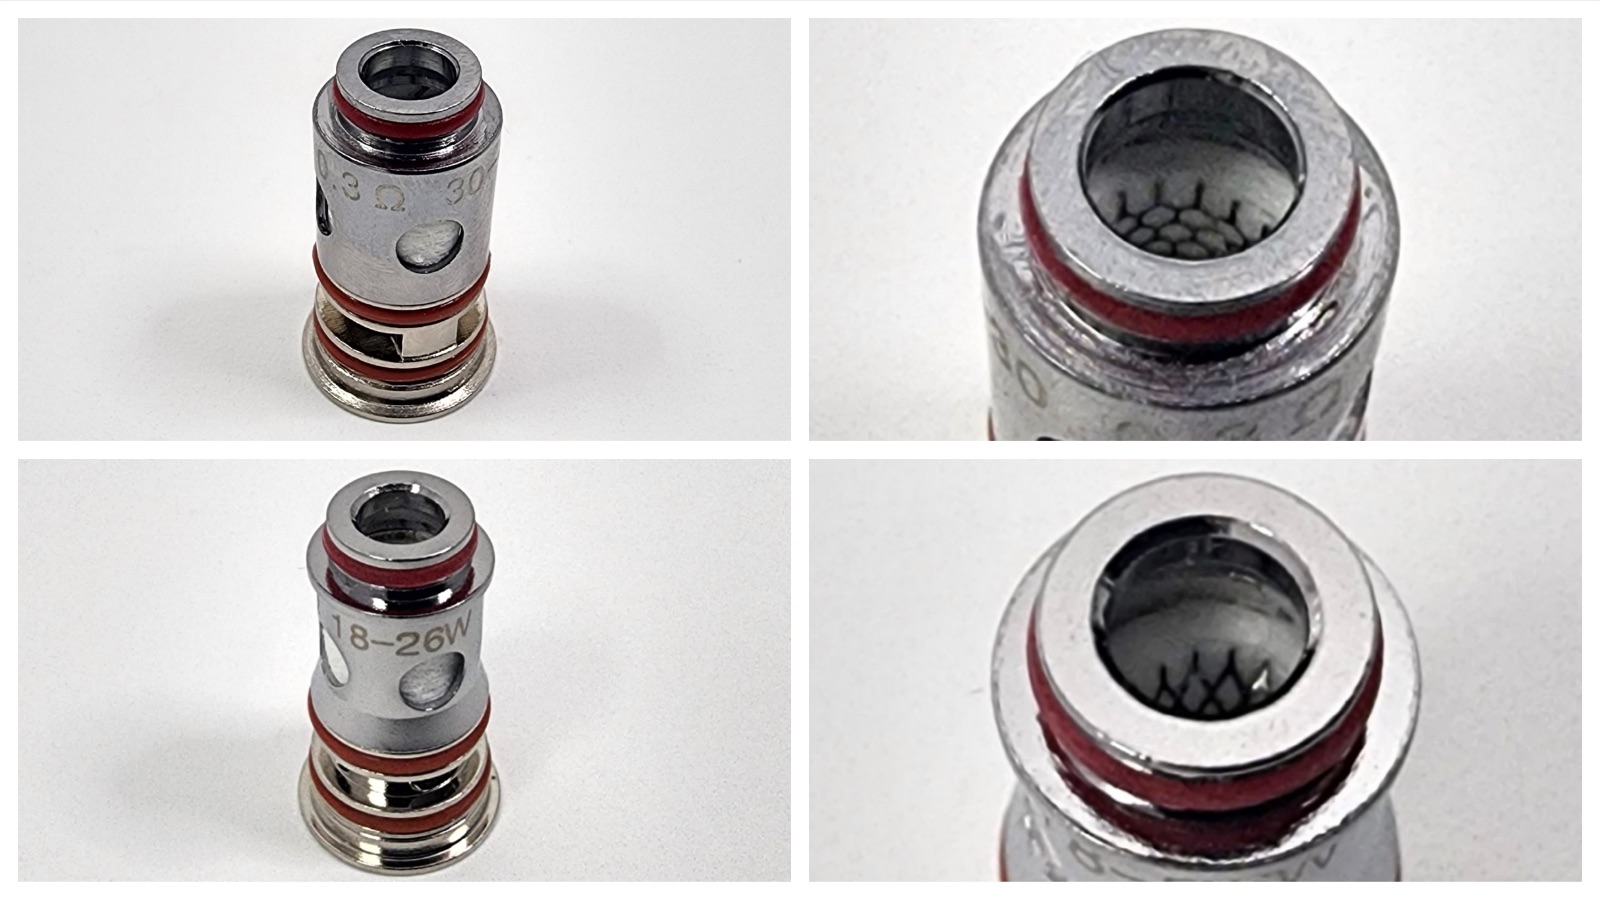
Vandy Vape included two different coil heads to try, the VVC30 and the VVC60.
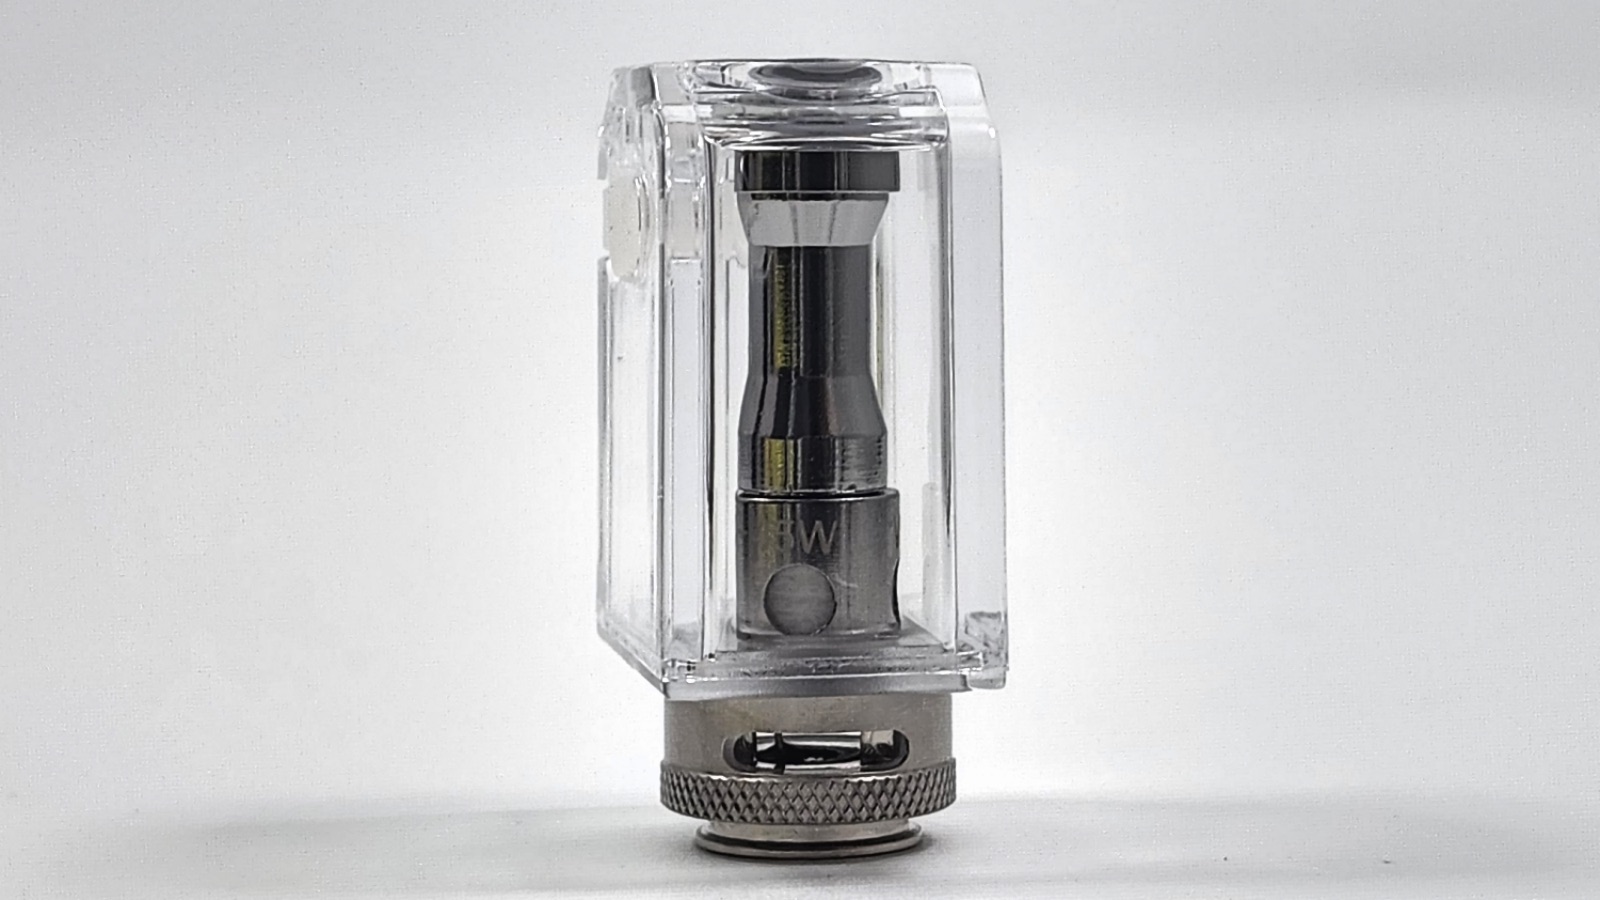
This tank has a 5ml capacity, so it can hold quite a bit. It’s super easy to use too. Just plug a coil into the bottom and adjust the airflow on the bottom of the coil to your liking, then install the tank in the device.
Filling The Tanks

Especially with the RBA tank, it’s best to fill up the tank once installed. The tank fill-port faces out, so it’s really easy to fill. Just be careful not to make a mess though, because you’ll have to take the whole tank out again to clean up.
Features and Functions
You press the firing button five times fast to turn the device off and on.
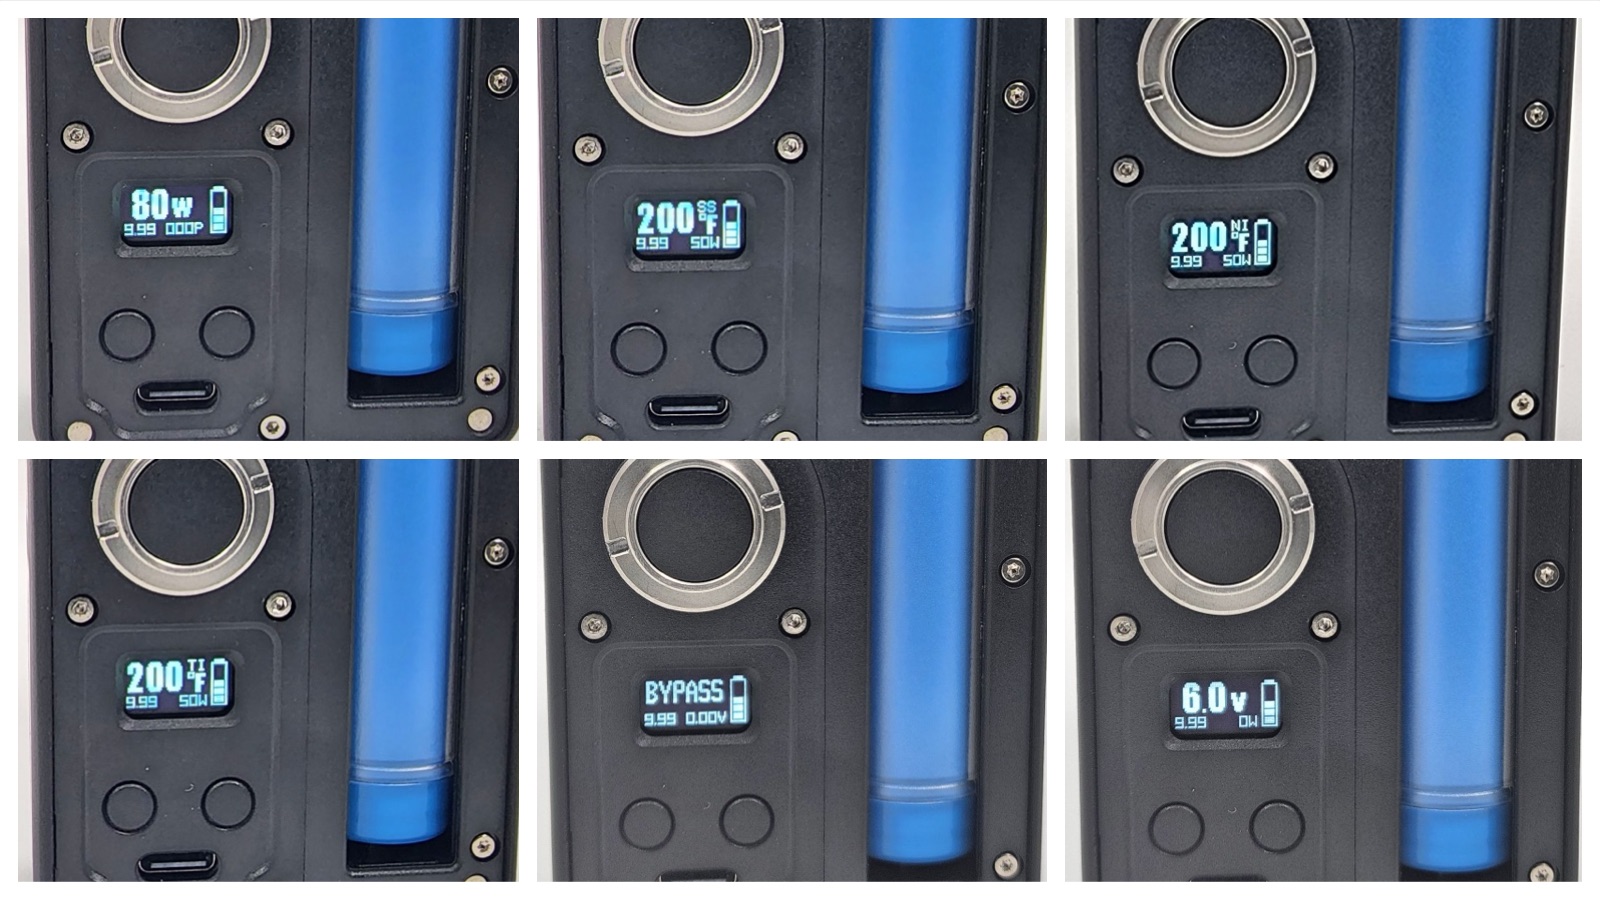
The screen shows you the wattage, temperature, or voltage you’ve set it to, the resistance of your atomizer, a puff counter, and the charge of your battery.
You access the menu by pressing the firing button three times fast when the device is on. You can scroll through the options by pressing the plus or minus buttons and then pressing the firing button to select the mode you want to use. There are several modes:
- Variable Wattage – This is your usual power mode. You can set the wattage to anything between 5 watts to 80 watts.
- Three Temperature Control Modes
- Each mode sets the device to a pre-set value to run a specific type of wire in temperature control mode. All temperature control modes can be set between 200-600 degrees Fahrenheit or 100-315 degrees Celsius. You can also set the starting wattage for all temperature control modes by pressing the firing button four times fast while you’re in any of these modes.
- TCSS – This is the temperature control mode for stainless steel wire.
- TCTI – This is the temperature control mode for titanium wire.
- TCNI – This is the temperature control mode for nichrome 80 wire.
- BP (Bypass) – This gives you a wattage based on how much charge is in your battery and the resistance of your coil. So it works like a mechanical mod
- VV – variable voltage mode works a lot like variable wattage mode but lets you change voltage instead of wattage. You can set your voltage to anything between 0.5 to 6.0 volts.
There’s also a secondary menu available by holding the plus and minus buttons at the same time for three seconds. There are a few options to pick from:
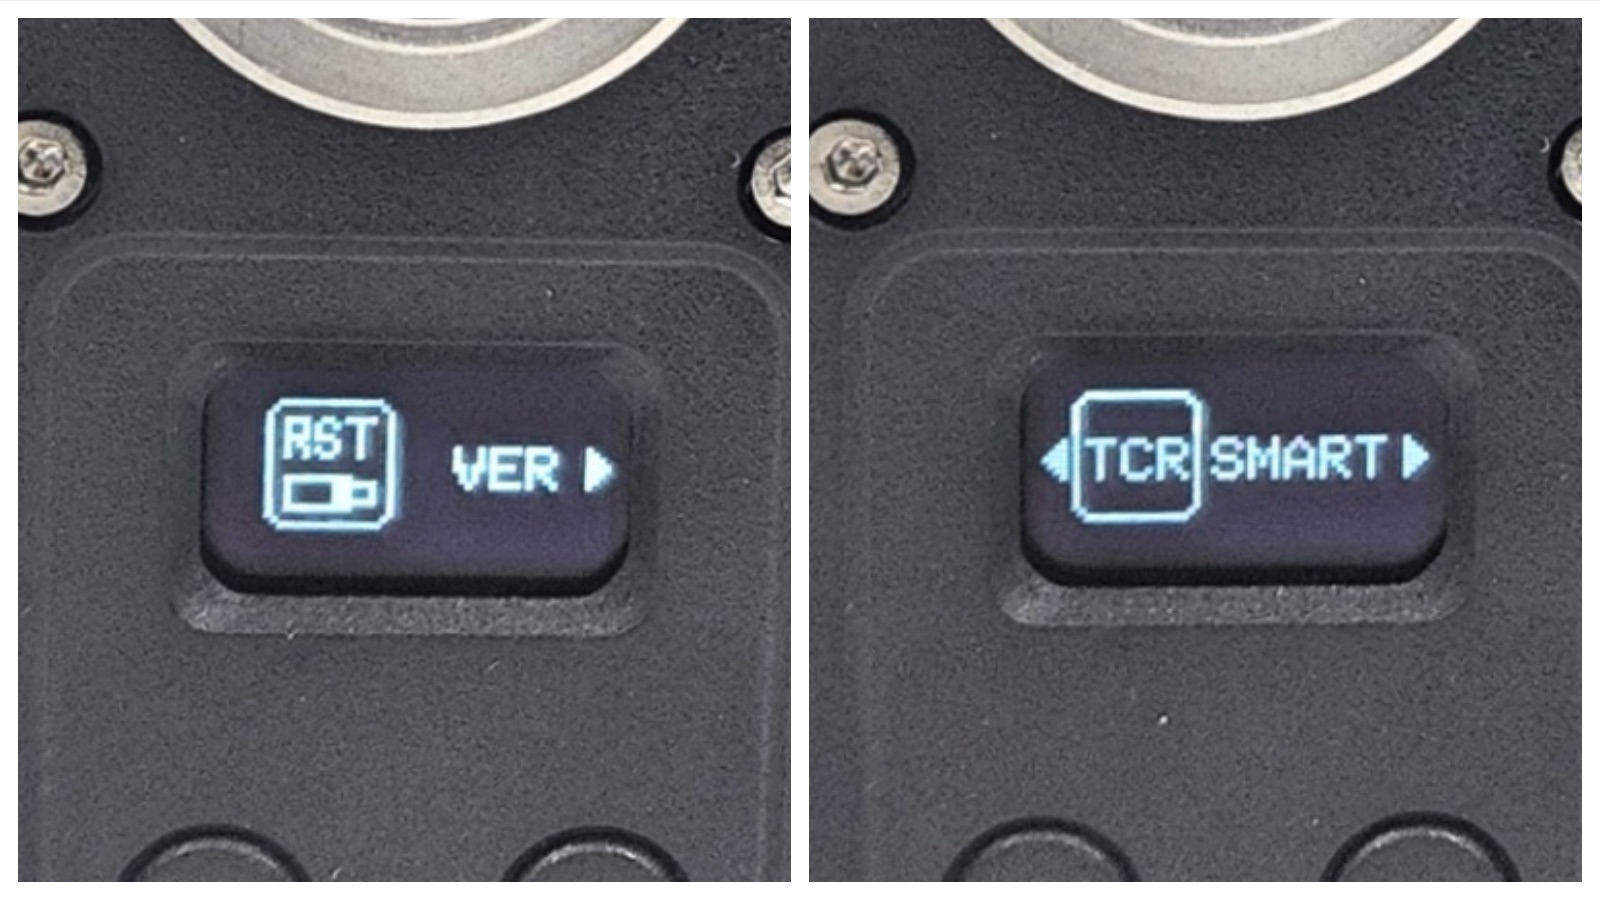
- RST – this lets you reset your puff counter
- VER – shows you the firmware version your device is using
- TCR – this lets you change the TCR or Temperature Coefficient of Resistance value for temperature control. You need to be in a temperature control mode to be able to change this.
- Smart – you need to be in Variable Wattage mode to select this. This turns on smart mode, which automatically sets your wattage based on what the device thinks is the best setting for your installed coil. It only works for VVC coils. Highlight the option and hold the firing button for three seconds to select it. You’ll know it’s on because there will be an “S” on the screen.
- Normal – This lets you return back to normal mode if you’re in Smart mode
And finally, a few key combination shortcuts
- Lock / unlock the device – hold the firing button and plus button at the same time
- Rotate the screen – hold the firing button and minus button at the same time
- Re-set the resistance reading – press plus and minus at the same time
- Stealth mode – hold plus, minus, and the firing button at the same time to turn off the screen.
Battery
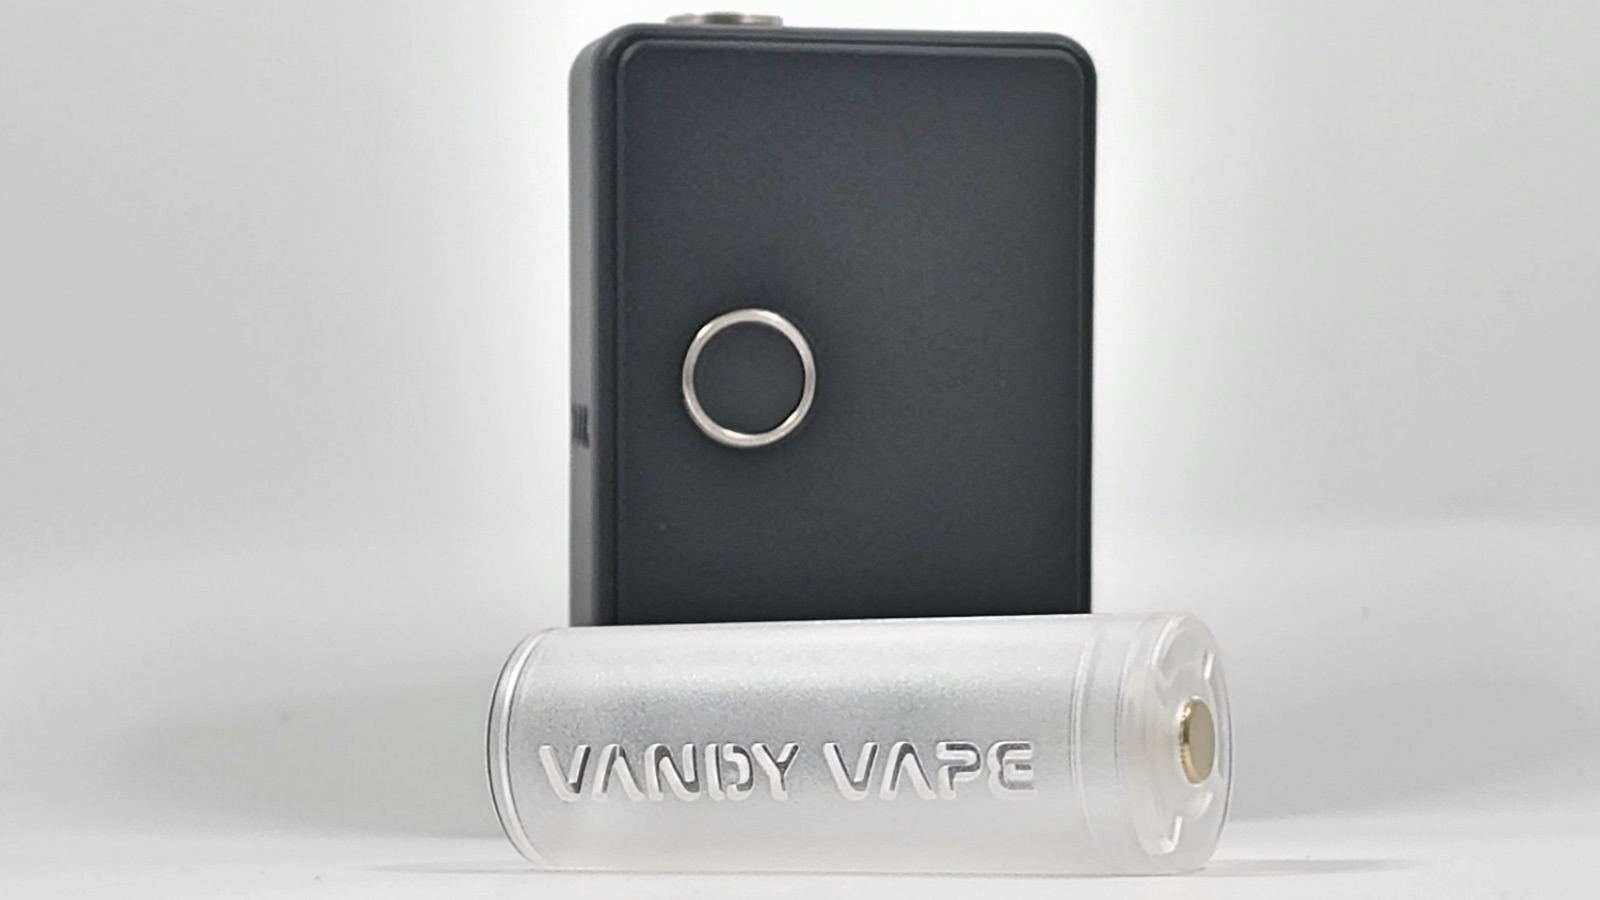
21700 and 20700 batteries fit perfectly in here but Vandy Vape also included an adapter if you want to use 18650 batteries. The battery can go in any direction in the adapter but need to make sure the batteries go in the right direction in the device.
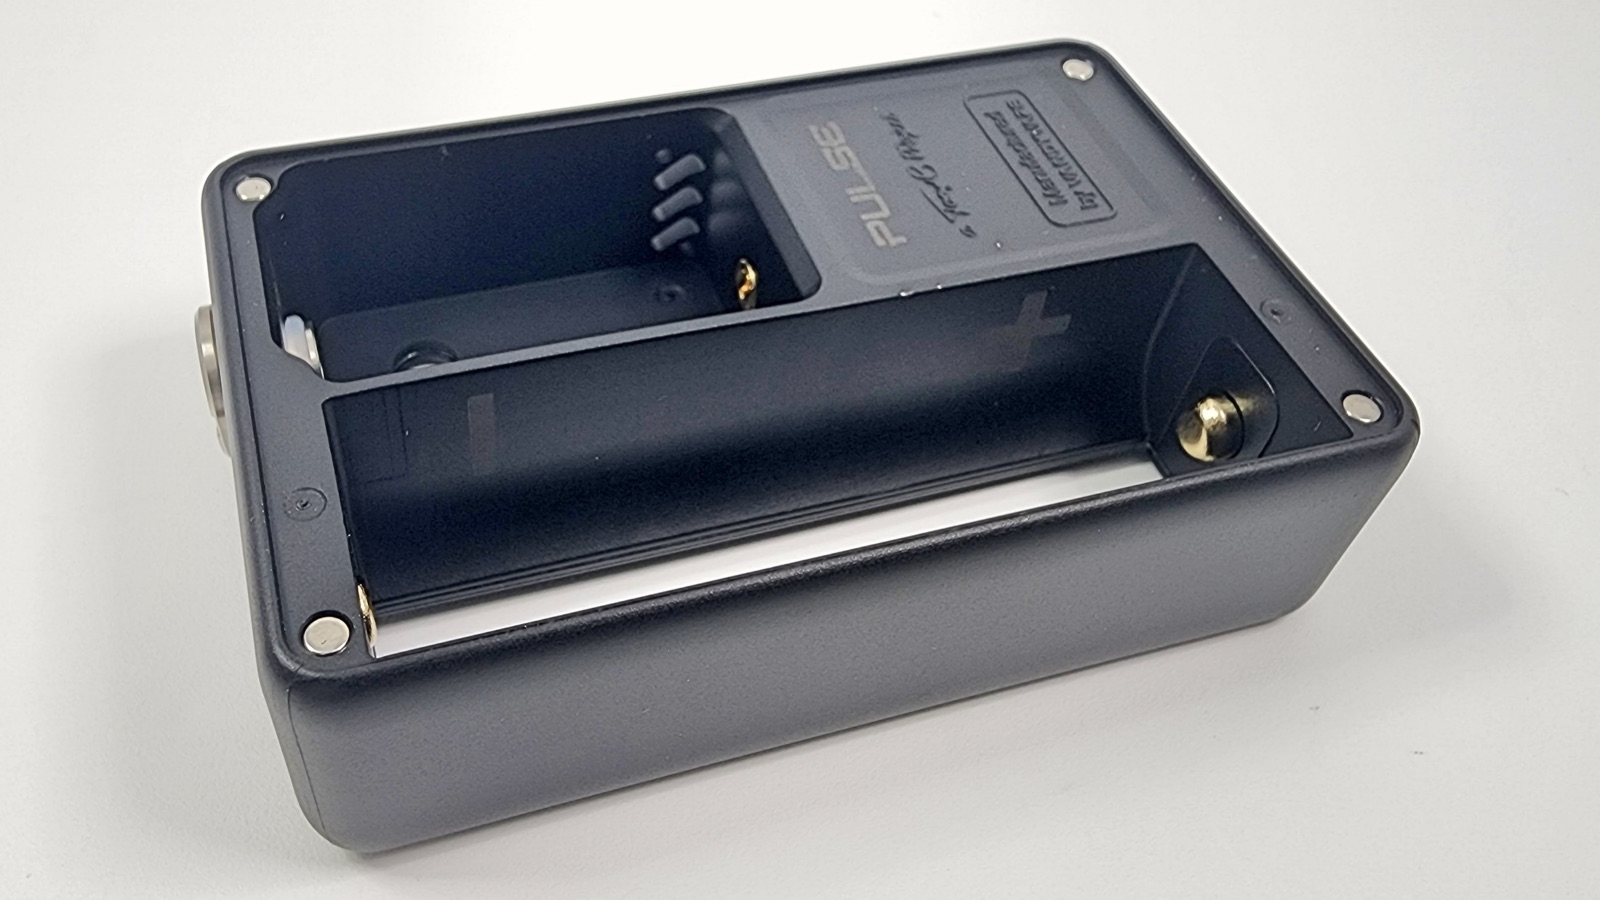
There’s a plus and minus button on the inside of the battery sled to tell you which end goes where.
Batteries fit in the Pulse AIO tight, so you need to pull the back panel off and push them out from the other side to get them out.
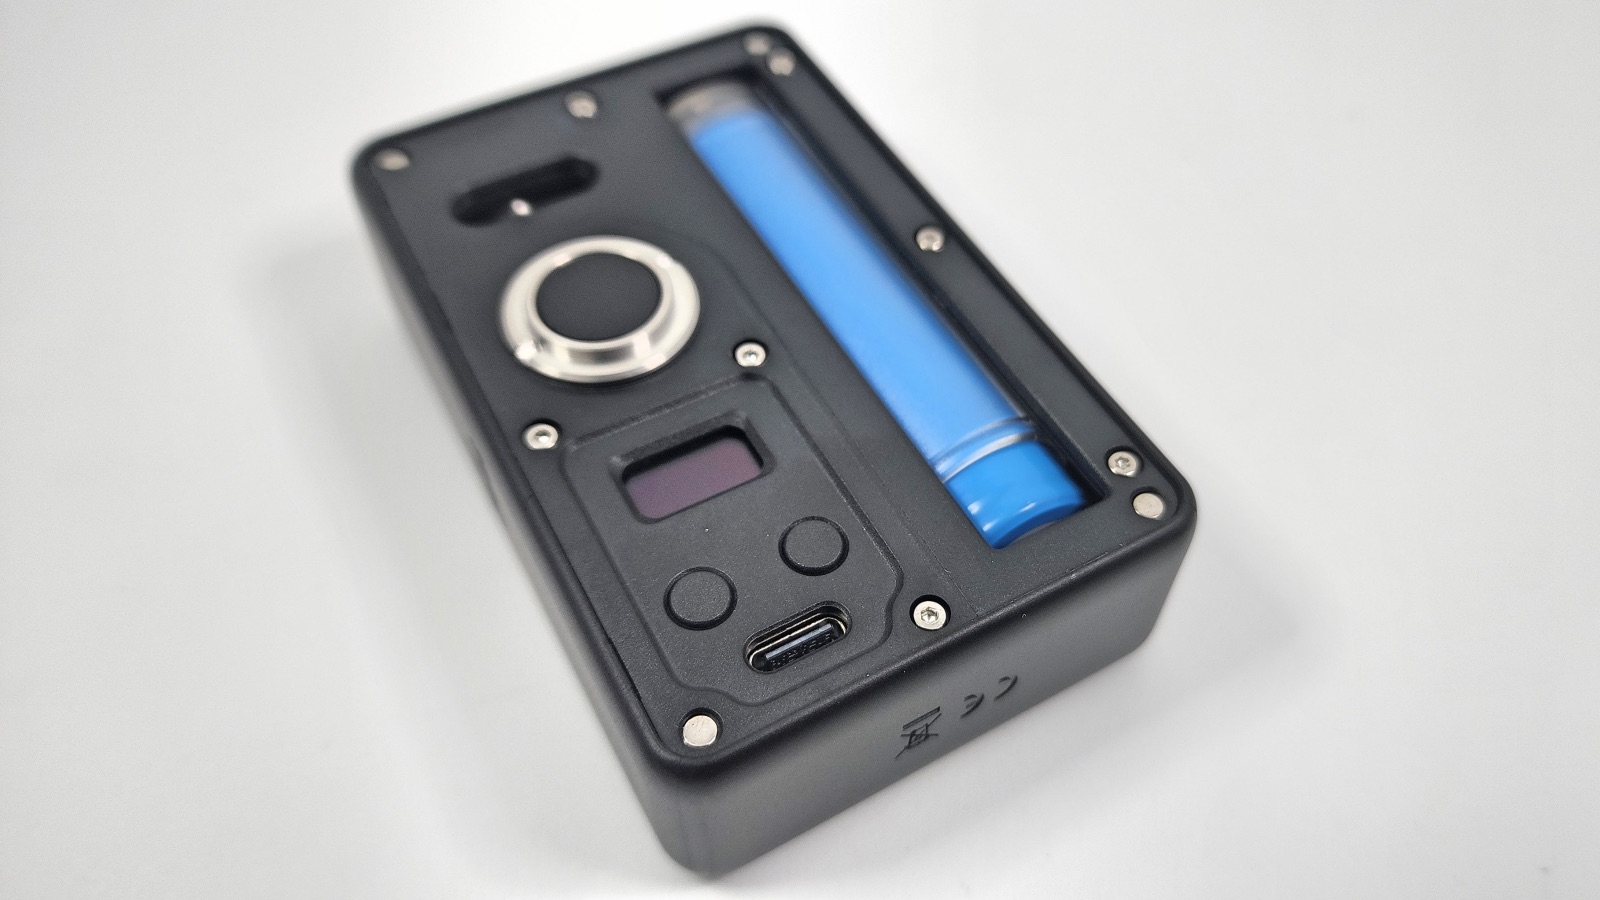
You can charge the battery within the device using the included USB Type-C cable.
Safety Features
And finally, the safety features. It has everything you’d expect:
- Open circuit protection
- Over-current protection
- 10-second cutoff
- Short circuit protection
- Over-temperature protection
- Low battery warning
Final Thoughts
So that’s the Pulse AIO! I think it performs great. I’m getting some great hits and flavor out of the Vessel tank. And the device has a ton of features in the menus. It’s manufactured well and everything feels high-quality. Vandy Vape also included a ton of stuff in this kit. Getting two tanks is awesome. The only thing missing is cotton.
There’s definitely more work involved in using this device when compared to other vape devices. It’s a lot of little things, like adjusting screws for your tank, making sure the RBA works right before installing it, not making a mess when filling it, and taking the tank in and out to adjust airflow. But that’s also kind of the fun in having a device like this.
From what I’ve heard, there are drawbacks to using any Boro-tank device. You have all the issues I already mentioned, but I’ve also heard that people will often cut slots into the door panels to improve airflow. I’ve also seen a lot of complaints of leaky tanks – not the Vessel, just Boro tanks in general. I haven’t had any issues with airflow or leaking on the Pulse AIO’s vessel tank.
But I think these devices cater to people who really enjoy the hobbyist and technical side of vaping. People who love RDAs and RTAs. And that’s why I really like it. I’m still not ready to buy a Billet Box, but I just bought two more Boro tanks to really give this side of vaping a chance, and then maybe after that, we’ll see.
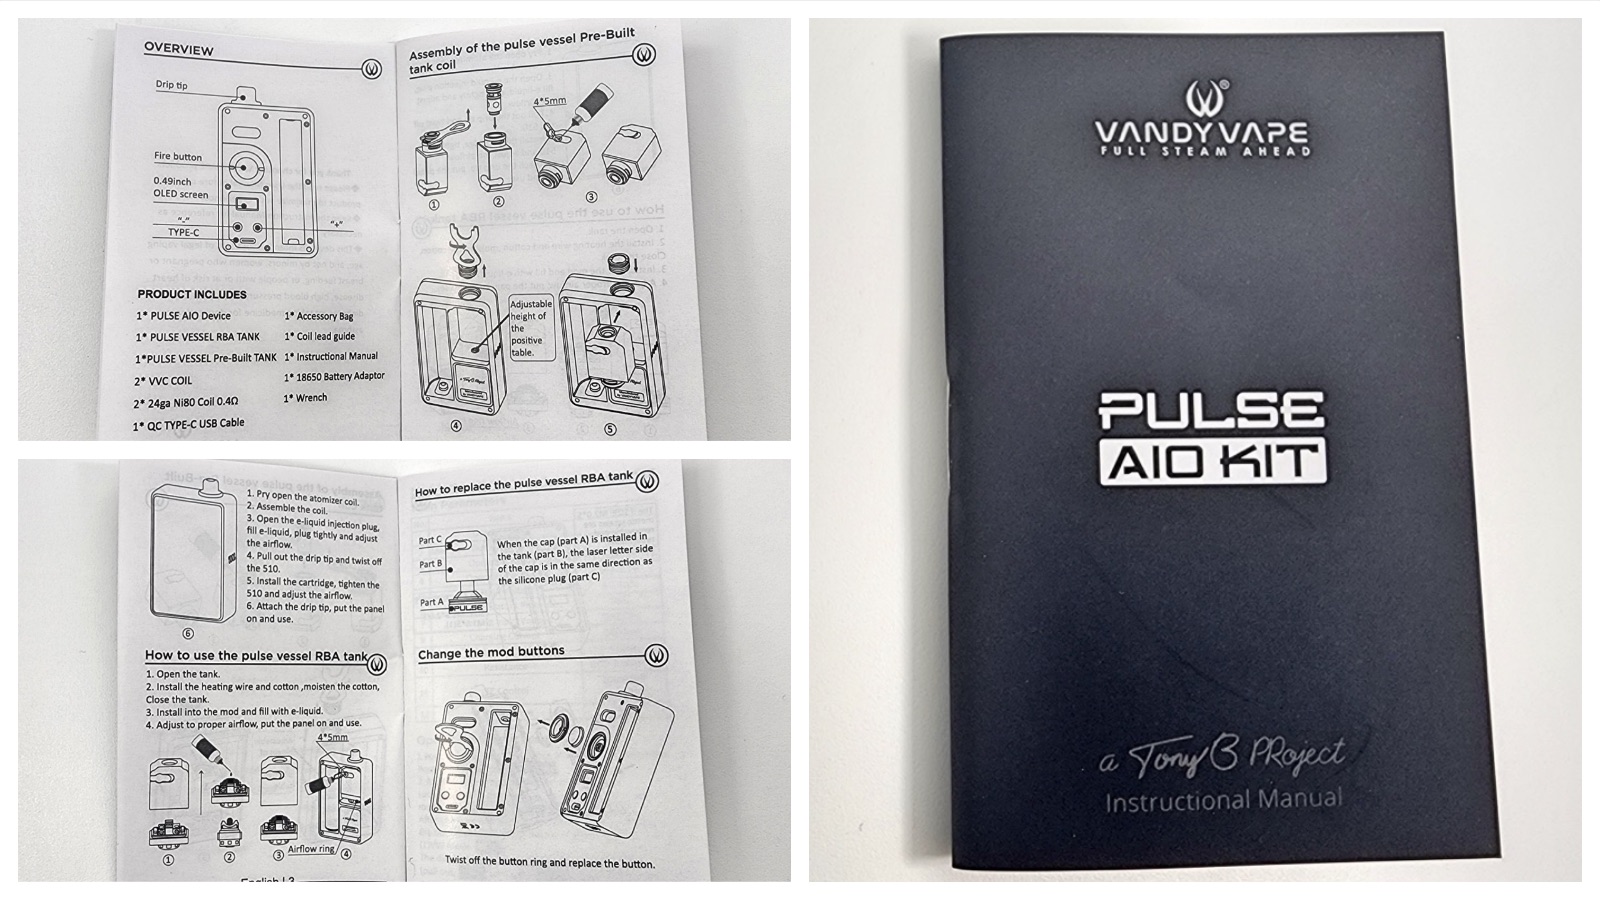
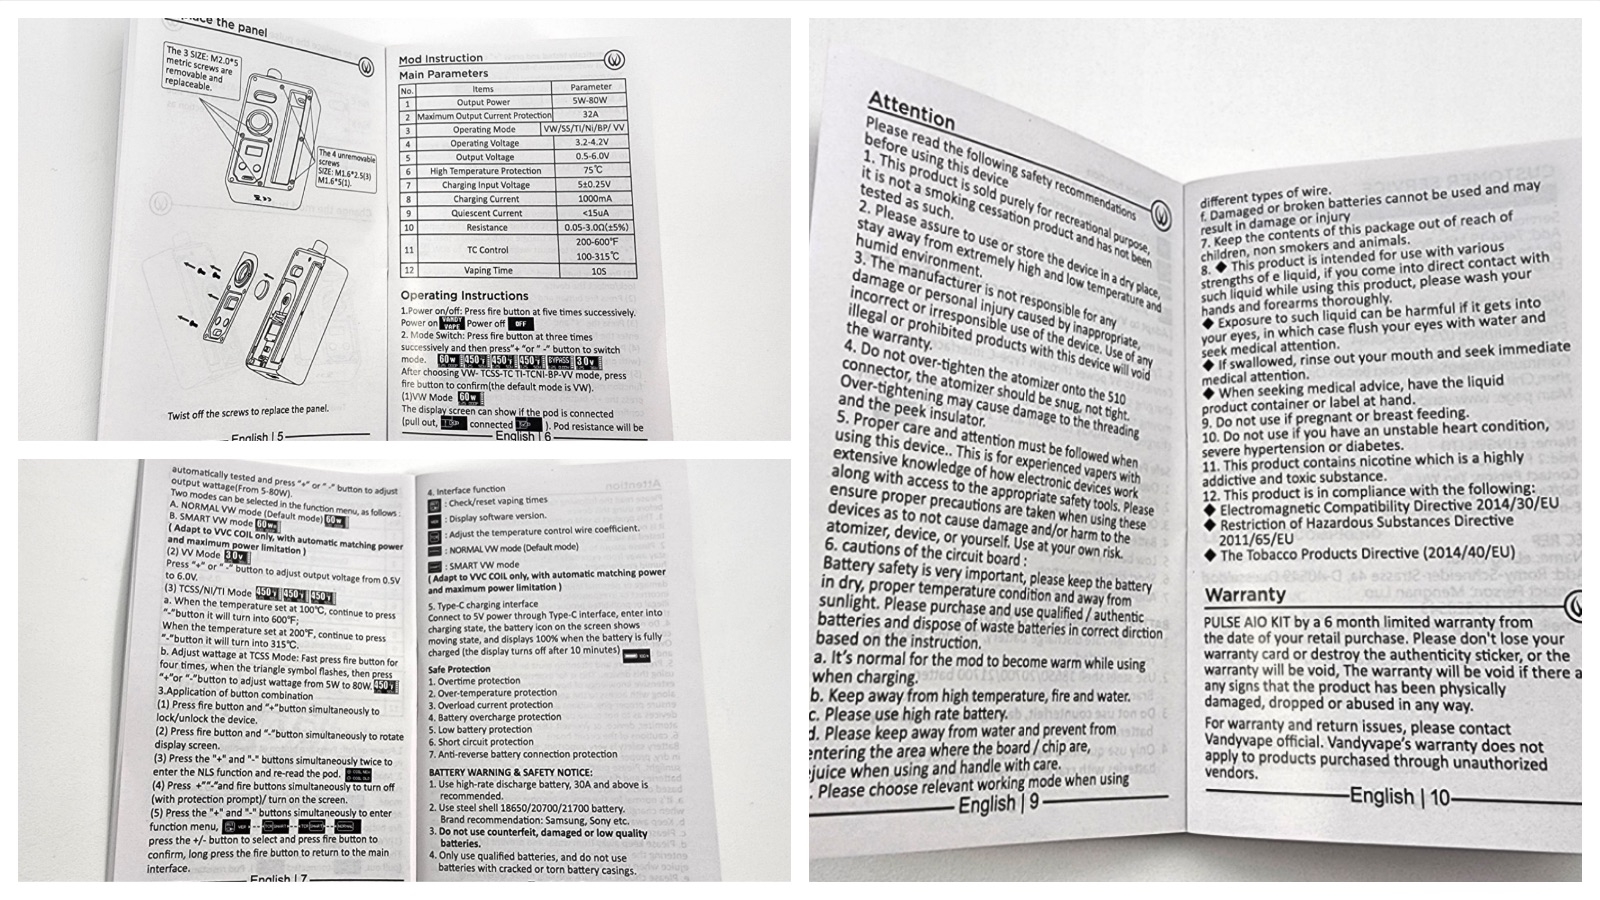
Pulse AIO User Manual
Lastly, in case you need the manual, here are a few rough screenshots. Download or zoom in to see the details.
Alex is a former smoker who successfully quit smoking after 14 years by switching to vaping. Now a pro-vaping advocate, Alex has become a seasoned expert with over a decade of experience in the vaping industry. Since starting his vaping journey in 2010, Alex has earned a reputation as a trusted reviewer, extensively testing all types of vape gear, including mech mods, sub-ohm tanks, RDAs, disposables, e-juices, boro devices, squonkers, dry herb vaporizers, and e-rigs. He’s also explored the craft of coil building and DIY e-juice.
Since 2015, Alex has published more than 800 in-depth articles on vaping, produced over 500 videos covering product reviews, industry news, and tips, contributed to several well-known vape publications, and hosted a popular vaping podcast featuring over 100 episodes and nearly 40 hours of content.