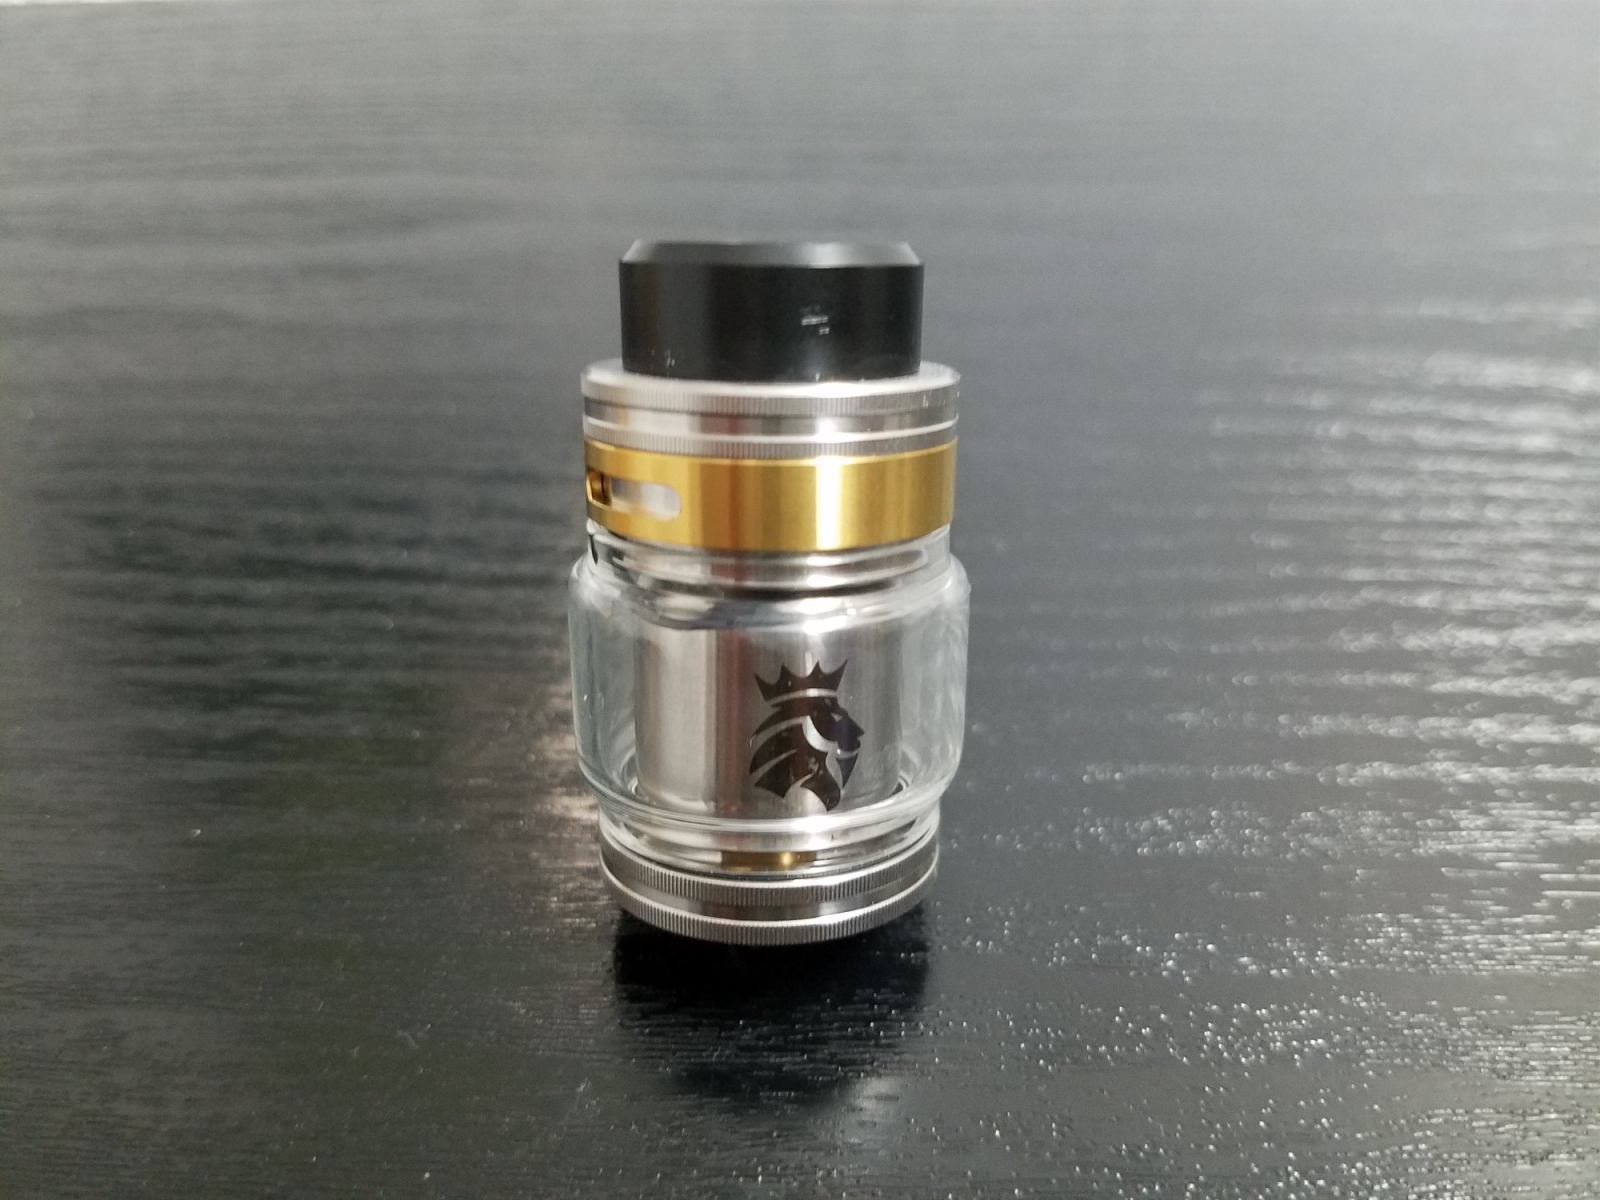
The Solomon 2 RTA was sent to me for the purpose of review directly from Kaess. This is a short little 24mm single-coil rebuildable tank. The original Solomon RTA was dual coil only, so it’s nice to see that their next version of the Solomon is a single coil tank to cater to those vapers.
Let’s get to it, starting with what you get in the box:
- You get the 24mm tank, with the pre-installed 5ml bubble tank
- You get a spare glass tube that reduces the juice capacity to 3.5ml
- It comes with one Clapton coil, a 510 Delrin tip, a 510 drip tip adapter, an 810 drip tip, a screwdriver, user manual, and spare parts.
The Kaess Solomon 2 Design
It’s 24mm in diameter, and 46mm tall. It’s a fairly average looking RTA in my opinion, but it’s simple and sleek. The most noticeable aspect is the gold airflow ring, which makes the design pop a bit. The top cap and the base have some knurling, which looks fine as well.
It also comes with a bubble tank so that you can hold more e-juice, while keeping it lower profile.

The Solomon 2 Drip Tip

The drip tip is a big wide 810 drip tip. You also have the ability to use your own, but you’ll notice that top cap of the Solomon 2 protrudes. The tip that comes with the Solomon 2 works as a cover for that piece, so if you use your own drip tip, it will not cover that protrusion and will sit a little higher.
There’s a rubber o-ring inside the top cap, so you can use an 810 that doesn’t have o-rings and it should fit fine. It’s worked well for the drip tips I’ve tested.
You also get a 510 adapter if you want to use a 510 drip tip instead. The one issue with the adapter is that it’s hard to get out once it’s in. The 810 tip it comes with is a little hard to get out too actually and I had to use pliers.
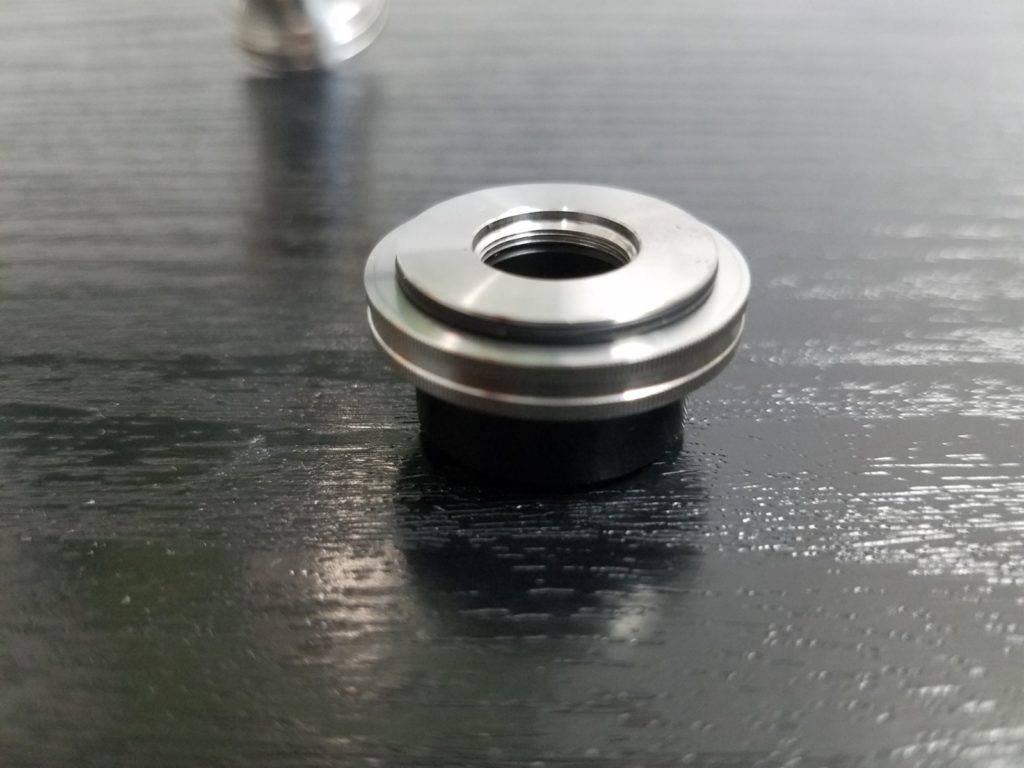
The Solomon 2 Top Cap and E-Juice Fill Holes

The top cap unscrews from the airflow section and gives you access to the fill ports. There’s a little knurling on it to give you a little extra grip. I haven’t had any problems getting it off. It’s been really easy to use and doesn’t seem to get overtightened.
I do have a warning for you on this though.
When you’re unscrewing it, make sure you’re unscrewing only that top cap and not the airflow section along with it, otherwise, that seal between the glass and deck will open and you’ll get e-juice pouring out. If you hold the airflow control ring while unscrewing the top cap, rather than holding any other part of the tank, will prevent that.
Solomon 2 Airflow Control and Chimney
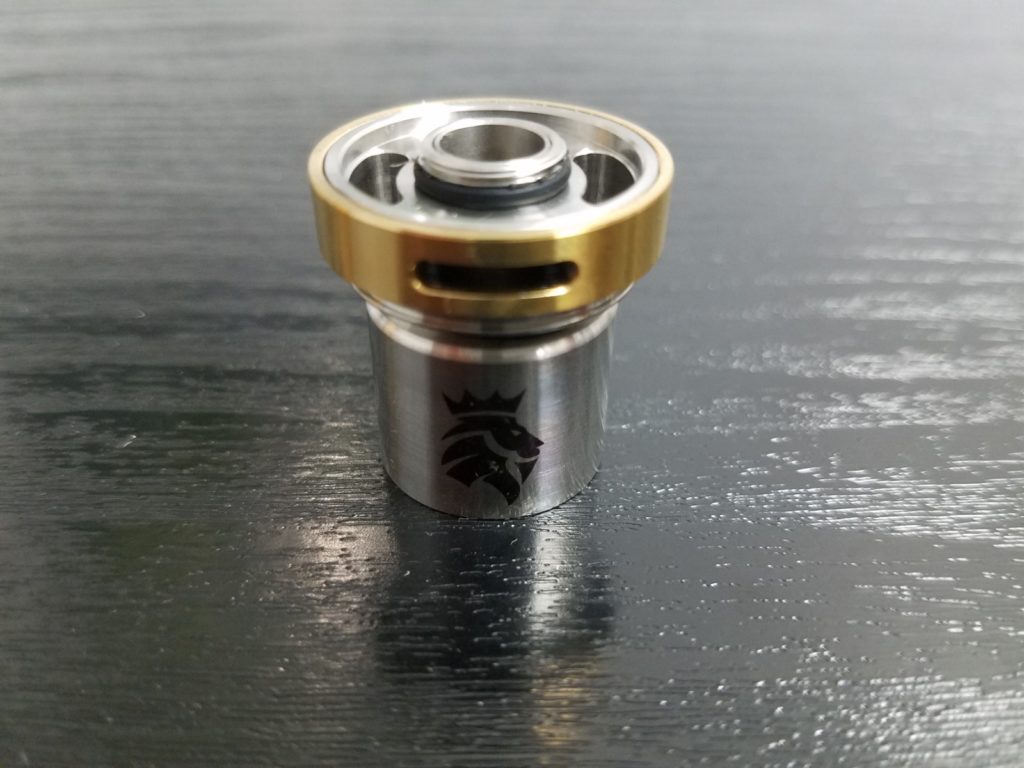
Beneath the top cap is the airflow section. You’ll notice right away that this is a top-airflow tank, which slightly reduces flavor, but also makes it theoretically leak-proof. I’ll talk more about that in a second.
The gold airflow control ring moves nice and smooth and also comes off, which I like because it allows me to clean behind it. Just remember that when putting the ring back on, it has to fit into some grooves. You’ll know it’s in the right place when it doesn’t turn freely and instead comes to a stop in either direction.

Connected to the airflow section is the chimney, which screws into the deck. The chimney and the deck are what hold the glass tank in place, so you need to be careful about making sure these two pieces are tight, otherwise the tank will leak from the bottom of the glass barrel.
So Kaees says that this tank is leak-proof, and if you can seal it off perfectly, it is.
But that’s the key! You have to get it sealed just right, which can be a little difficult.
The problem is that the glass sits flush right on top of the o-ring on the deck. It slips really easily. That means you really need to crank down when screwing this back together so that the seal is really tight. I would have liked for the glass barrel to seat deeper into the deck because that would have made it much easier to get that good seal.
I do want to add though that it’s easier to put together if you connect the glass tank to the top piece first because it seals and sticks well. Then you can tighten down. This is also nice because you can tip the tank upside down and unscrew the deck and change your coil or make adjustments if you need to, without having to empty the tank. You still need to be very careful if you do this, but it’ll work.
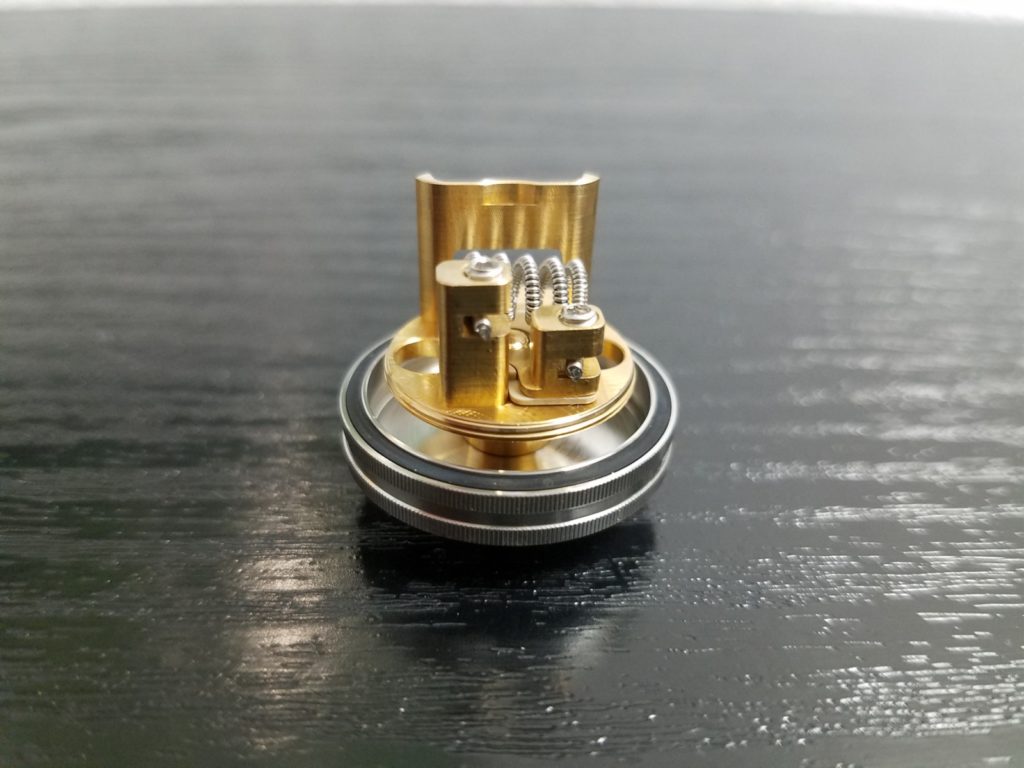
Solomon 2 Deck

This deck is really cool. It’s a single-coil deck only and you’ll see that there’s this little wall on the side. That’s where the airflow leads up the chimney. I really love the way they designed these posts because one is just slightly higher than the others.
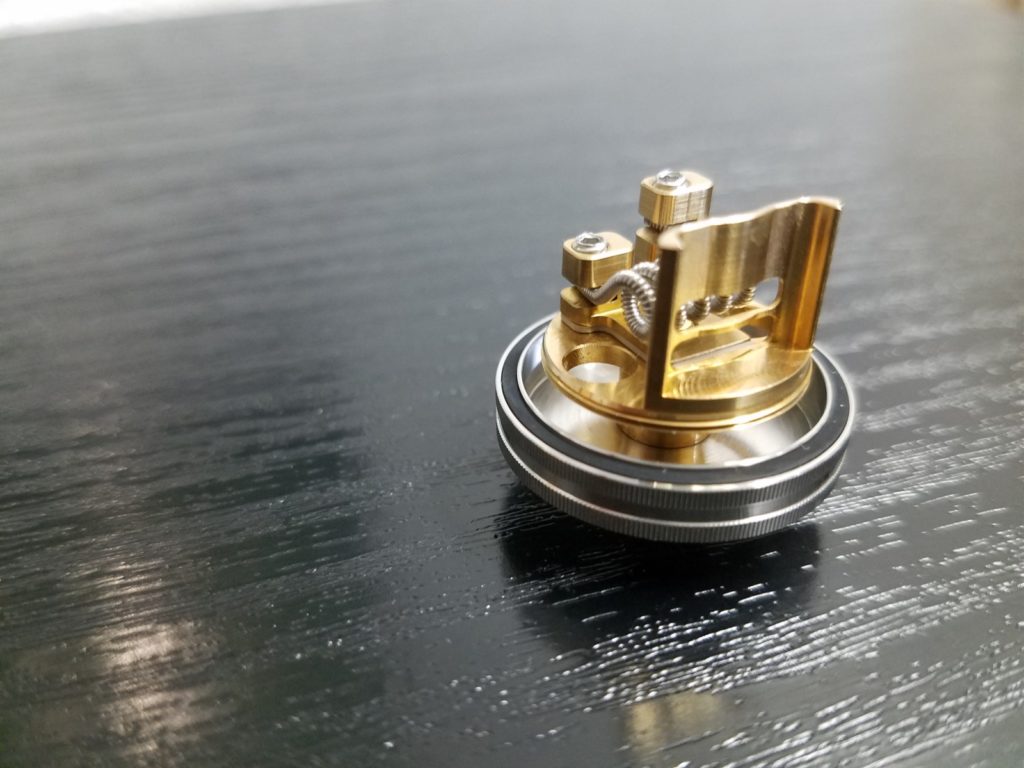
As you probably know, hand-built coils always have one leg higher than the other, at least when both legs are pointing in the same direction. So with these posts, they are the perfect difference in height that makes it so that the coils just slide right into place and you can tighten them down. It’s a really neat design and the deck is just really easy to build.
There’s is a drawback to this though. Many pre-built coils, such as Clapton coils, are wrapped in the opposite direction. That means they won’t slide into place on this deck. You’ll need to bend the coil legs to get it to fit. That can be a bit of a pain.
Anyway, the way this tank works is that e-juice sits in the base of the deck but doesn’t rise above it. So you can put your cotton wicks through the wick holes that lead below deck, but you don’t need to worry about how much cotton is in there. As long as the cotton reaches into those holes, the e-juice will feed up and stay saturated.
Ok, now something important to note when putting this tank back together is the wall on the deck. You need to make sure that this wall is lined up with the hole on one side of the chimney.

It’ll fit right in. If you don’t have that lined up, you won’t be able to screw it back together. I actually had a big issue with this at first. I didn’t realize that it needed to line up. I thought the threads were stripped. I just kept turning and turning and it wouldn’t slip into place. I sent a message to Kaees saying I thought it was stripped and within seconds, they sent me a picture showing how to line up the deck with the chimney, which leads me to believe that other people are asking them the same question. I think they should have included these directions in the box.
Solomon 2 Flavor
I’ve been using the Clapton coil that Kaees included with the tank, which I believe is a triple or quad core Clapton, 5 wraps, with an inner diameter of 3mm. It reads out to about 0.21 ohms and I’ve found that it works perfectly for me around 30 watts. This being a single-coil tank, you don’t need a lot of watts. I get lots of vapor and the flavor is decent. This isn’t a flavor-chaser by any means and I really wish it had more flavor, but the flavor production is okay.
I’ve also tested this using a hand-made basic round coil – 22 gauge Kanthal, 5 wraps, built at 0.27 ohms. Surprisingly, the flavor was about the same. Not great, but decent. But what’s surprising is that the round wire build was pretty much as good as the crazy Clapton they included. So you don’t need a crazy coil to get good flavor out of this.
And I’ve also used a pre-made Clapton coil and again, the flavor is about the same.
Final Thoughts on the Kaess Solomon 2
There are some things I wish were better, for example, I think flavor production could be a lot better, the deck and chimney connection should be more user-friendly, and I’m also not a fan of sandwiching the glass barrel between the deck and chimney to get a tight seal. But the airflow is very good in my opinion, I like the small size and juice capacity, and I love how easy it is to build the deck if the coils are wrapped in the right direction.
And while it’s not even close to perfect, the price might appeal to you. You can get it for around $20 in most places and I’ve even seen it online for $18. I think that’s a pretty good price for an RTA tank.
So that’s it! Those are my thoughts. If you have any questions, feel free to ask. Otherwise, I’ll see you next time.
Alex is a former smoker who successfully quit smoking after 14 years by switching to vaping. Now a pro-vaping advocate, Alex has become a seasoned expert with over a decade of experience in the vaping industry. Since starting his vaping journey in 2010, Alex has earned a reputation as a trusted reviewer, extensively testing all types of vape gear, including mech mods, sub-ohm tanks, RDAs, disposables, e-juices, boro devices, squonkers, dry herb vaporizers, and e-rigs. He’s also explored the craft of coil building and DIY e-juice.
Since 2015, Alex has published more than 800 in-depth articles on vaping, produced over 500 videos covering product reviews, industry news, and tips, contributed to several well-known vape publications, and hosted a popular vaping podcast featuring over 100 episodes and nearly 40 hours of content.