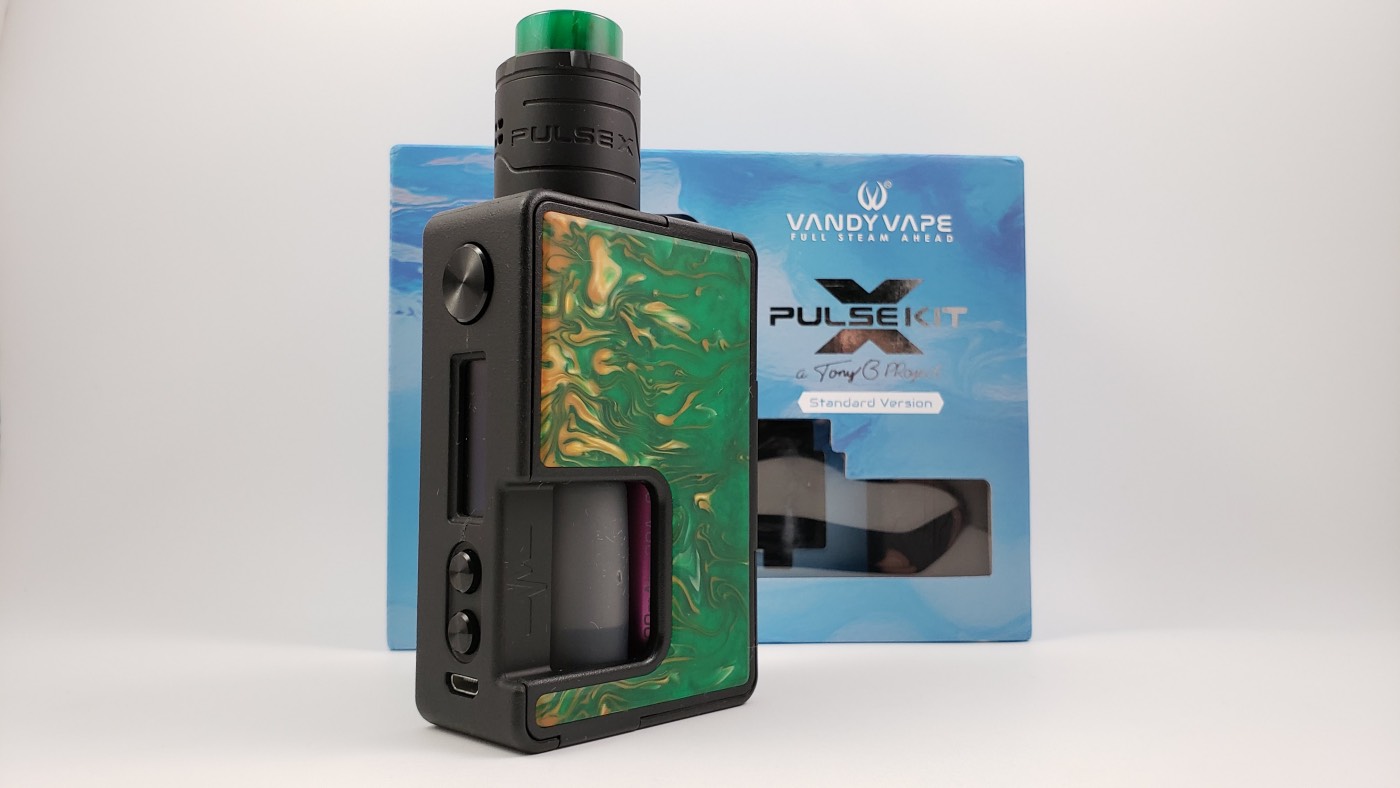
The Pulse X Kit was sent to me for review from Sourcemore.com. Get it here (affiliate). This is nearly a year old now, having been released around August of 2018, but it’s still the latest version of the Pulse mod and comes with the Pulse X RDA so it’s worth looking at.
I actually reviewed the Pulse 80w last year and I loved it. I still use it, which I think says a lot about it, at least for me. It’s a great device.
Well the Pulse X is the upgraded 90-watt version, so let’s take a look at this kit.
Mod Specs:
- 5w – 90w max
- 200-600 Fahrenheit / 100-315 Celsius
- 18650/20700/21700 battery compatible
- Size: 82.6mm tall, 54.8mm in depth, and 27mm thick
- Output voltage: 0.5 to 9.5 volts
- Resistance range: 0.05 to 3.0 ohm (voltage mode, 0.05 to 1.5 ohm (temp-control)
- 17 Colors
- $48.26 from SourceMore.com
RDA Specs
- Dual coil
- X-Shaped Deck
- Squonk Compatible
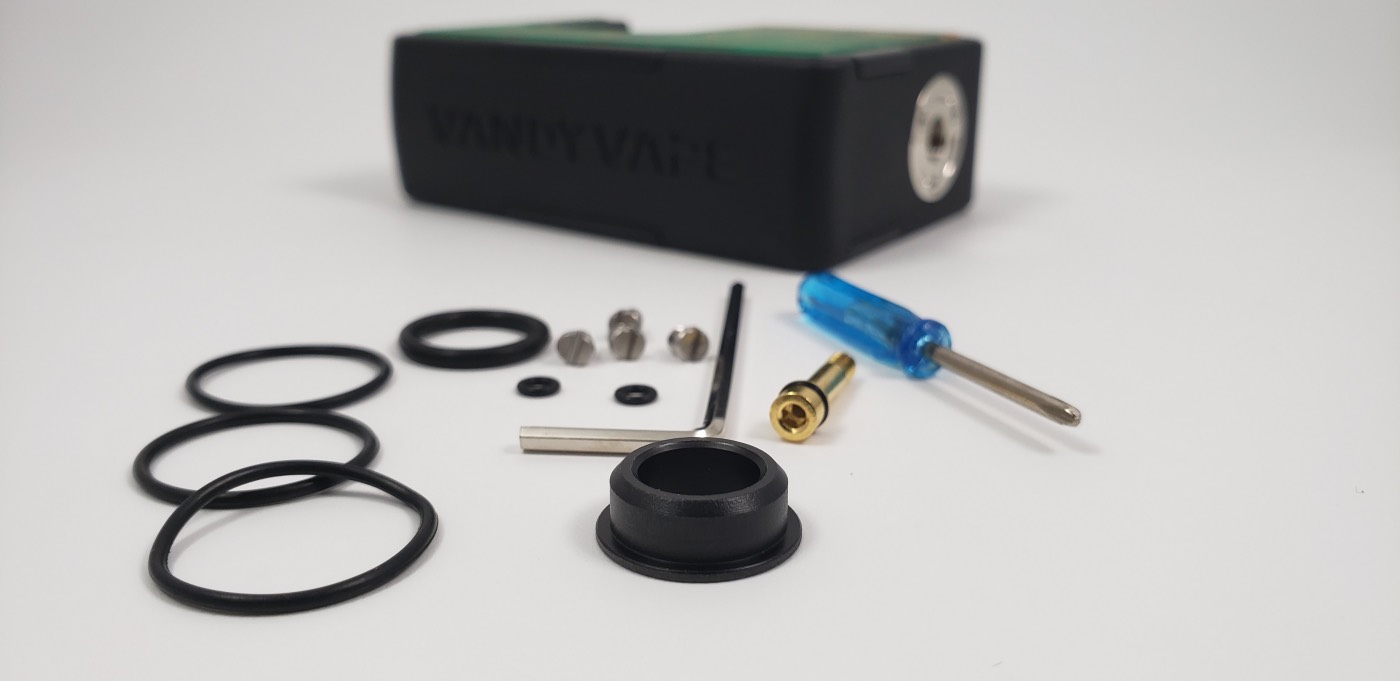
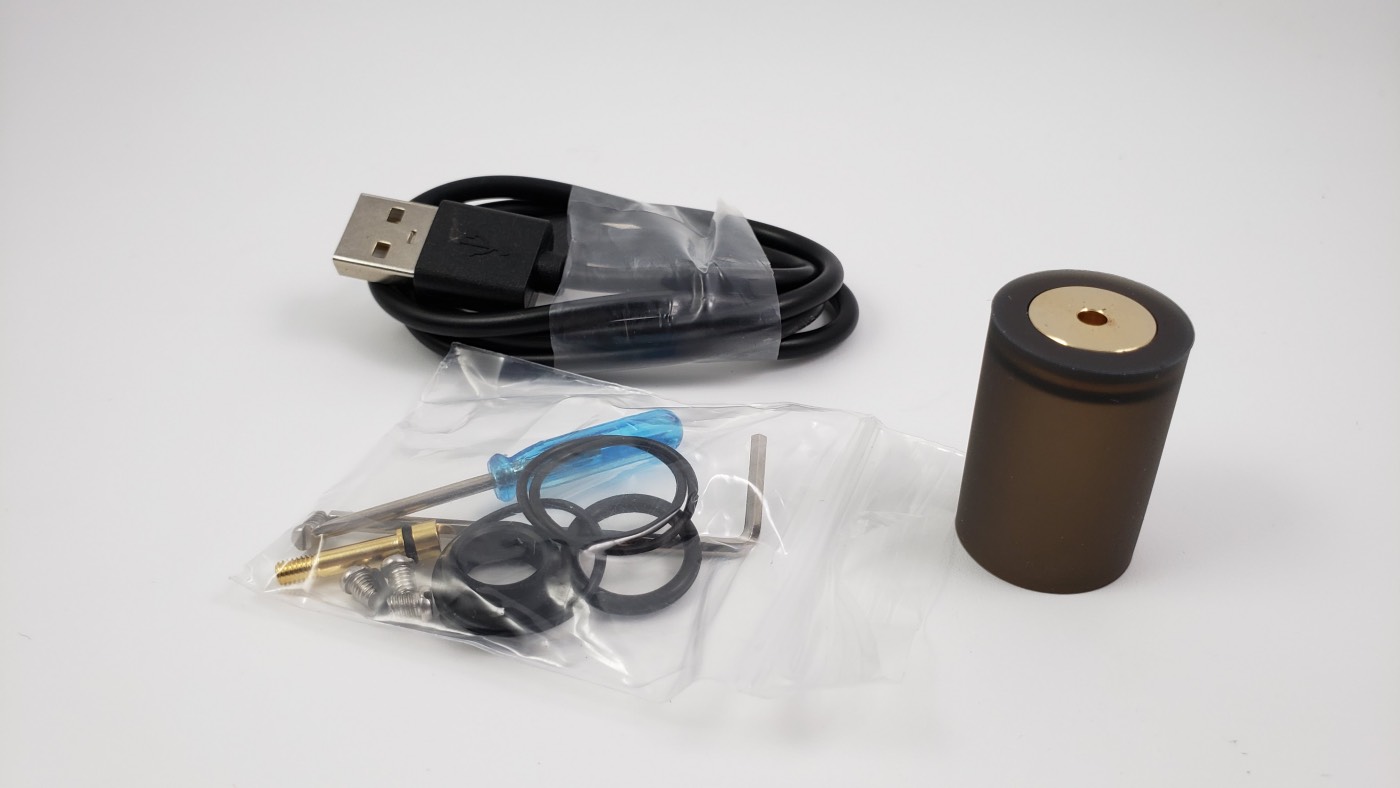
In the Box:
- Pulse X Mod
- Pulse X RDA
- 8ml Squonk Bottle
- 18650 Battery Adapter
- Extra Airflow Cap
- USB Cable
- Accessories
- User Manual
Design
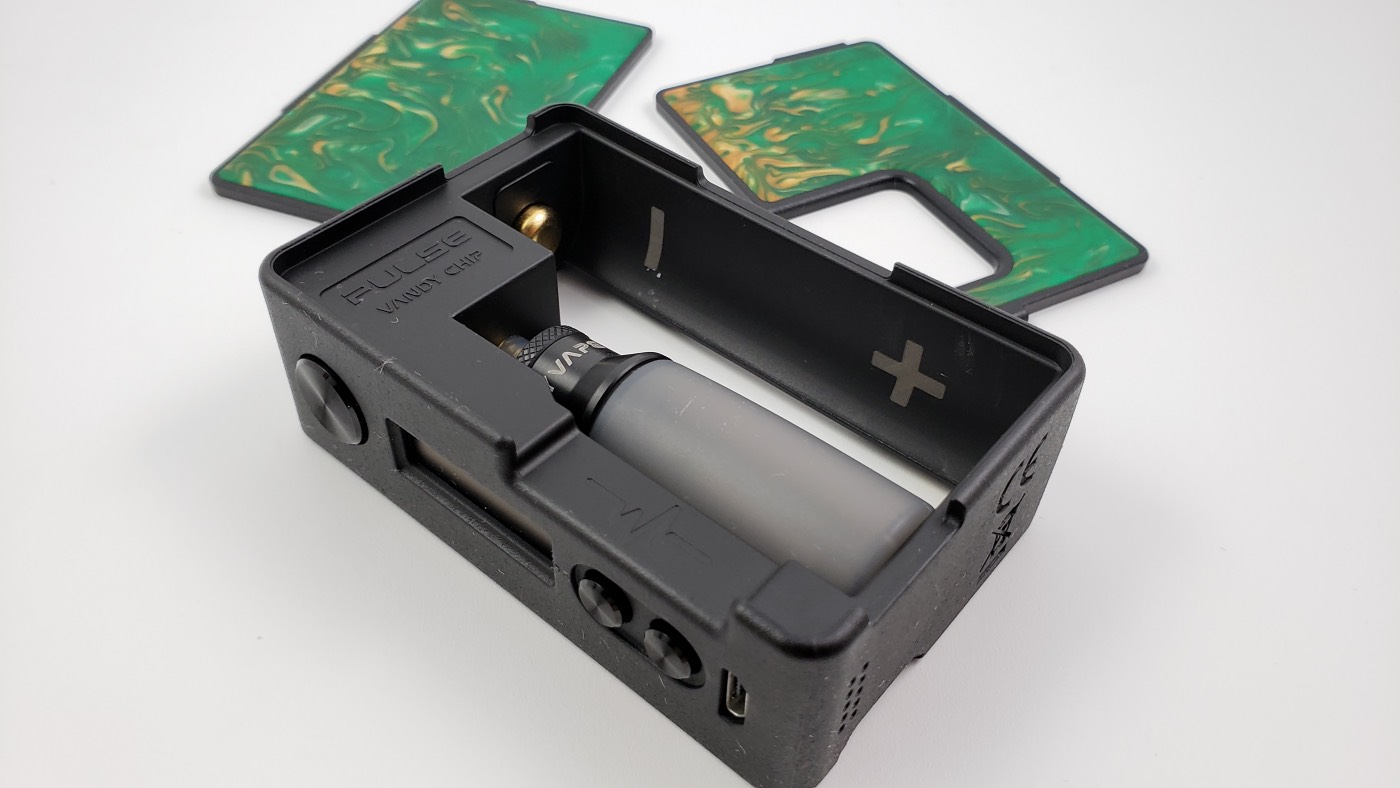
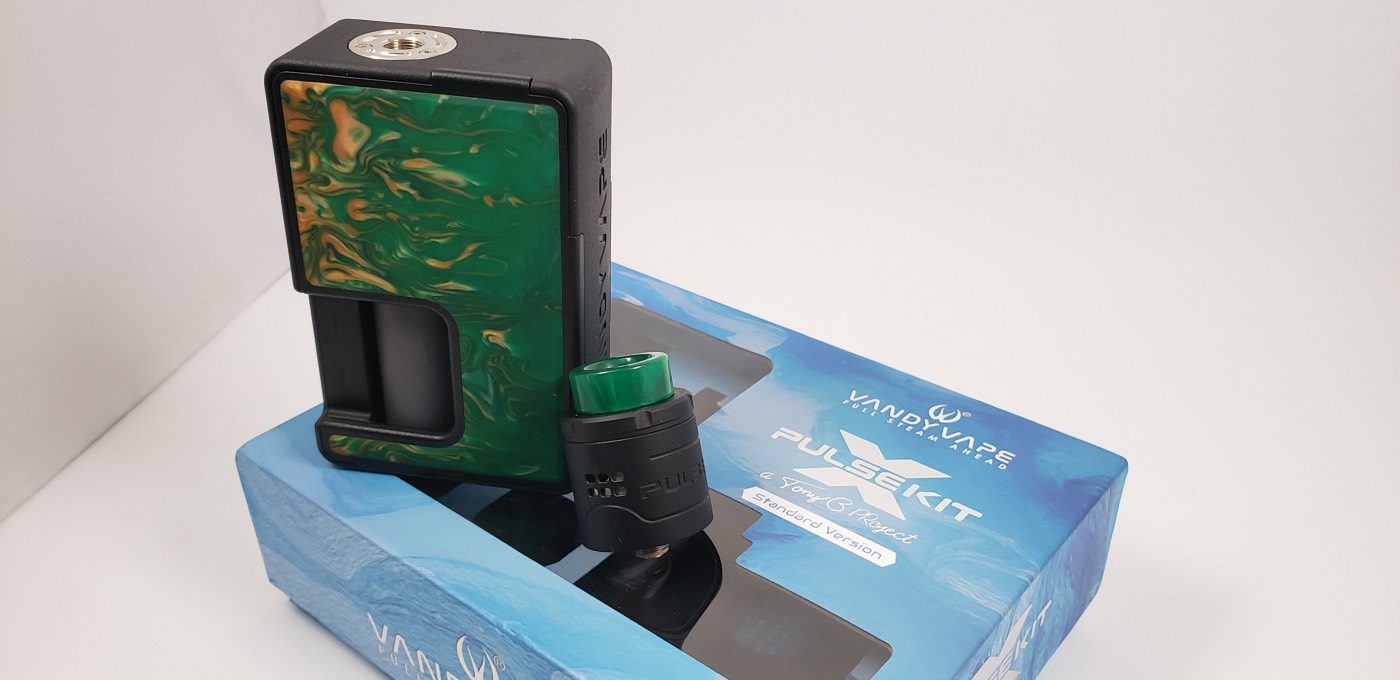
I really like the design of the Pulse series of mods. I like all of them. I’m not a fan of all of the different colors, but there are so many colors, that there has to be at least one that you’ll like. Sourcemore sent me the Kill Devil Hills variation, which has a green marbleized look.

I actually really wanted these plates when they were released for the 80w version, but now that I see it in person, the colors are much darker and less vivid than the pictures that Vandy Vape shows on their site. So that’s a little disappointing and I think it’s almost like a bait and switch. The images online should be true-to-life, not heavily edited. So I’m not a huge fan of the colors of the Kill Devil Hills colors. I mean, they’re ok, but I would have liked them to be brighter. And that doesn’t take away from the rest of the design and performance.
The panels snap into place with nice strong magnets.

The panels are made out of plastic, but they’re thick and feel durable. Also what’s really cool is that panels from the 80w version will fit this too. So if you have them, you can use them.
On the top is the 510 connection. It looks nice and there’s a strong spring-loaded pin inside.
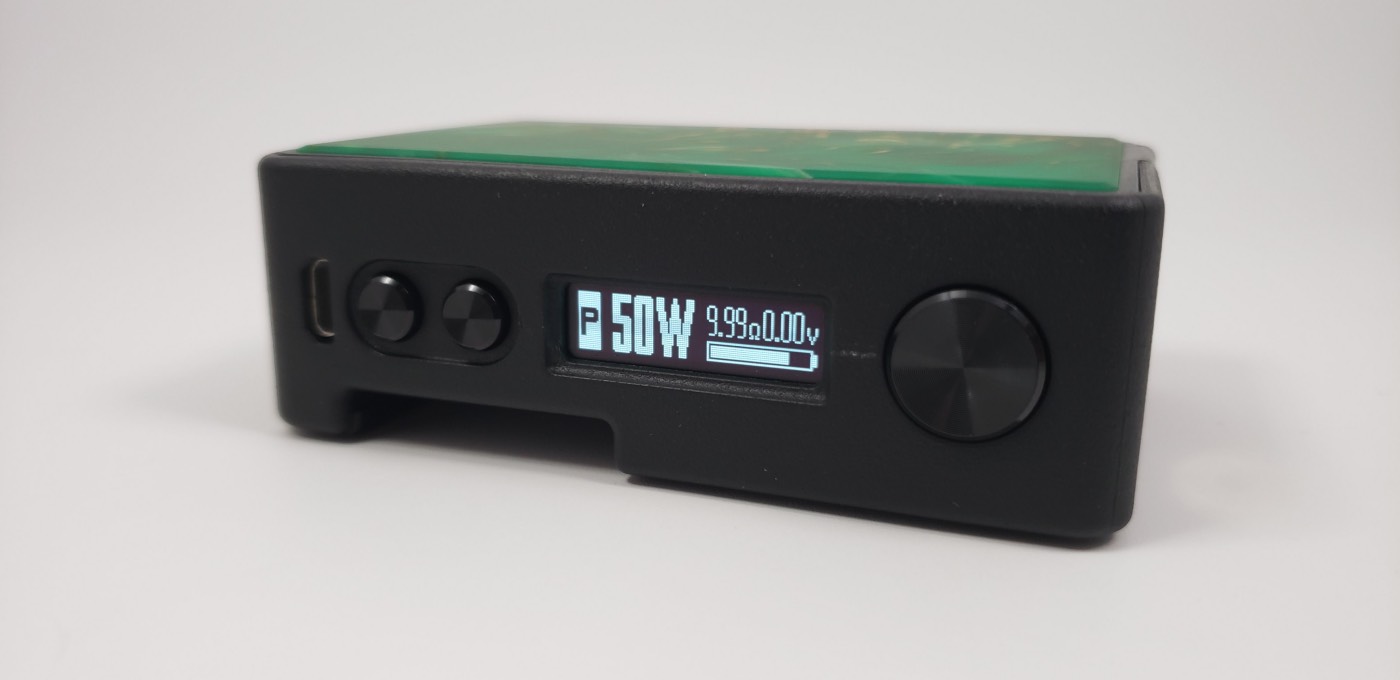
On the front of the device is the firing button, which has a nice click to it.
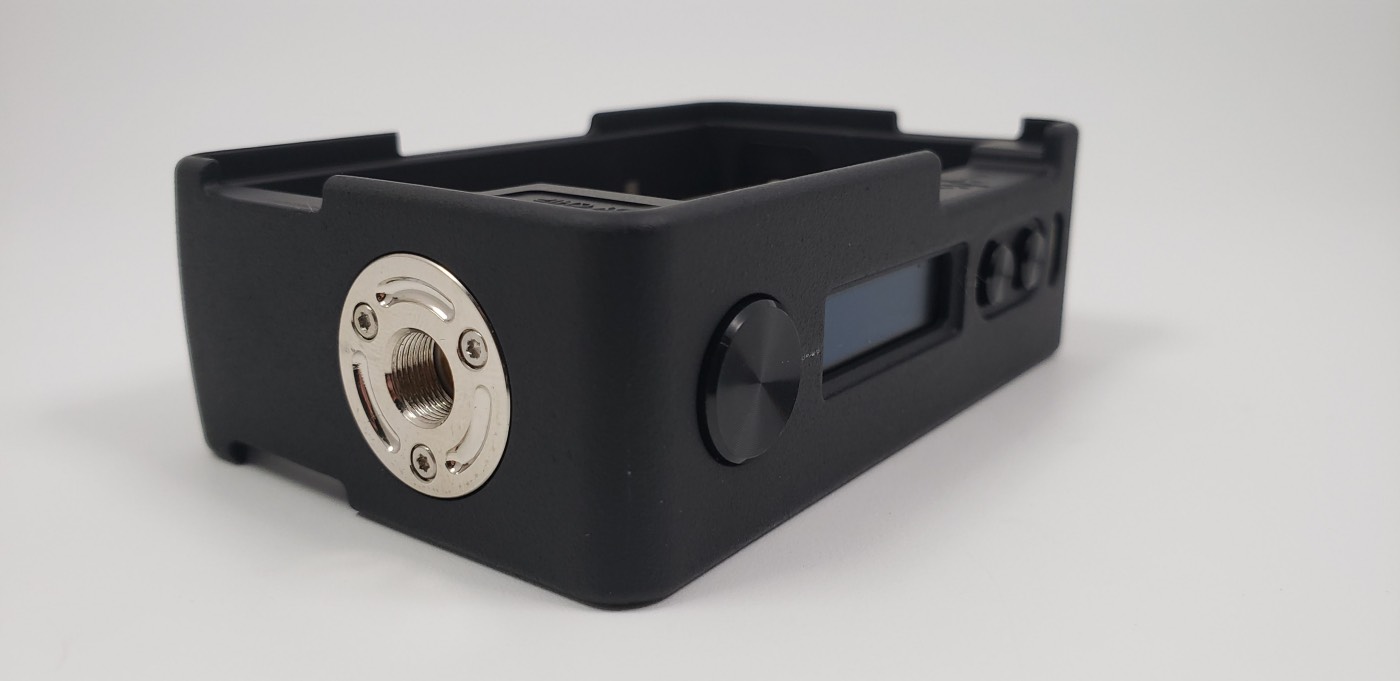
Beneath that, you have the display screen, which is nice and bright. I really like the brightness of the screen. It looks great.
And then you have the up and down buttons to change settings and the micro USB port that can be used for firmware updates and battery charging, although I want to mention that it’s always better to charge your batteries in an external charger rather than in the device. It’s safer.
And size – It’s 3.2 inches tall, 2.1 inches front to back, and 1-inch side to side.
The Squonk Bottle
Just like with 80w version, the squonk bottle is very nice. It looks great, it’s of high-quality, and it’s the perfect softness.
Chipset and Firmware
The chipset in the Pulse is the same Vandy Chip from the first Pulse, which was a great chip in my opinion. It has a lot of features and it fires extremely fast.
It’s also firmware upgradeable. But in the entire year that the Pulse X has been out, there hasn’t been one upgrade. I don’t know if they ever will, and maybe it doesn’t need one. The previous version of the Pulse, the 80w, had three firmware updates, so it’s reasonable to believe that everything that needed to be fixed was already covered before the Pulse X was released.
And of course you have your typical safety features:
- Overheating Protection
- Open Circuit Protection
- Short Circuit Protection
- Overcurrent Protection
- Overtime Protection
- Low-Battery Warning
Features and Modes
First, there are four settings that aren’t in the menu:
- Press and hold the firing button and the up button at the same time to lock the up and down buttons, but you can still fire it.
- Press and hold the firing button and the down button at the same time to flip the screen.
- Press and hold the up, down, and fire button to go into stealth mode
- No Lift Shift – if you quickly press up and down at the same time twice fast, the device will let you re-read the resistance of the atomizer
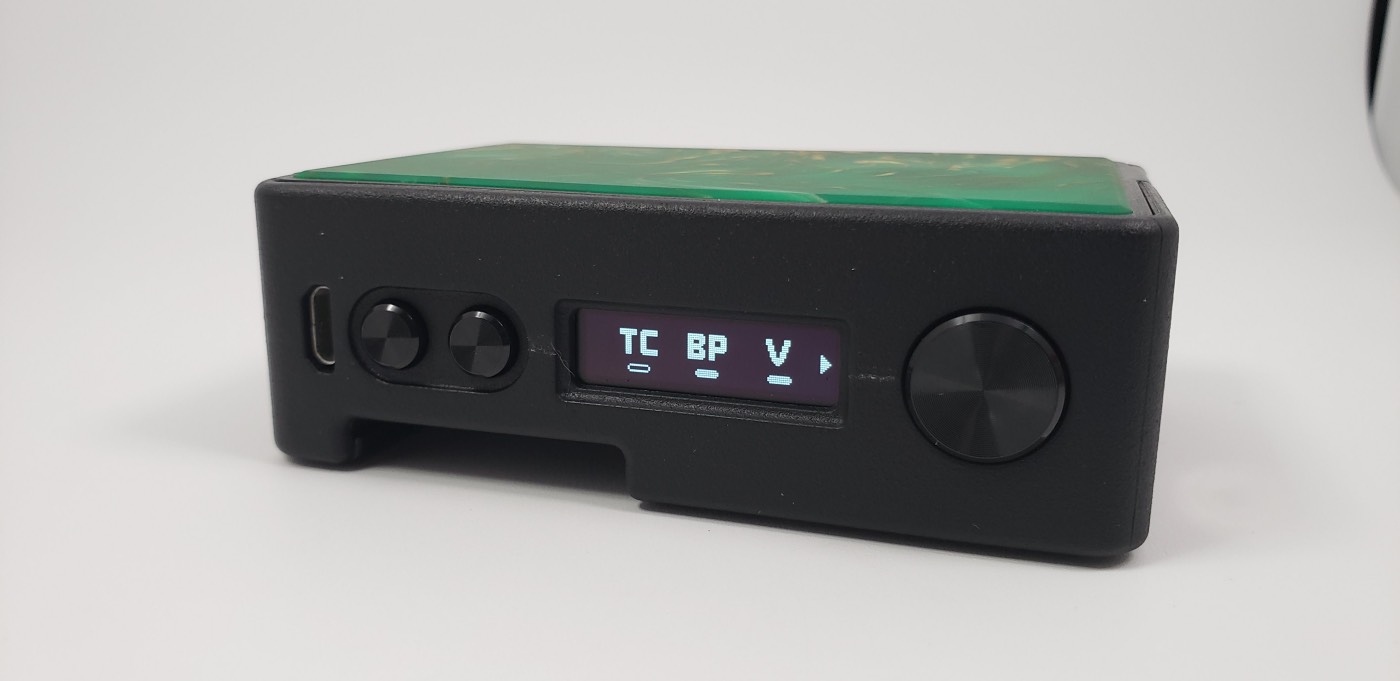
Ok, now the modes. To change modes, press the fire button three times fast.
There are three modes
- V: Voltage mode – which works like any typical regular wattage mode. Nothing crazy here.
- TC: Temperature Control mode – Again, nothing new with this mode. As long as you’re using temperature control supported coils, the device will attempt to keep you at the temperature you prefer while preventing you from burning the cotton if it gets dry. This mode supports Ni200, Stainless Steel, and Titanium. If you want to change the wattage in this mode, press the fire button four times.
- BP: Bypass mode – which makes the device work like a mech mod in terms of delivering power based
on the resistance of your atomizer build and the charge of your batteries. But of course, you get all of the safety features of a regulated device.
To get into the settings menu, press and hold the up and down buttons at the same time.
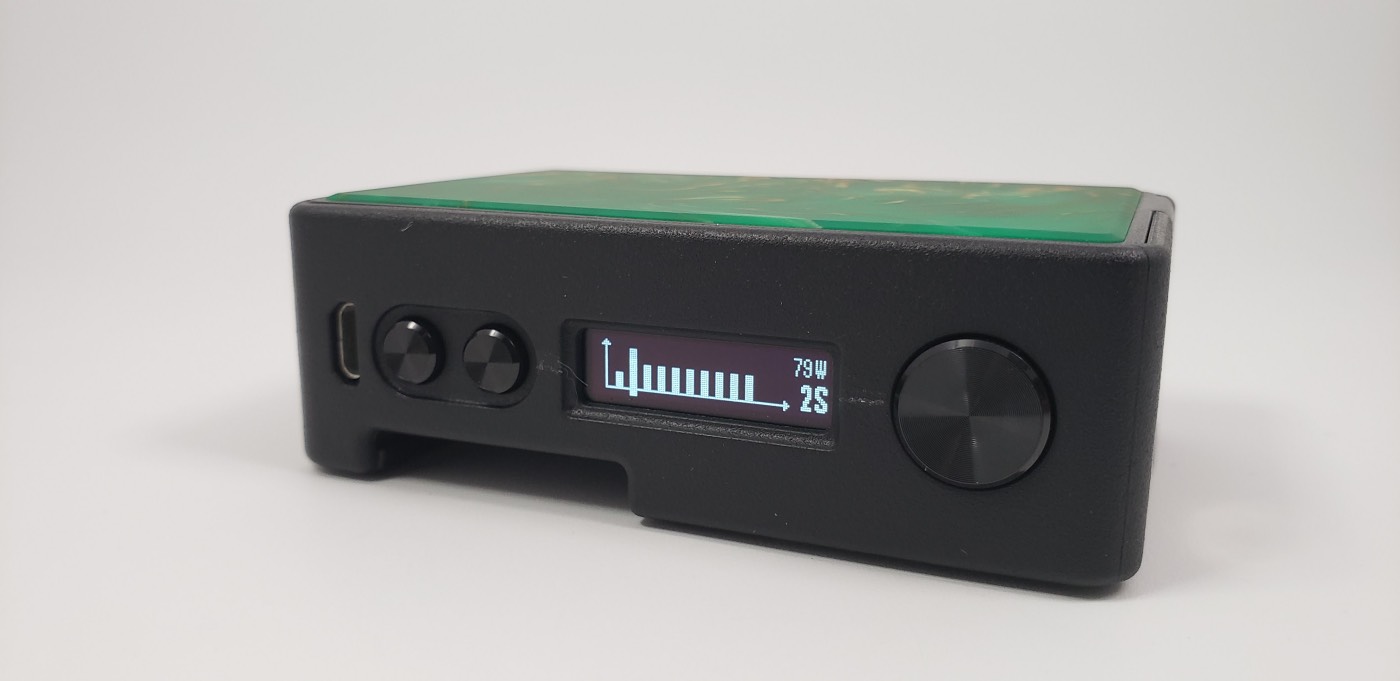
- The DIY 1-5 setting lets you adjust the custom curves on either temp-control or voltage/wattage mode. You have five memory slots that you can save custom curves too. These curves let you fine-tune how the device fires through all ten seconds of a hit. So, for example, you can set the first second to 40 watts, second 80 watts, third second down to 50 watts and so on. You can set it however you like.
- N-H: Boost power setting – which lets you set how strong you want the device to deliver power when you first hit the fire button. You can set it to normal or hard. There’s an extra feature here when you’re in hard mode. If you press the firing button four times, you get a new menu. This lets you adjust how hard you want it to hit and for how long. So at its max, you can add an extra 10 watts, bringing it up to 100 watts, to the initial few seconds of your hit.
- ID and Version give you some information about your device
Heres the Custom Curves menu:
Additional Settings:
- Tools: This is a neat feature. So in here, you can add or remove settings from the main menu. So if you never use Temperature Control or Bypass mode, for example, you can turn those off in this menu. Then when you go back to the main menu, they’re no longer there. I love this feature because it makes it so that I don’t have to navigate through modes I don’t care about.
- NLS: Lets you turn off the No Lift Shift feature
- ST: Lets you set or turn off the sleep timer settings, which is how many seconds before the device turns off after being fired.
- BRI: Brightness – which lets you change the brightness of the screen.
- FIR: Fire lock – which locks the firing button so that you can’t fire it
- RST: Reset – which lets you reset all of your settings to factory default
Here’s what it looks like to turn off modes in the device. You’ll see that it’s off when the bar beneath it is empty.
Batteries

The original Pulse 80w only supported 18650 and 20700 batteries. The Pulse X still supports 18650s and 20700s, but now also 21700 batteries. So that’s the main change here, but it’s a nice change because a lot of people really like 21700’s since they have such a long life.
The batteries are easy to install. The batteries just slide right into place and when you want to take them out, you take the back panel off and push the battery out.
If you use a 18650 battery, you’ll need to use the battery sleeve included in the box to add more height to the battery.
As far as I know, It doesn’t really matter which end of the battery you put the sleeve on but Vandy Vape shows it on the negative end of the battery if you want to follow their lead.
And you’ve got all of your safety protections; overtime protection, low power, short circuit, high resistance, low resistance, and over-heat protection.
The Pulse X RDA

I love doing RDA reviews because RDA’s are my favorite vape products to use. But since this has been out for almost a year now, I’ve already heard some of the complaints, mainly that it gets really hot. And yeah, I think the same thing. It gets hot fast and takes a long time to cool down.
Design
The RDA looks nice. Nothing really interesting about the design on the outside, but it looks fine. You get a big 810 resin drip tip which also looks good on the top.

Top Cap
The top cap has airflow slots that are angled down, which helps to prevent leaking. To change the airflow, you turn the top cap. You can open it as much as you want or close it down entirely. I like being able to close it off so that I don’t have to worry about leaking issues in my pocket or backpack. The cap slides smoothly and works well. No complaints from me on that.
It’s conical on the inside to help produce a better flavor.
Barrel and Airflow
The barrel has honeycomb airflow holes on both sides. On the inside, there are notches that align with the deck so that you can be sure it’s always in the right place. That also prevents the barrel from spinning around when you’re tightening it down or taking it off, so it’s a good feature.
To adjust the airflow, just spin the top cap around. You can open it up or close it down however you like.
You also get this clear acrylic cap.
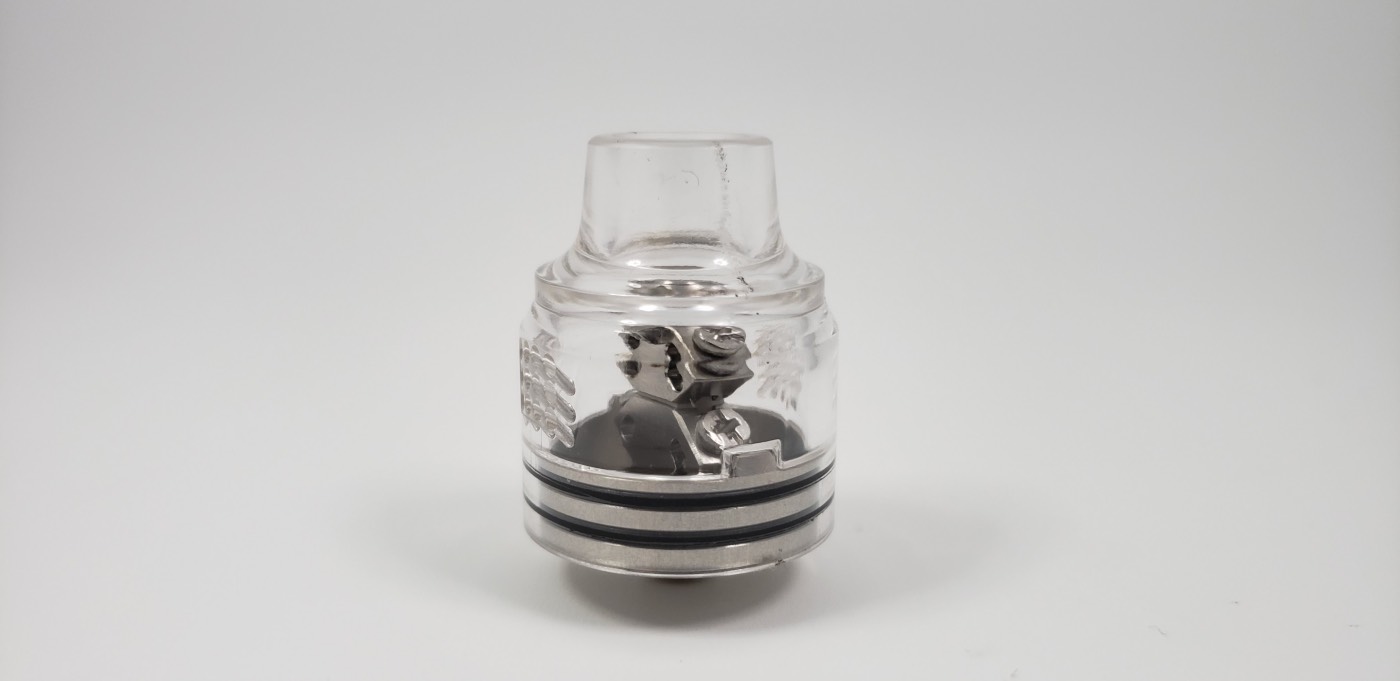
This is basically the drip tip, top cap, and barrel all molded into one piece. With this you get a lot more airflow than the metal barrel. You can’t adjust the airflow at all here. So this is for those of you like a lot of airflow.
The Build Deck
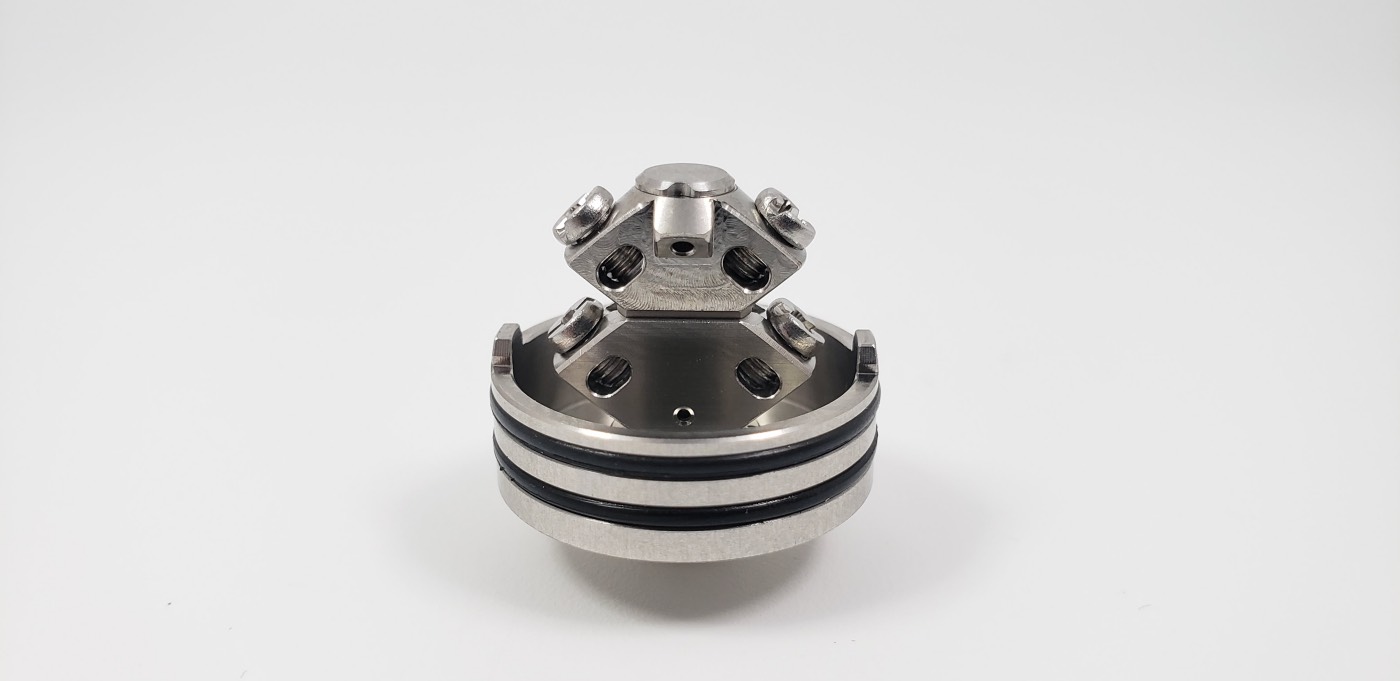
This is a dual coil only deck. You can’t really do single coils in here.
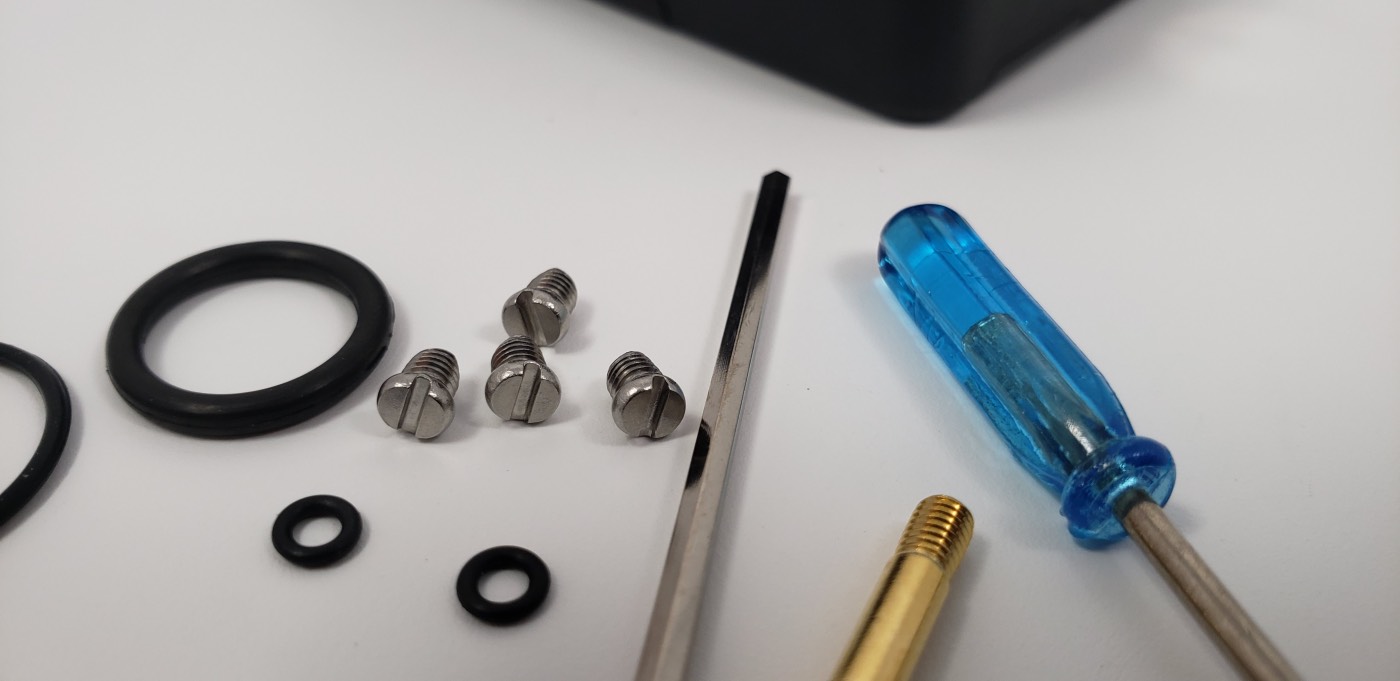
The deck is really unique. It’s like two posts stacked up on top of each other, forming an X shape. The post screws are Phillips head screws, but you have flatheads in the box if you want to use those instead.
With the posts opened all the way up, you get lots of space to add big coils.
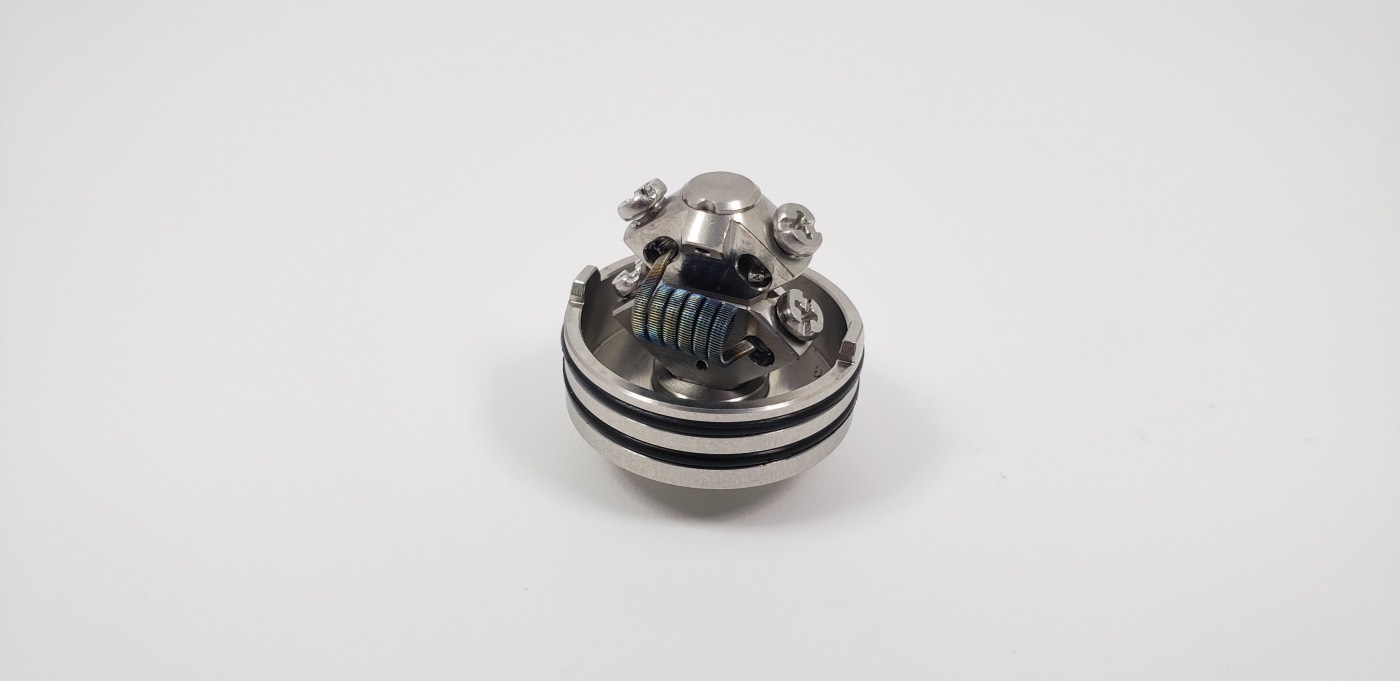
The kit comes with some pre-built triple fused Clapton’s, so you can fit some decent sized coils in here.
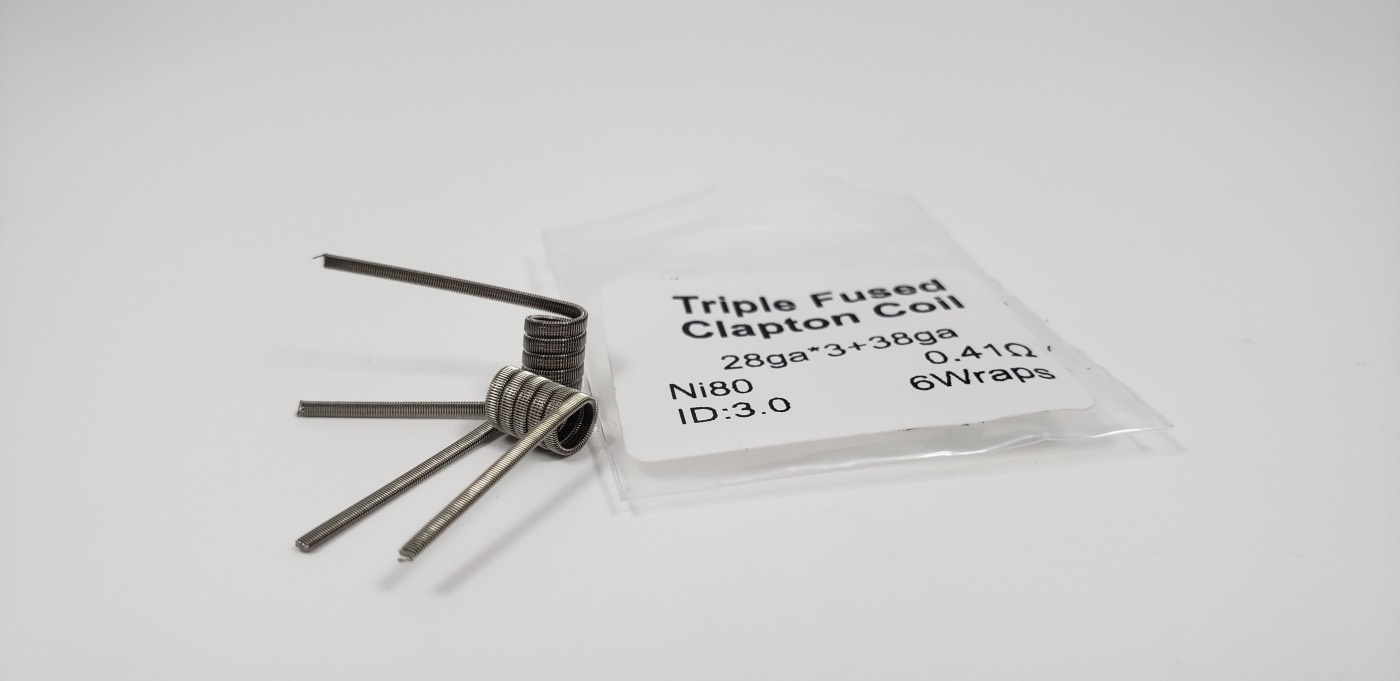
If you care about precise specs, these are made with Ni80 wire. There are three strands of 28g wire that are wrapped with 38g wire. The inner diameter is 3mm, there are six wraps, and they come out to 0.41 ohm. Vandy Vape actually sells these wires both in spools so that you can wrap your own or in pre-wrapped coils that you can install right into the RDA.
To install the coils, just put one leg in the top post and the other leg in the bottom post. Position the coil near the middle of both posts, clip your legs on the other side, add your cotton, and tighten it all down. It’s really easy to build.
The squonk holes are at the top and drop e-liquid right over the top of the coils.

If you get too much liquid in there, there are holes near the base of the posts that suck up the excess e-liquid. Of course that only works in squonk mode. If you’re using this in dripper mode, the squonk holes don’t do anything.
Final Thoughts
The Pulse X Mod is basically the same as the 80w version, but now you get 90 watts and the ability to use 21700 batteries. If you already own the 80w version, I would say stick with it. There’s no reason to upgrade unless you really want to use 21700s, which actually is a really nice feature since you can get way more battery life. And if you don’t have the 90w version, then yeah, absolutely get this. It’s an awesome device that works great.
The RDA is nice too. It’s easy to build and the flavor is really good. The airflow is nice too. The only con I have is that it gets so hot. It’s uncomfortably hot and it takes a long time to cool down. That’s a big drawback.
But overall, the whole kit is pretty nice.
This was sent to me for review from Sourcemore.com, so if this sounds like something you’d like, you can get it from them for $54.45
Alex is a former smoker who successfully quit smoking after 14 years by switching to vaping. Now a pro-vaping advocate, Alex has become a seasoned expert with over a decade of experience in the vaping industry. Since starting his vaping journey in 2010, Alex has earned a reputation as a trusted reviewer, extensively testing all types of vape gear, including mech mods, sub-ohm tanks, RDAs, disposables, e-juices, boro devices, squonkers, dry herb vaporizers, and e-rigs. He’s also explored the craft of coil building and DIY e-juice.
Since 2015, Alex has published more than 800 in-depth articles on vaping, produced over 500 videos covering product reviews, industry news, and tips, contributed to several well-known vape publications, and hosted a popular vaping podcast featuring over 100 episodes and nearly 40 hours of content.