
Sourcemore sent me the Vandy Vape Pulse AIO V2 for review. They also gave me a coupon code – “VVV2” – bringing the cost down to $57.29.
The original Pulse AIO came out a few years ago in November 2021, and people loved it (see my review of the first Vandy Vape Pulse AIO here). I loved it too, and still use it today! It was one of the first affordable boro-style devices on the market. Before the Pulse AIO, your only options were $250+ devices.
Vandy Vape released the .5 model in July 2022, which was basically the same as the original, but with a few new accessories and some updates to address customer complaints. It came with both round and square buttons, new panel designs, better o-rings on the tank, and a stronger frame.
In December 2022, the Pulse AIO mini was released. It was smaller than the original, fit only an 18650 battery, had a few feature improvements, and it had a new and smaller Vessel V2 tank (the tank didn’t fit a standard boro device, but the bridge/RBA deck did.
The new V2 model is completely redesigned and is even smaller than the mini version.
Specs & Features
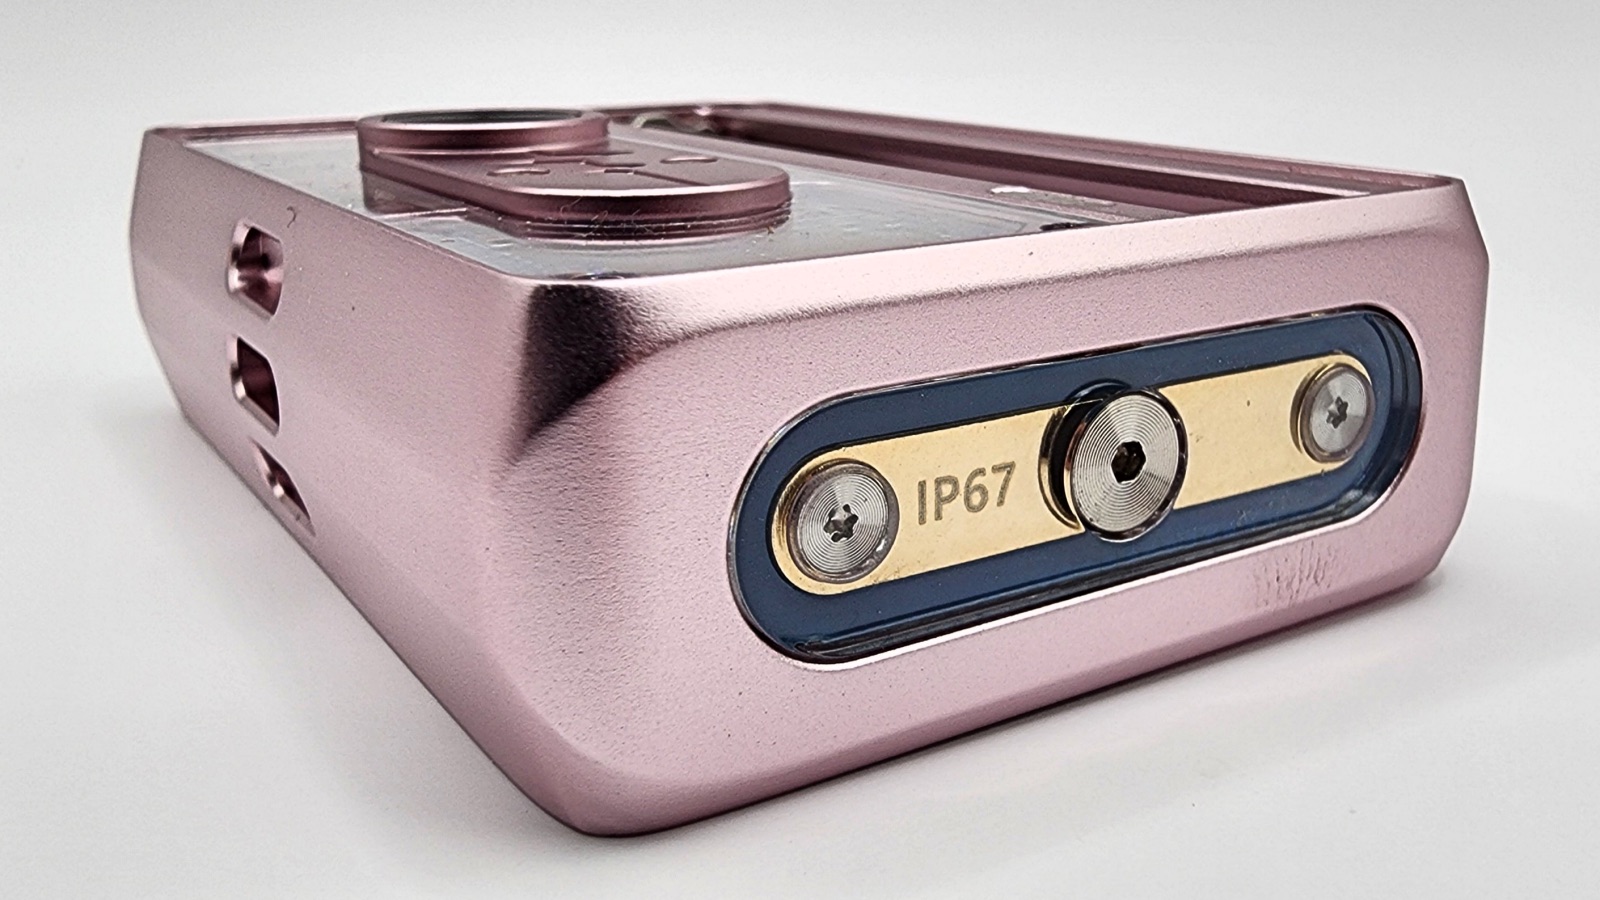
- IP67 PCBA waterproof
- Wattage: 5-80
- Resistance: 0.05-3.0 Ohm
- Uses an 18650 Battery
- Aluminum Alloy body
- 6ml capacity in the RBA tank
- Weighs 122 grams
- Size: 51x77x23.4mm
- $69.99 from Sourcemore (use code VVV2 to get it for $57.29)
The printed circuit board (PCB) has a protective coating and is IP67 water-resistant. This model also now only accepts an 18650 battery, whereas the original could use both a 21700 battery and an 18650 (with the included battery sleeve).
In the Box
- Pulse AIO V2 device
- 4 RBA airflow pipes
- 3 drip tip airflow restrictors
- 510 adapter
- 2 drip tips
- RBA tank
- Drip tip coin
- Parts and Accessories
Vandy Vape included a ton of stuff in this kit. It’s awesome that you get two drip tips and all of those airflow adaptors.
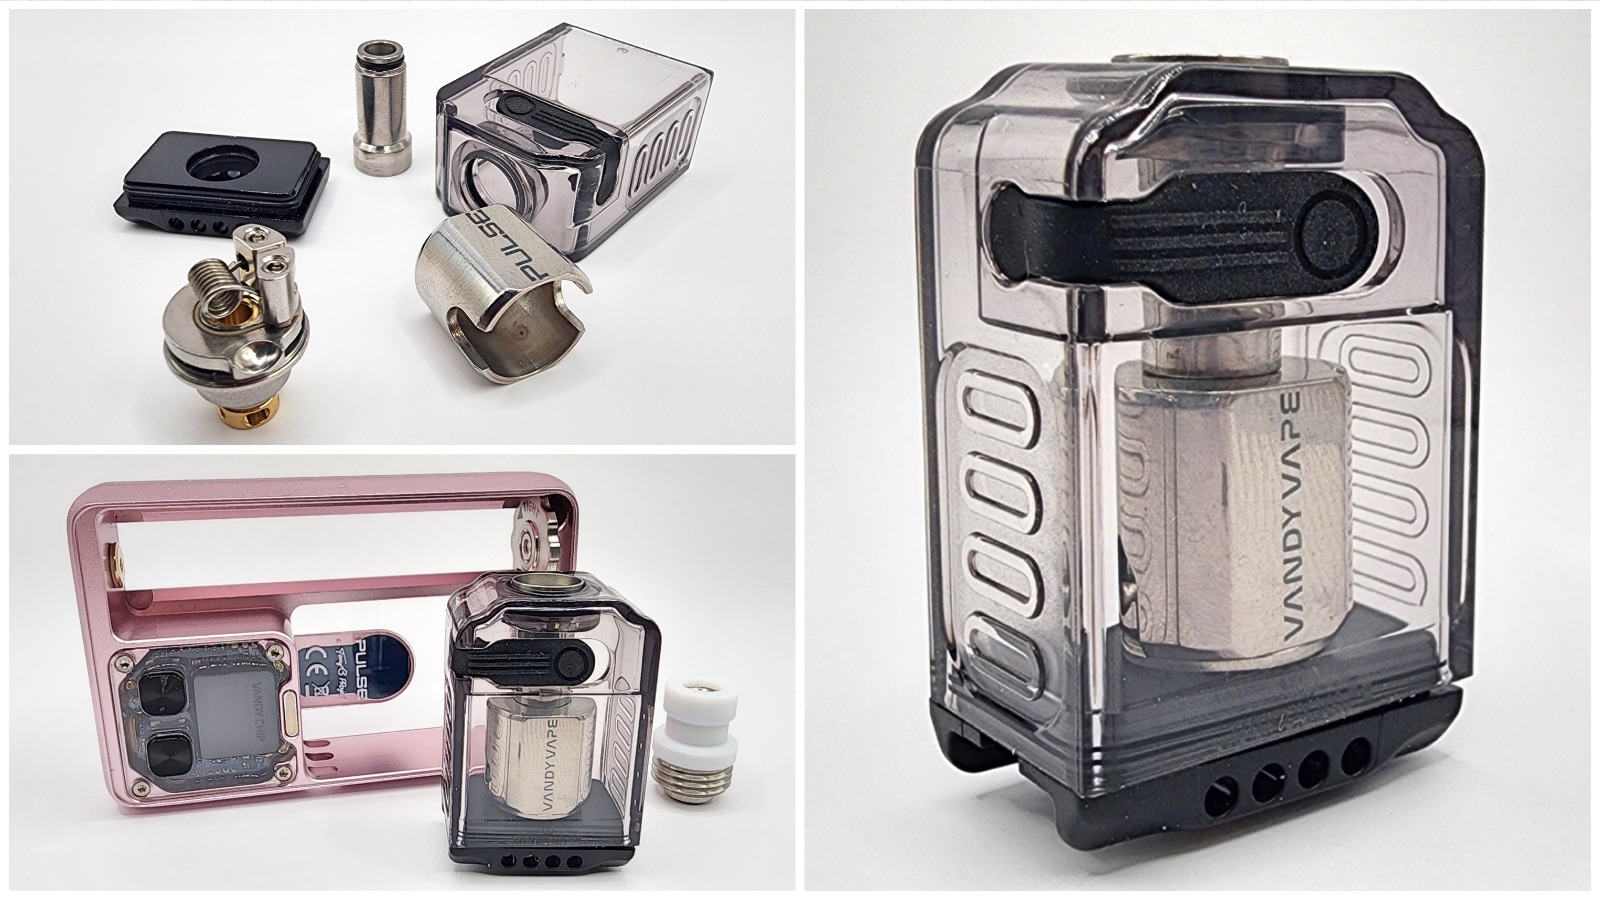
Design
This an absolutely great-looking device. It has an aluminum frame and see-through panels. The one drawback with the clear panels is that they attract fingerprints and tiny scratches.
![]()
All of the little details around the body look great. You can see the chipset at the bottom, and that looks cool too.
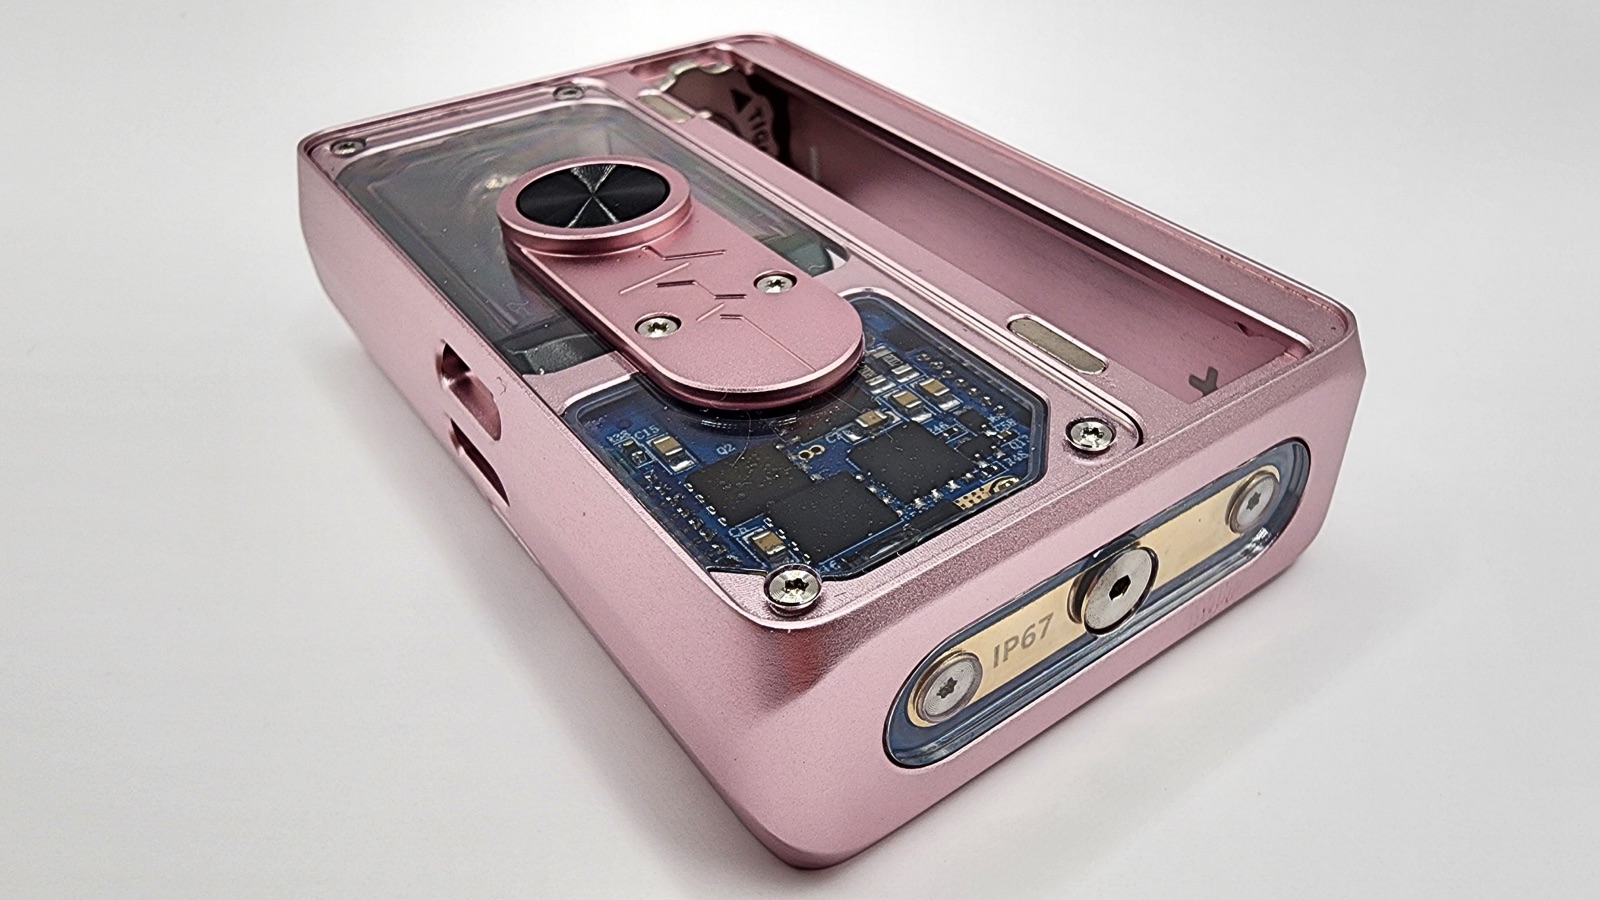
One really nice feature of this is that it’s sealed to be waterproof, so you can clean this thing inside and out without having to worry about damaging it. The chip is waterproof too, which is great because boro-style tanks are known for leaking, so this protects the chip if that happens. The only thing you need to be careful of is making sure that it’s completely dry before putting the battery back in.
You do have access to the internal too. There are screws at the bottom that let you take everything apart. Vandy Vape and Tony B. really wanted this to be a fully customizable device, allowing you to change out buttons and panels.
It currently comes in six different colors:
- Black
- Klein Blue
- Violet
- Red
- Celeste Green
- Sakura Pink
Drip Tips and Airflow Pipes
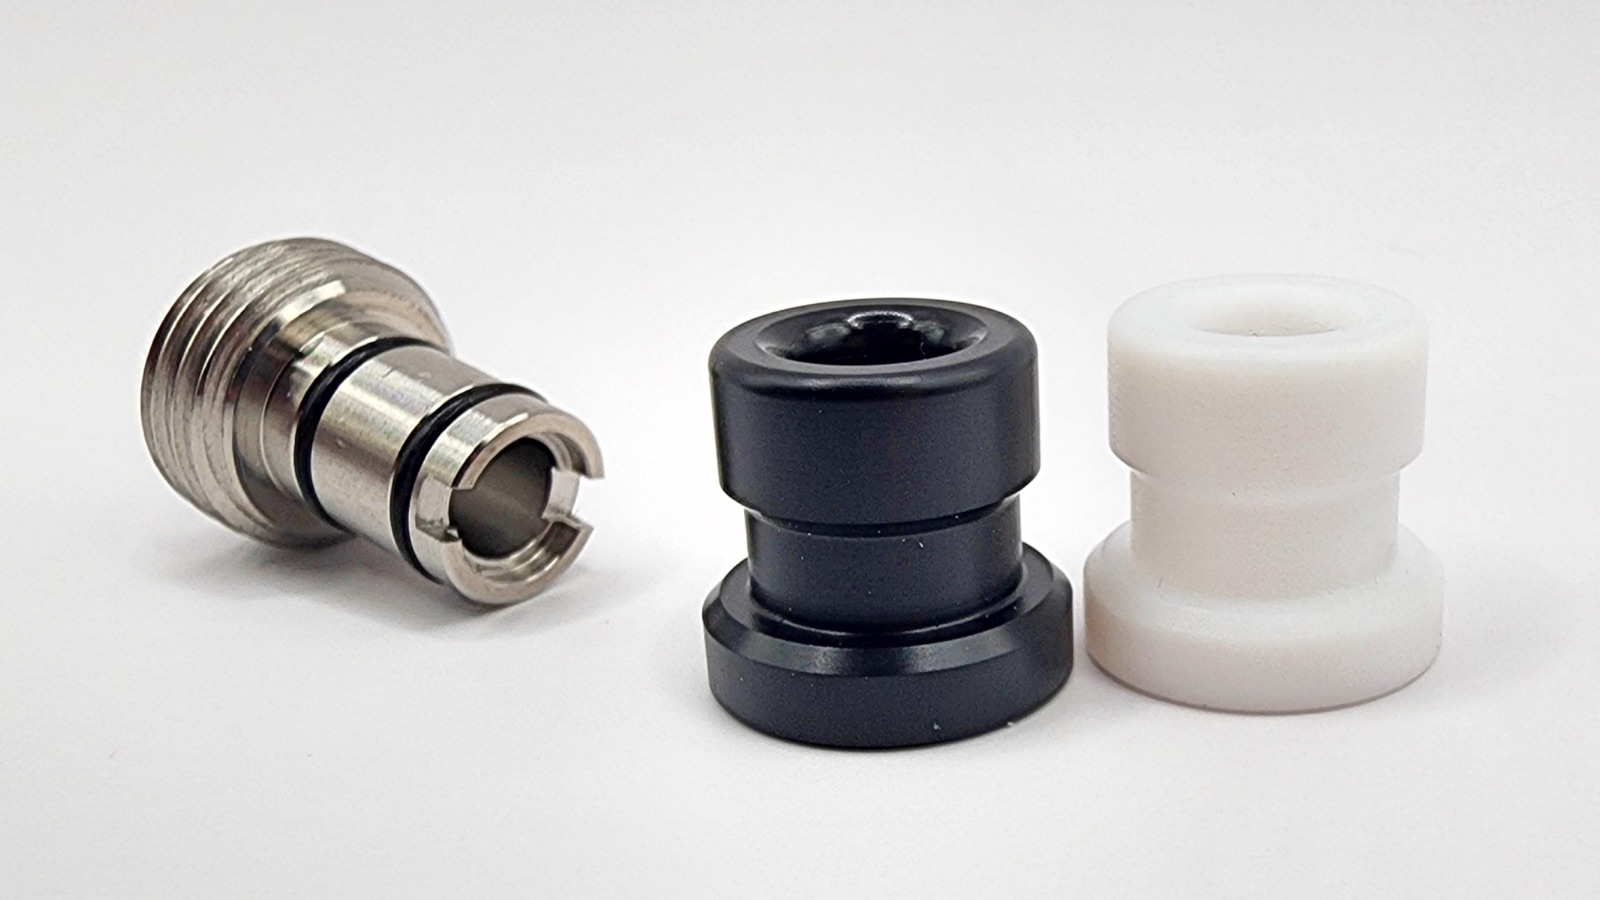
Vandy Vape did something a little different with their drip tips here by allowing you to change the looks by sliding these little plastic covers over the metal section of the tip. That’s a neat way to change colors, but this also has a functional purpose.
When you remove the cover from the tip, you’ll find an airflow insert inside, which Vandy Vape calls airflow pipes.
One is already pre-installed, and you get two more in the box. These are airflow restrictors and give you a little more customizability for your airflow. If you don’t want any airflow restriction, you can leave an insert out and vape it empty.
The inserts just sit loosely in the mouthpiece, so you just want to be careful when taking the tip cover off so that you don’t lose them
Airflow
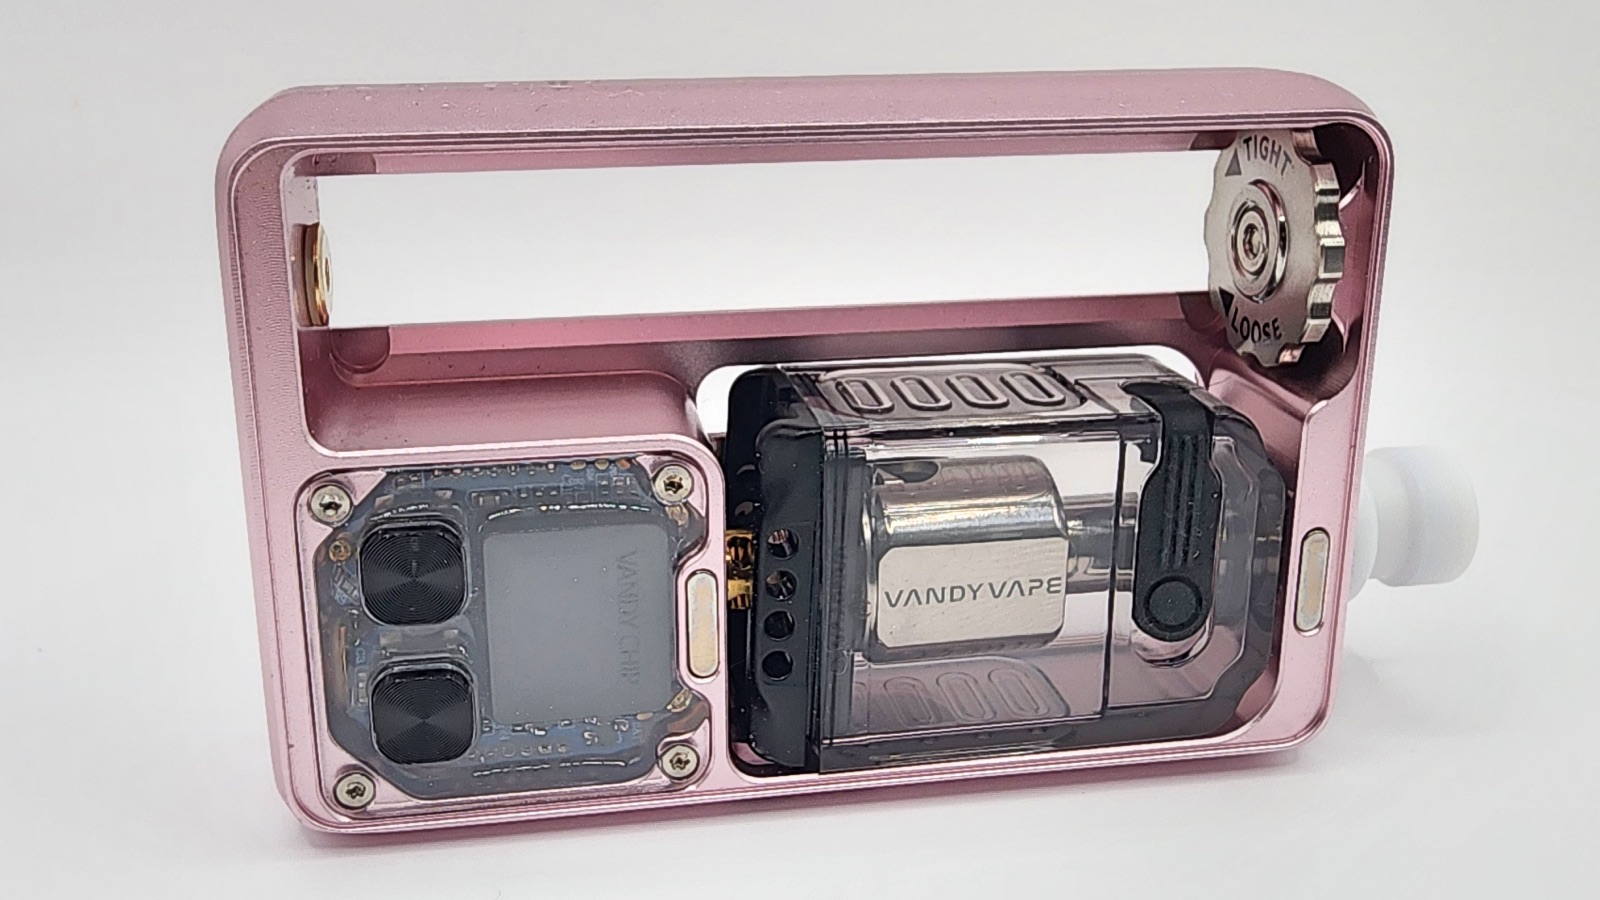
The included RBA has airflow holes facing outwards on the same side of the screen. The panel on the front of the device also has lots of little airflow holes that match up with the airflow holes on the tank.
The device also has airflow holes on the side. This is great because you get airflow from more angles, especially if you use a different tank with airflow in a different position.
You can really get a lot of airflow in here. And if it’s too much airflow, you have additional airflow restriction pipes that fit into the build deck. So they give you a lot of options to fine-tune that airflow to how you like it.
Build Deck Airflow Pipes
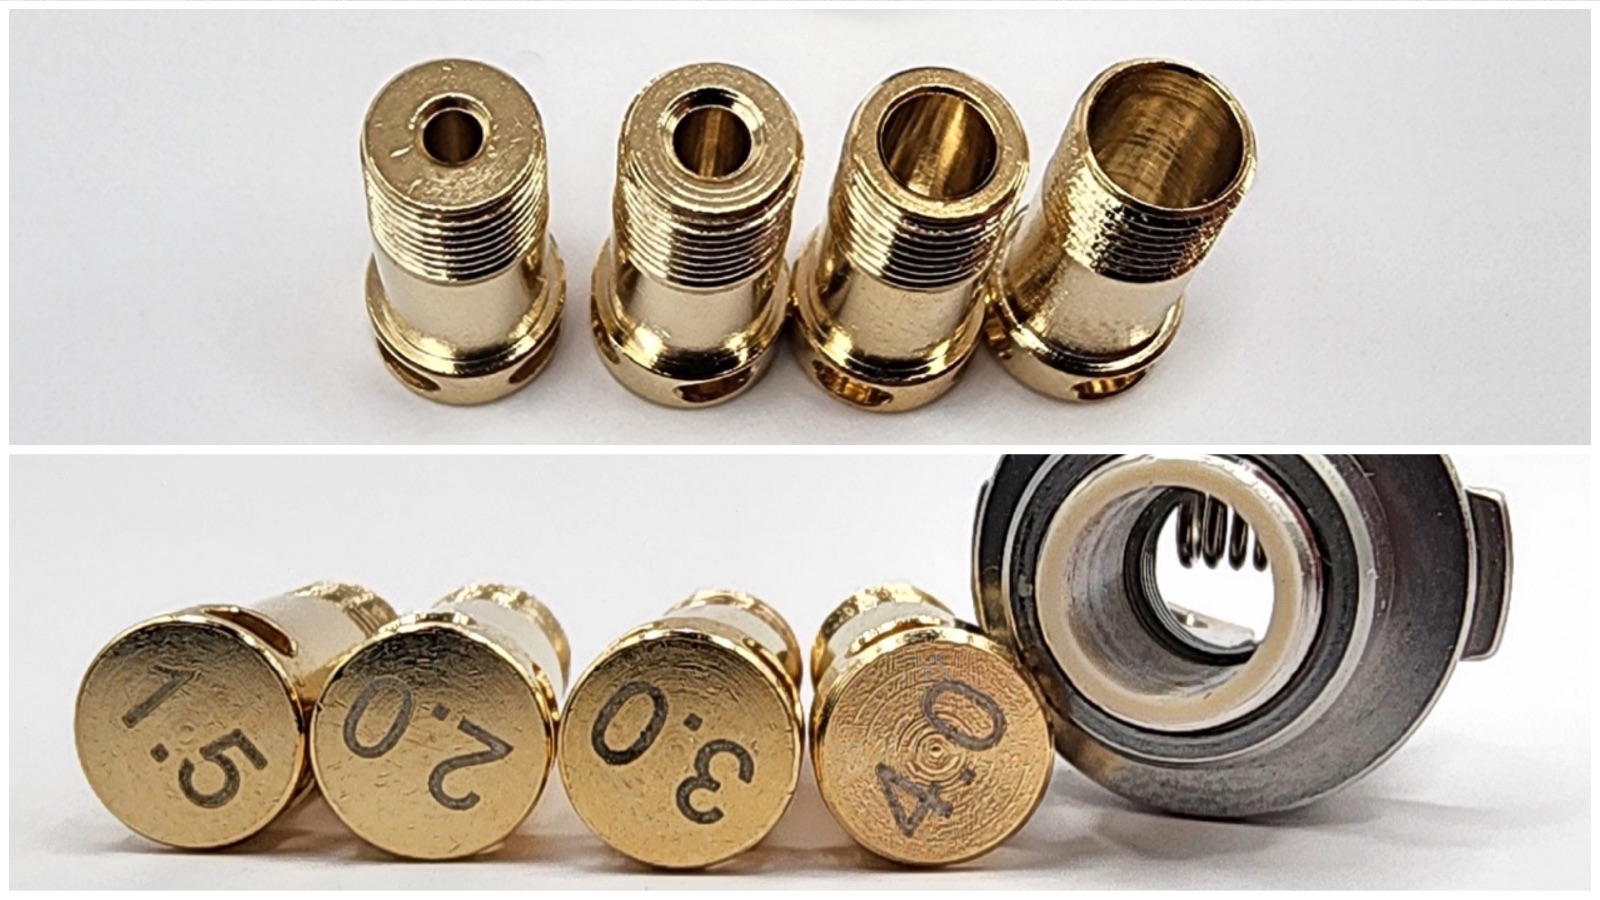
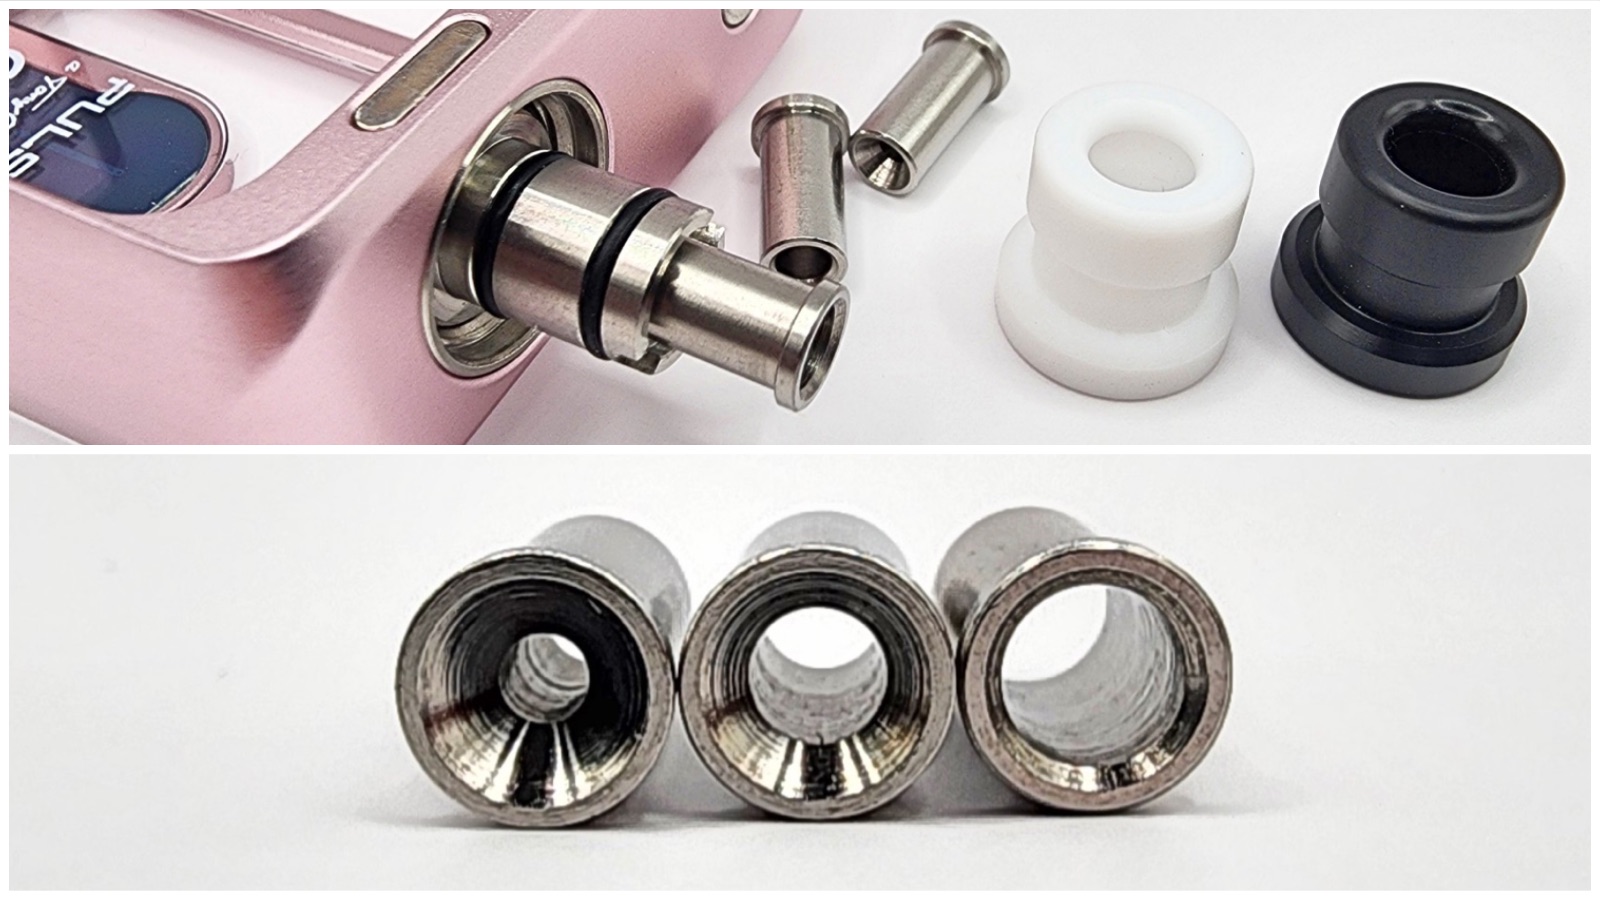
Let’s talk about those build deck airflow pipes. You get four of these in the kit.
- 4.0mm
- 3.0mm
- 2.0mm
- 1.5mm
The 3.0mm airflow pipe is pre-installed.
These fit into the bottom of the tank. They screw in and work as the 510 pin. Personally, I like using the kit as it is right out of the box, so I’ve been sticking with the 3mm pipe, but if you want more or less restriction, you have the ability to change it.
What’s also nice about these is that you can exchange them at any time, even when the tank is full, so you won’t have to deal with taking the whole tank apart if you want to make changes.
The New Tank: Pulse AIO V2 RBA
This is a new RBA deck. The original pulse came with an RBA tank called the Vessel. It was an okay tank, but the seals were weak. You had to be careful with it while the tank was full because it would easily come apart and spill everywhere. This new tank is a completely different tank, and it also has much better seals.
The tank holds 6ml of liquid, so you can fit plenty in here. The fill hole should be facing outwards when it’s installed. And that’s nice too, because you can fill it without having to take the tank out.
If boro-style devices are new to you, something to keep in mind is that they are offset. Look at the holes on the top and bottom, and you’ll see that the hole isn’t exactly in the middle. That’s important to keep in mind because you’ll need to make sure that the deck is facing the right direction and that you put the tank back into the device so that the hole lines up with the drip tip. Putting the tank together wrong won’t cause problems other than that, but it won’t go back together. So if you’re struggling with fit, that’s probably why.
This is also a standard-size boro tank, so it’ll fit in other boro-style devices.
Build Deck
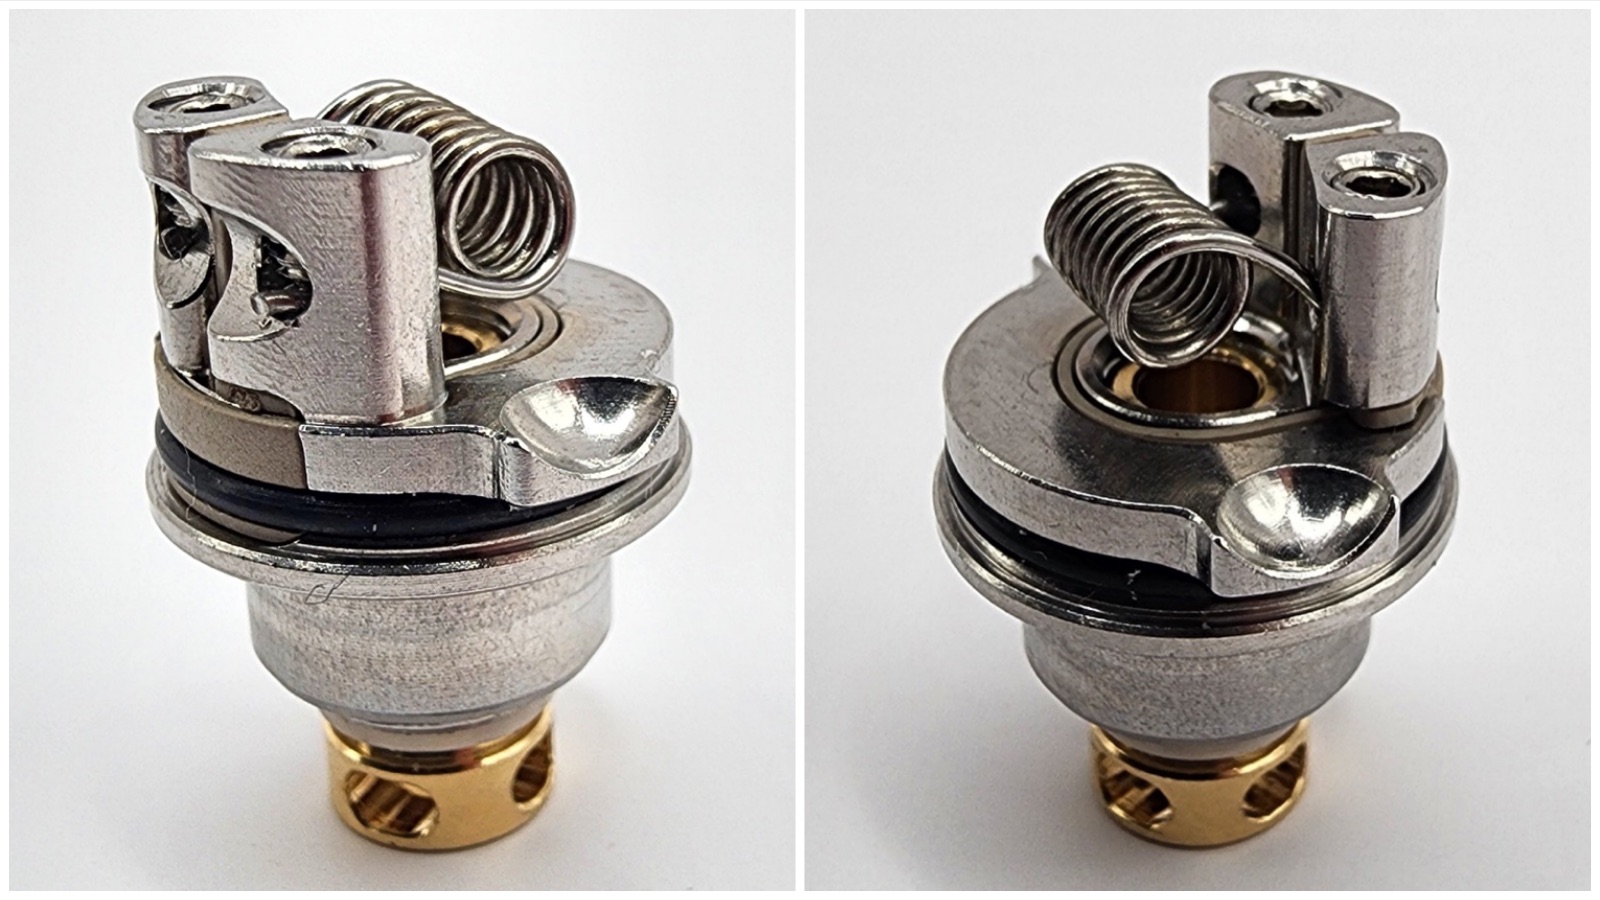
This build deck is extremely simple. You have two posts. All you do is slide the coil leads into the posts, tighten down the post screws, and then snip the leftover leads off the back. You need to get those leads clipped really close to the deck, or they’ll touch the metal chimney-piece when you put it back together, so just keep an eye out for that. If the leads are too long, the device will tell you there’s a short, and it won’t fire. I recommend clipping them close and also bending them inwards into the extra space in the back.
Getting the cotton right is also very easy. Once the coil is in place, add your cotton and then put the chimney section back on. The cotton will come out of the sides, and all you have to do is cut it off right where it comes out of the chimney.
Now I do have to mention that I had several problems with this tank. I would constantly get a message saying there was a short. I think there were several factors at play here, but I think it came down to a few main things; the coil leads were just slightly too long, the 510 pin wasn’t screwed in tight enough, the tank might have been just slightly off center, and the drip tip wasn’t tight enough. Sometimes it might have been all of those things, and sometimes maybe just one or two. I could get the tank to work just fine in other devices, just not the Pulse AIO V2. So I think everything involved with the tank section is extremely sensitive. Or at least it is on mine. All that said, if you’re having problems, check EVERYTHING.
The 510 Adaptor
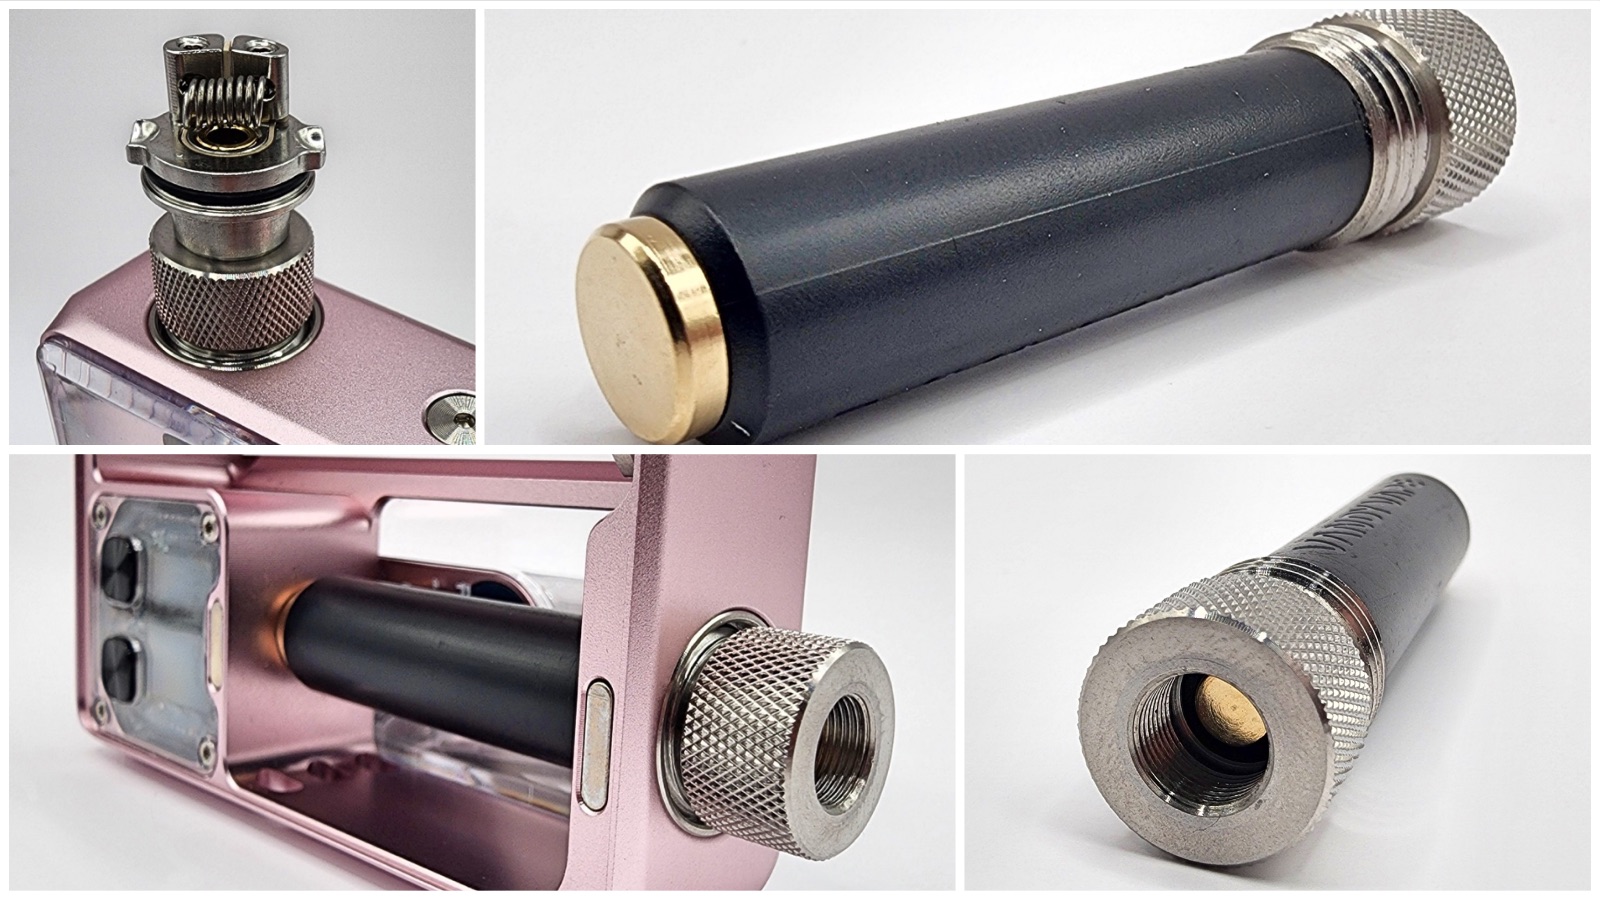
There’s a long metal pipe in the box called a 510 adaptor. This basically allows you to build and test your coil directly on the Pulse AIO V2, rather than having to use another device to test it. Without this tube, there’s no way to fire the coil and make adjustments to it, because you’d have to put the deck back into the tank, put the tank into the device, and then fire it. That’s too much work and also too much heat inside the tank while you’re dry-firing it.
So this simple little adaptor is awesome. Just screw it in, screw the little deck into it, and start building the deck. When it’s done, you can put the tank back together and toss it into the device.
Another side benefit of this is that you could also fire another tank on top of the Pulse AIO V2. It would look funny, but you could do it.
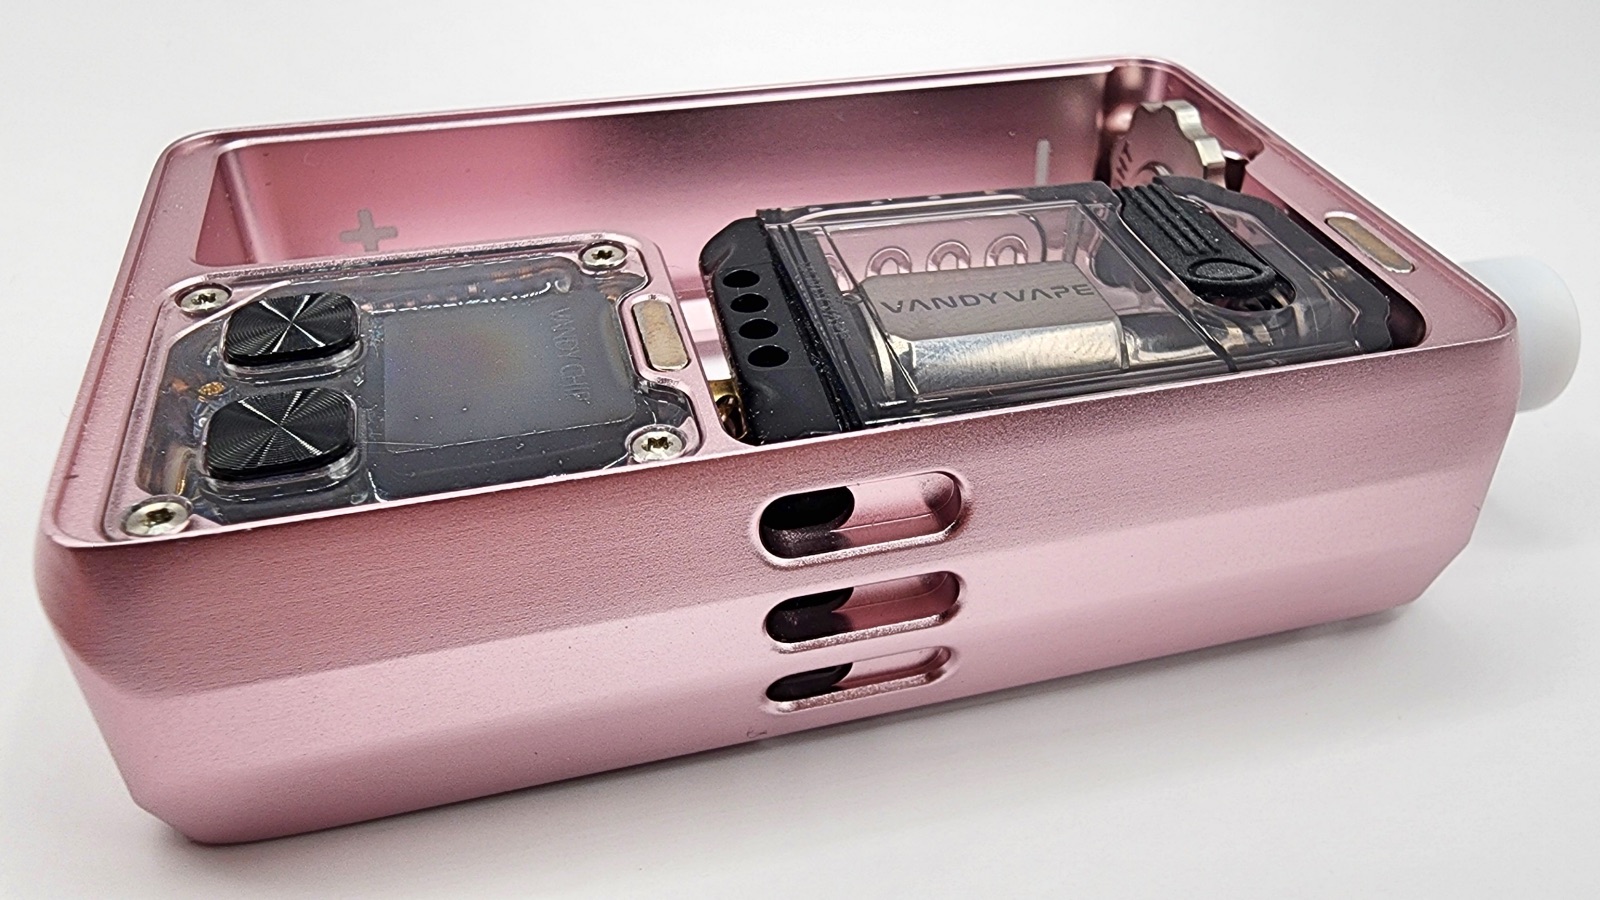
Battery
The Pulse AIO V2 takes only an 18650 battery.
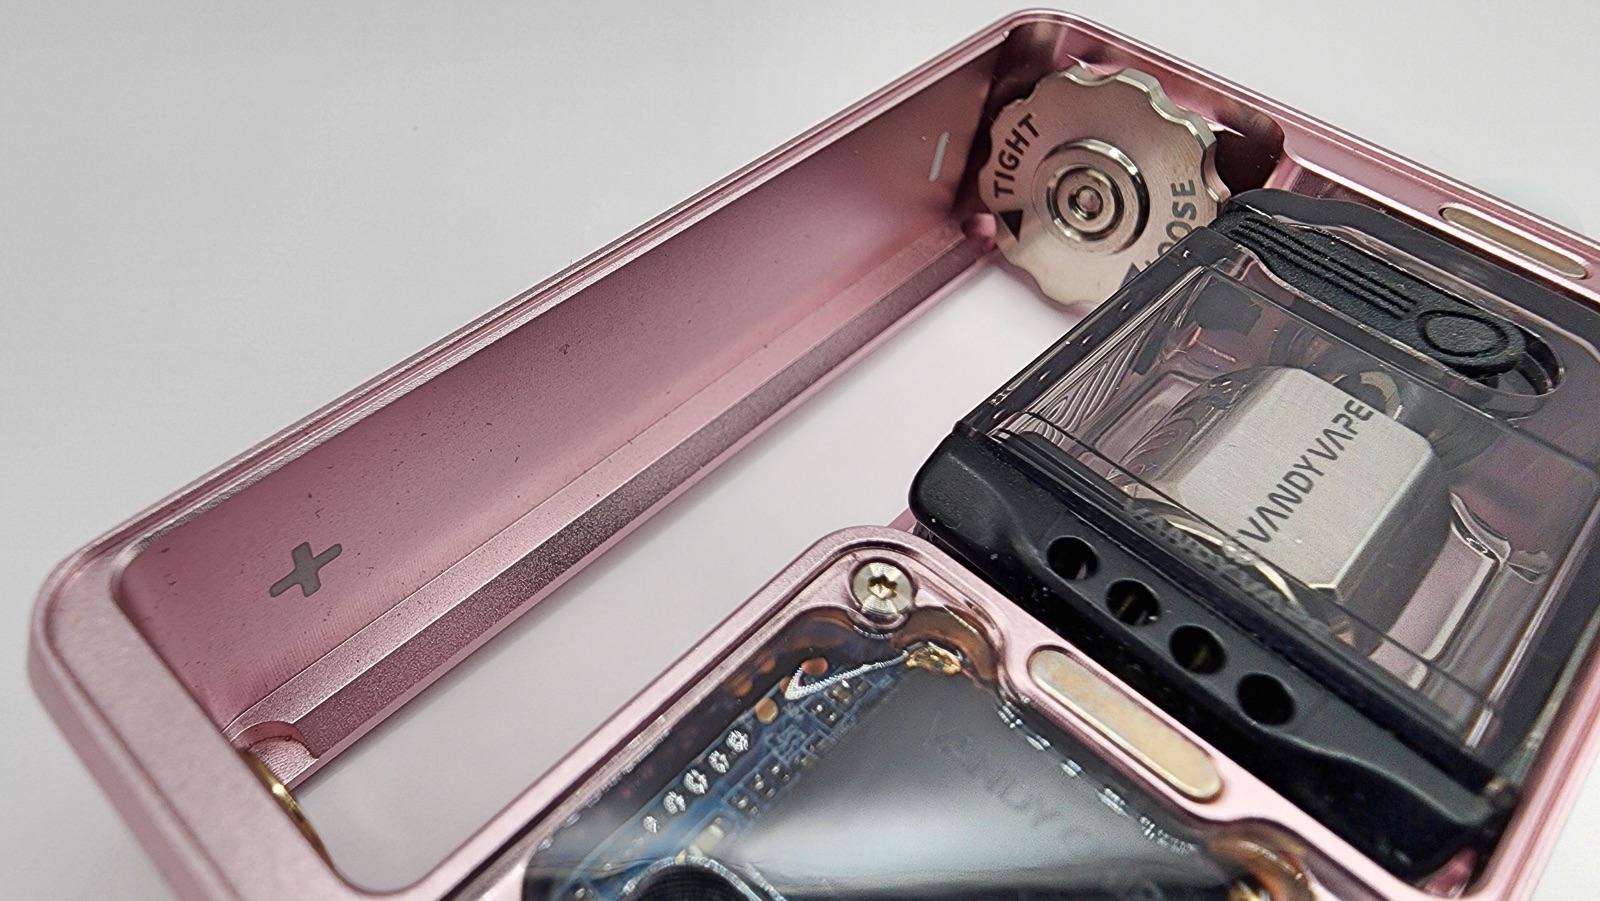
You’ll also notice a dial at the top of the battery sled. That dial lets you fully disconnect the battery while allowing you to keep it in the device, it lets you take the battery out without having to remove the back panel (but you can still do that), and it lets you adjust for different battery sizes. 18650 batteries are generally the same size, but they can be millimeters off in some brands, so this dial lets you make sure that any 18650 battery fits tight.
The device is designed for the positive end of the battery to point down so that it’s closer to the chip and has a faster response time. And that’s what you see at the bottom of the device in the clear window.
That plate sends the voltage from the battery straight to the chip. But there are protections here that prevent problems if you accidentally put the battery in backward. It simply won’t fire if you put it in wrong.
Something you’ll also notice here is that there isn’t a USB port. They have no plans to make firmware updates, and it’s safer to charge your batteries in a battery charger, so they just didn’t include a charging port. That might be a con for some people, but I also only charge removable batteries in an external charger, so I’m fine with their decision.
Features and Performance
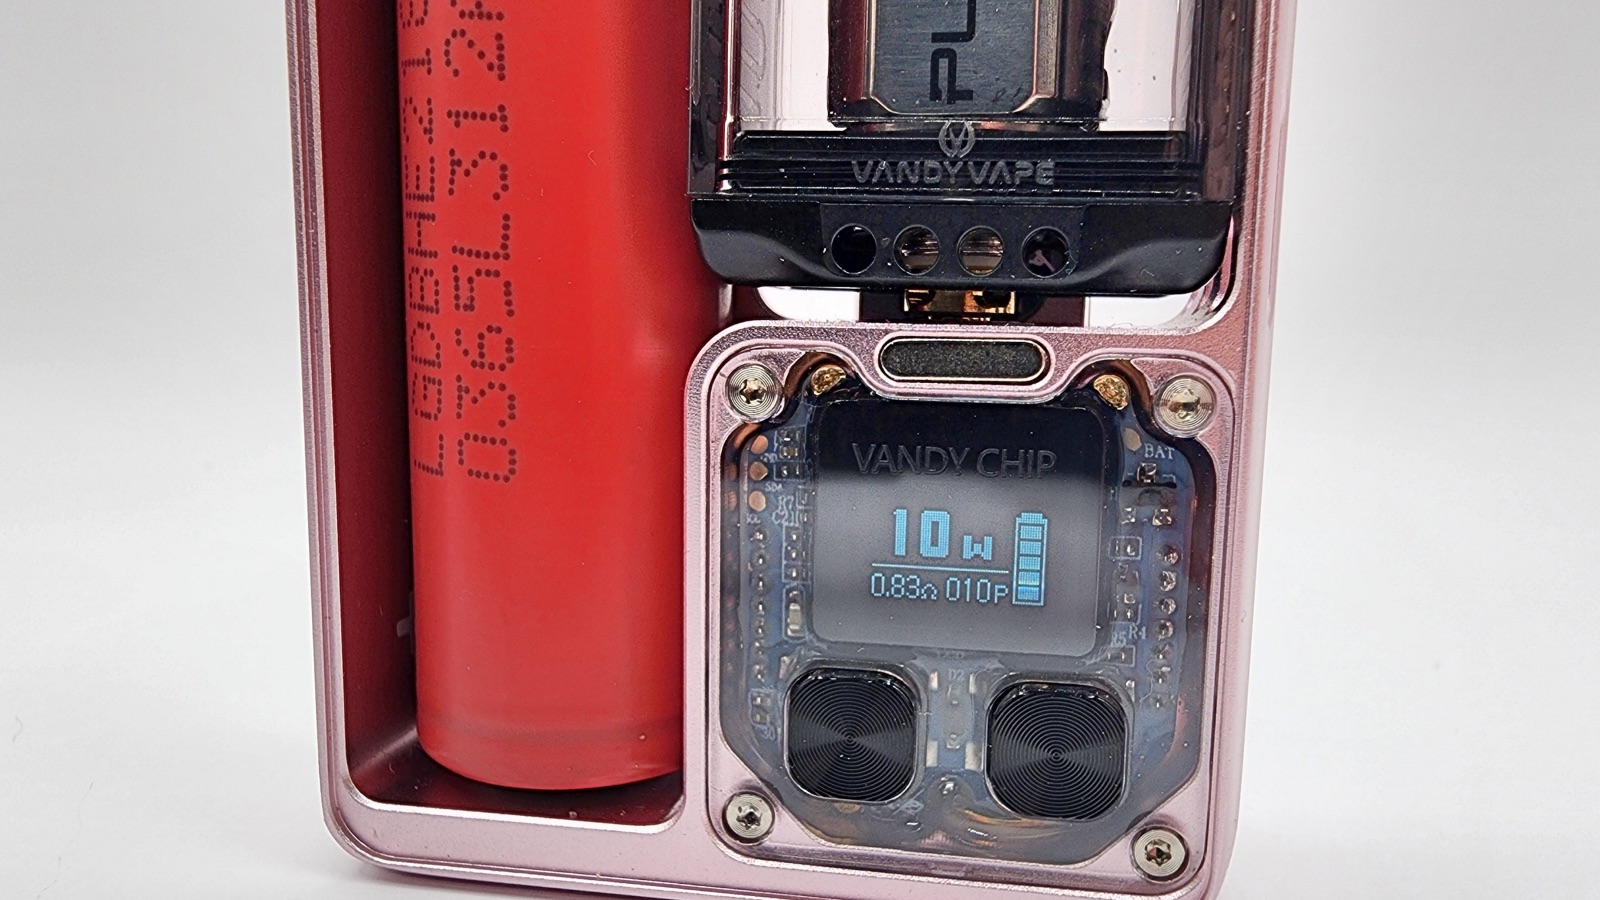
The screen shows your wattage, the Ohm rating/resistance of your coil, the number of puffs you’ve taken, and your battery life.
You do have to take the front panel off to access the up and down buttons, so a little extra work there, but once you find the wattage you like, that’s not something most people will be messing with anyway. And I like having those buttons protected from button presses anyway.
The menu system is very simple.
Press the fire button three times fast to change modes.
- Wattage
- TC: Stainless Steel
- TC: Titanium
- TC: Ni200
- Bypass
- Voltage
There are also a few shortcuts on the buttons:
- If you click the up and down buttons twice fast, you can tell the device that you’re using a new coil. That’ll help if you’re getting a reading from a previous build.
- If you press both the up and down buttons together, you enter the menu. That gives you the option to reset your puff counter, see the version number of the chip, and you can set your TCR values if you use temperature control.
- If you hold the up button and power button at the same time, it will lock your wattage adjustment buttons. That feature is useless if you’re using the kit as it comes since those buttons are protected by the front panel, but it might be more useful if you buy an aftermarket panel or if Vandy Vape releases a panel with that section open.
- If you hold the up, down, and power buttons at the same time, the device goes into stealth mode, and the screen turns black. It’ll operate, but you can’t see what it’s doing.
Final Thoughts
The Pulse AIO V2 is an awesome device. It looks amazing, it’s light and compact, it feels durable, and it works great. I love how customizable it is too. I would love to get some new panels for it. I don’t see that Vandy Vape is selling accessories for it yet, but they did for the .5 model, and Tony B. said he thinks they’re making accessories for it, so I hope they do.
The tank gave me the most problems, and that’s where Vandy Vape might need to look into quality control. When it works, it works nice. It’s super easy to build, and the flavor and airflow is great. I like being able to change those airflow pins so easily too.
But overall, the kit is awesome. So if you want a nice Boro-style device, I highly recommend it.
I was sent this product for review. The Vandy Vape Pulse AIO V2 is available from Sourcemore for $69.99 but use the coupon code VVV2 to get it for $57.29.
Alex is a former smoker who successfully quit smoking after 14 years by switching to vaping. Now a pro-vaping advocate, Alex has become a seasoned expert with over a decade of experience in the vaping industry. Since starting his vaping journey in 2010, Alex has earned a reputation as a trusted reviewer, extensively testing all types of vape gear, including mech mods, sub-ohm tanks, RDAs, disposables, e-juices, boro devices, squonkers, dry herb vaporizers, and e-rigs. He’s also explored the craft of coil building and DIY e-juice.
Since 2015, Alex has published more than 800 in-depth articles on vaping, produced over 500 videos covering product reviews, industry news, and tips, contributed to several well-known vape publications, and hosted a popular vaping podcast featuring over 100 episodes and nearly 40 hours of content.